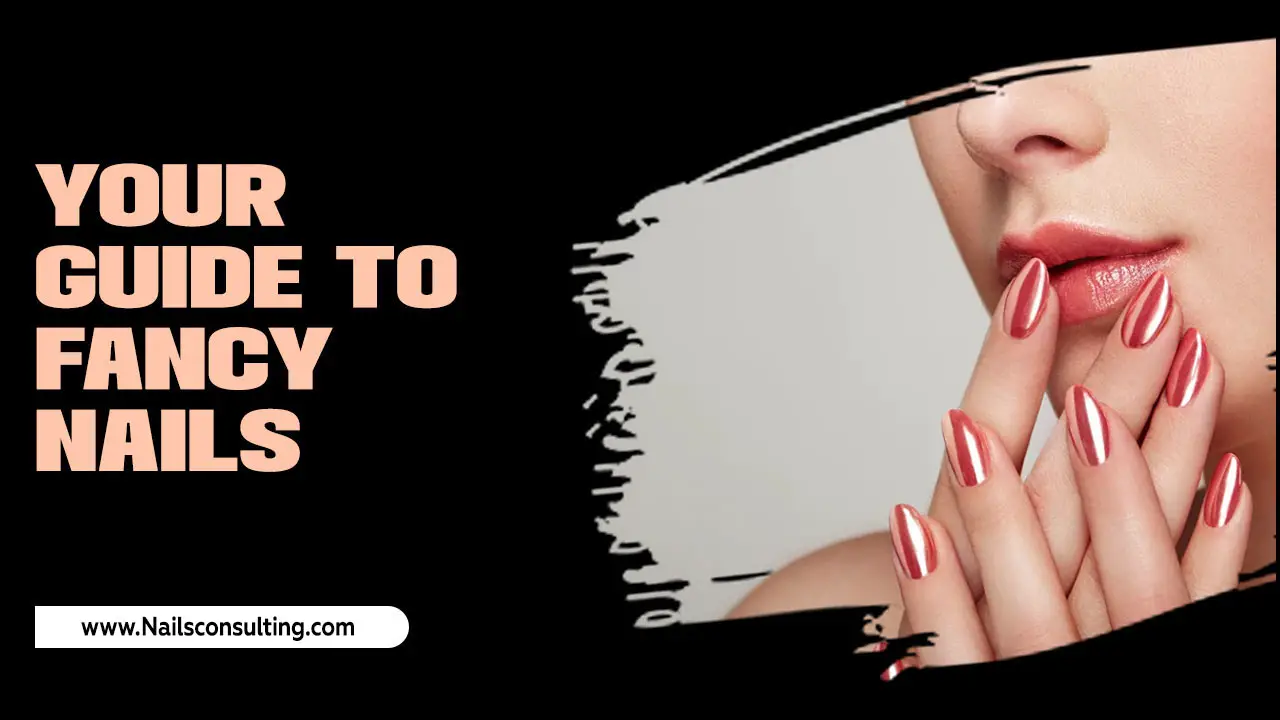
Red polish date night nail designs are your shortcut to a captivating manicure! These simple, stunning ideas enhance your look with classic elegance and a touch of allure, perfect for any special occasion.
Dreaming of nails that wow on your next date night? Red polish is a timeless classic for a reason – it’s bold, beautiful, and undeniably romantic. But sometimes, a simple red coat can feel a little… well, plain. You want something with a little extra sparkle, a touch of sophistication, or a hint of playful charm to match your evening’s vibe. If you’re looking for easy yet stunning date night nail designs using that perfect red polish, you’ve come to the right place! We’re diving into simple tricks and elegant touches that will make your nails the star of the show, no complicated art skills required.
Get ready to transform your classic red manicure into a show-stopping look that’s totally achievable, even if you’re new to nail art. We’ve got gorgeous ideas packed with simple techniques that speak volumes. Let’s make your nails as unforgettable as your date!
Why Red Polish is Perfect for Date Night Nails
Red is more than just a color; it’s a statement. It’s associated with passion, confidence, and a classic sense of glamour. For a date night, this translates into nails that are noticed and admired. Red polish has the power to instantly elevate an outfit and your overall mood. It’s versatile enough for a casual coffee date or a fancy dinner, and it complements a wide range of skin tones and styles. Plus, it’s a color that rarely goes out of fashion, making it a reliable choice for any romantic occasion.
Beyond its aesthetic appeal, red is psychologically powerful. It’s been linked to boosting confidence and even attracting attention. So, when you wear red nails for a date, you’re not just adornment; you’re embodying a certain energy that can make you feel more radiant and self-assured throughout the evening.
Essential Tools for Your Date Night Manicure
Before we dive into the designs, let’s gather your nail essentials. You don’t need a professional salon at home to create salon-worthy nails. Having the right tools makes the process smoother and the results look so much better. Think of these as your simple toolkit for nail success!
- Base Coat: Protects your natural nails from staining and helps polish adhere better.
- Top Coat: Seals your design, adds shine, and prevents chips. A quick-dry one is a lifesaver!
- Red Nail Polish: Your star player! Choose a shade that makes you feel amazing – from a bright cherry to a deep, vampy crimson.
- Buffing Block: Smooths nail surfaces and creates a good base for polish.
- Nail File: For shaping your nails to perfection.
- Cuticle Pusher: Gently tidies up the cuticle area.
- Optional Embellishments: Think fine glitter polish, metallic accent polish, small rhinestones, or nail stickers if you’re feeling extra creative!
- Dotting Tool or Toothpick: For creating small, precise dots.
Beginner-Friendly Red Polish Date Night Nail Designs
Let’s get to the fun part! These designs are designed for ease and maximum impact. We’ll start with the simplest and move to slightly more involved, but still totally beginner-friendly, ideas.
1. The Classic Red with a Secret Sparkle
Sometimes, all you need is a touch of shimmer to elevate your classic red. This is the easiest way to add a little oomph without straying far from tradition.
How-To Steps:
- Start with a clean, prepped nail. Apply your favorite base coat and let it dry completely.
- Apply two thin coats of your chosen red nail polish. Allow each coat to dry for at least two minutes before applying the next.
- Once the red polish is dry to the touch, apply a thin layer of a glitter top coat on just the tips of your nails, creating a subtle French tip effect. Alternatively, dab a small amount of glitter polish onto the cuticle area or over the entire nail for a wash of sparkle.
- Finish with a generous layer of your regular top coat to seal in the glitter and prevent chipping.
2. The Chic Red French Tip
The French manicure gets a bold update with a classic red twist. This is sophisticated and stylish, perfect for a more elegant date night.
How-To Steps:
- Apply your base coat and let it dry.
- Paint your nails with a nude, sheer pink, or opaque white polish. This will be your base color. Let it dry.
- Now for the red tip! You can use a fine-tip brush (often found in striper polishes) or even a clean toothpick. Carefully paint a thin red line along the free edge of your nail. If you’re a beginner, using nail guide stickers can be a huge help to get a crisp line.
- If you want a bolder look, use a thicker red tip. For a more subtle effect, keep the red line very fine.
- Once the red tips are dry, apply a clear or shiny top coat over your entire nail to smooth everything out and add gloss.
3. The Subtle Red Accent Nail
This design uses one or two accent nails to add a pop of detail without overwhelming the classic red look. It’s all about balance and a focal point!
How-To Steps:
- Paint all of your nails with your chosen red polish, applying two coats for full opacity. Let them dry completely.
- Choose one or two nails (usually the ring finger or thumb) to be your accent nails.
- On these accent nails, you can:
- Apply a thin stripe of a contrasting metallic polish (like gold or silver) down the center or diagonally from the cuticle.
- Use a dotting tool or toothpick to place a few small dots of metallic or glitter polish near the cuticle or tip.
- Apply a single, small rhinestone near the cuticle. Use a tiny dot of nail glue or your top coat to secure it.
- Once your accent details are in place and dry, apply a top coat to seal everything in, ensuring it covers your accent elements smoothly.
The American Academy of Dermatology Association recommends keeping your nails clean and well-maintained, which forms the perfect canvas for any design.
4. The Minimalist Red Dot Design
Dots are your best friend for easy nail art. A few perfectly placed red dots can look incredibly chic and modern on a neutral background or even on their own red nails.
How-To Steps:
- Apply your preference of base – either a neutral shade (nude, beige, or clear) or a lighter shade of red. Let it dry.
- Using a dotting tool, the tip of a toothpick, or even the end of a bobby pin, dip it into a contrasting polish (a darker red, black, white, or metallic) or a deeper shade of your base red.
- Carefully place a few dots onto your nails. For a classic look, try a single large dot at the base of the nail or a scattering of smaller dots. For a trendier vibe, create a constellation of dots.
- Let the dots dry completely.
- Apply a top coat to seal the design.
5. The Classic Red with a Subtle Stripe
Similar to the accent nail idea, a single stripe adds a graphic, modern touch. This can be done horizontally, vertically, or diagonally.
How-To Steps:
- Apply your base coats of red polish and let them dry thoroughly.
- Using a fine-tip brush or a striper polish, carefully paint a single, clean line across your nail. You can place it near the tip, across the middle, or from one side to the other.
- For a clean line, consider using nail tape or guide stickers. Apply the tape, paint the stripe, and then carefully peel the tape off while the polish is still wet.
- Let the stripe dry completely.
- Apply a top coat to seal and smooth out the design.
6. The Deep Red and Gold Combination
This combination is pure luxury and perfect for a sophisticated evening. Deep reds like burgundy or oxblood paired with gold accents scream elegance.
How-To Steps:
- Apply two coats of your deep red polish. Ensure it’s completely dry.
- On your accent nail(s), apply a thin layer of gold leaf (if you’re feeling adventurous and have it!) using nail glue or top coat as the adhesive. Gently press it onto the nail and then dust off excess.
- Alternatively, use a liquid gold polish. You can paint a thin gold line along the cuticle, create a “half-moon” at the base of the nail, or paint delicate gold swirls.
- Allow any gold accents to dry fully.
- Seal the entire nail with a strong top coat.
Table: Choosing Your Perfect Red Shade
The shade of red you choose can dramatically change the overall feel of your date night nails. Here’s a quick guide to help you pick the perfect hue:
| Red Shade | Vibe / Occasion | Best For |
|---|---|---|
| Classic Cherry Red | Bold, playful, energetic | All skin tones, lively dates |
| Deep Burgundy/Oxblood | Sophisticated, mysterious, elegant | Fair to deep complexions, evening dates |
| Vibrant True Red | Confident, glamorous, classic | Universally flattering, any date |
| Warm, Orangey-Red | Fun, summery, outgoing | Warm undertones, daytime or casual dates |
| Cool, Berry-Red | Romantic, chic, slightly edgy | Cool undertones, evening dates |
Tips for Long-Lasting Date Night Nails
You’ve put in the effort; you want your gorgeous nails to last! Here are some pro tips to help your manicure stay chip-free and fabulous:
- Prep is Key: Always start with clean, dry nails. Push back cuticles, file them to your desired shape, and wipe away any oils or residue with nail polish remover.
- Thin Coats are Better: Don’t glob on the polish! Thin, even coats dry faster and are less likely to smudge or bubble.
- Cap the Edges: When applying your color and top coat, run the brush along the free edge (the tip) of your nail. This seals the polish and prevents chipping from the tip.
- Top Coat Power: Reapply your top coat every 1-2 days, especially if you notice any dullness or signs of wear. This is a game-changer for longevity.
- Be Gentle: Avoid using your nails as tools! Don’t try to scrape or pry things open with them.
- Moisturize: Dry hands and cuticles can lead to polish drying out and cracking. Moisturize your hands and cuticles regularly.
Elevating Your Red Polish Game: Beyond the Basics
Once you’re comfortable with the basics, you might be curious about taking your red polish designs even further. Here are a few ideas to spark your creativity:
- Ombre Effect: Blend two shades of red, or red with a nude/pink, for a smooth gradient.
- Geometric Designs: Use tape to create sharp lines, squares, or triangles with your red polish.
- Negative Space: Leave small sections of your nail “bare” while incorporating red color blocking or designs for a modern, minimalist look.
- Stamping: If you get a nail stamping kit, you can easily transfer intricate patterns onto your red base.
Always remember that nail health is paramount. Regular care ensures your nails are strong and beautiful, ready for any polish or design. For more information on nail care best practices and potential concerns, resources like the U.S. Food & Drug Administration (FDA) offer valuable guidance on cosmetic product safety.
Frequently Asked Questions About Red Polish Date Night Nails
1. How do I get a smooth finish with red polish?
Apply thin, even coats and allow each to dry before the next. Avoid pressing too hard with the brush. Always finish with a good top coat to smooth imperfections and add shine.
2. My red polish always smudges. What can I do?
Ensure each coat is completely dry before applying the next. Be patient! Using a quick-dry top coat can also help speed up the drying process and prevent smudging.
3. Can I do these designs if I have short nails?
Absolutely! These designs, especially the French tips, dots, and accent nails, look fantastic on short nails. Shorter nails often show fewer chips, making them ideal for a date night!
4. How long should I let my nails dry?
While polish might feel dry to the touch in a few minutes, it can take up to 20-30 minutes (or longer) to cure fully. Be extra gentle during this time. Quick-dry top coats can significantly reduce this waiting period.
5. What if I’m not good at painting straight lines?
Don’t worry! Use reinforcement stickers, nail tape, or guides from a drugstore. You can also use a fine-tip brush dipped in polish remover to clean up any wobbles after painting.
6. How do I remove red nail polish without staining my nails?
Always use an acetone-based nail polish remover, as it’s more effective. Apply a base coat before your red polish to act as a barrier. If staining does occur, a nail whitening pen or buffing block can help.
7. Can I combine multiple red polish designs?
Yes! You can mix and match elements – perhaps a red French tip on some nails and a glitter accent on others. Just ensure it doesn’t become too busy and still feels cohesive.
Conclusion
There you have it! Creating stunning and sophisticated date night nail designs with red polish is totally within reach, even for beginners. From a hint of sparkle to a chic stripe, these simple yet elegant ideas prove that you don’t need to be a nail art pro to achieve a captivating manicure. Red polish is a powerful tool, and with these easy techniques, you can confidently elevate your look for any romantic occasion.
Remember, the most important thing is to have fun with it and choose designs that make you feel beautiful and confident. Your nails are a canvas for self-expression, so embrace the creativity! Now go forth, paint those nails, and have a wonderful date night!


