Want fun, unique nails? Cartoon character nail designs are an easy, playful way to express yourself! With simple steps and basic tools, you can bring your favorite animated pals to life right on your fingertips. Get ready to boost your style and creativity with these essential tips and tricks.
Who doesn’t love a touch of whimsy and nostalgia? Cartoon characters have a special way of bringing smiles to our faces, and now you can carry that joy with you everywhere – on your nails! Whether you’re reliving your childhood with classic icons or embracing a new animated crush, cartoon character nail designs are a fantastic way to showcase your personality. It might seem tricky to paint tiny details, but trust me, with a few helpful hints and a little practice, you’ll be creating adorable manicures in no time. Let’s dive into making your nails a canvas for pure fun!
Why Cartoon Character Nails Are So Popular
There’s something wonderfully joyful about cartoon character nail designs. They’re an instant mood-booster! Think about your favorite cartoon – maybe it brings back happy memories or represents a personality trait you admire. Wearing these characters on your nails is a subtle, yet fun, way to share a bit of that happiness. Plus, they’re a fantastic conversation starter!
In a world often focused on serious adulting, a splash of playful cartoon art can be incredibly refreshing. It’s a form of self-expression that doesn’t take itself too seriously. For kids, it’s an especially exciting way to engage with characters they love, making their everyday feel a little more magical.
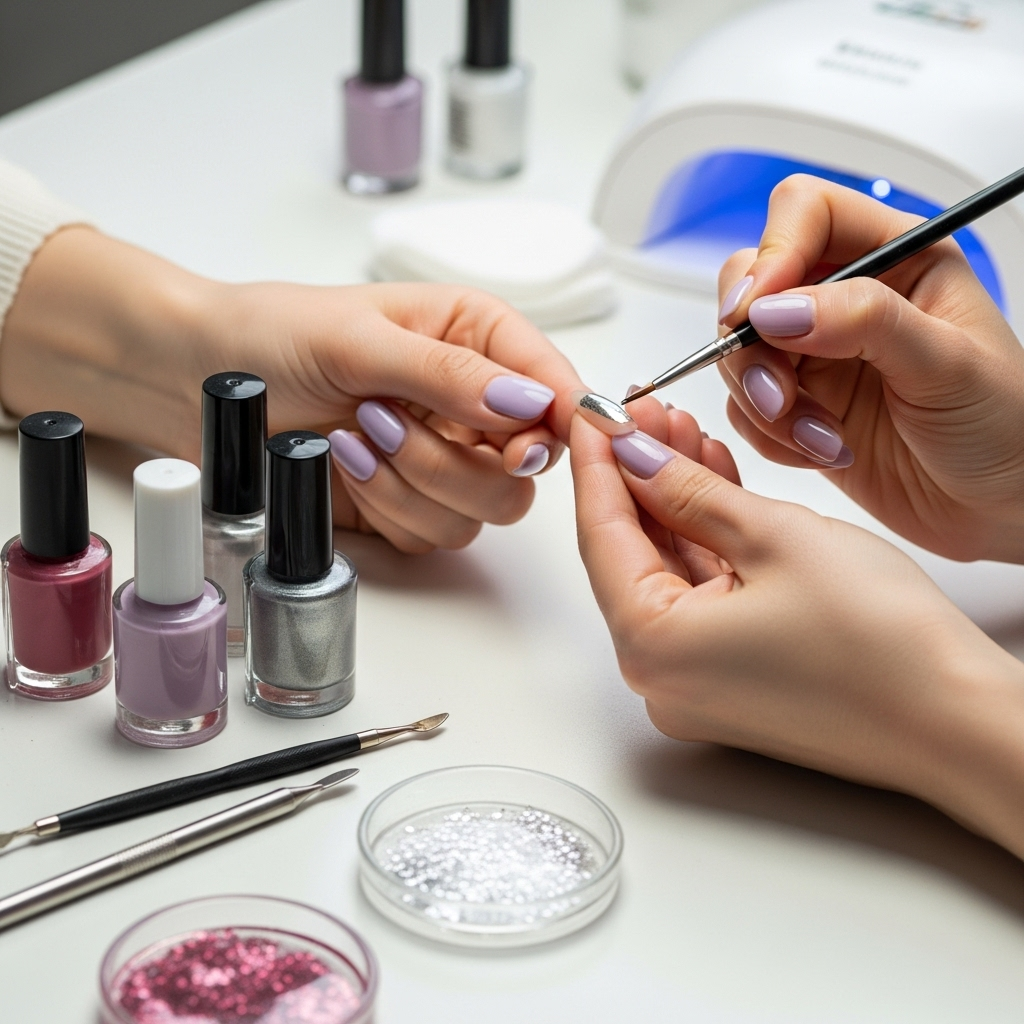
Getting Started: Essential Tools for Cartoon Nail Art
Don’t worry if you’re new to nail art! You don’t need a fancy salon setup to create amazing cartoon character nail designs. Here are the basic tools that will help you get started:
- Nail Polish in Various Colors: Stock up on the base colors for your characters and background.
- Detail Brushes: These are your best friends for drawing small lines, dots, and features. Look for fine-tipped brushes.
- Dotting Tools: Perfect for creating eyes, polka dots, and other circular elements quickly and evenly.
- Toothpicks or Orange Sticks: Great for picking up small amounts of polish or cleaning up edges.
- Top Coat: This seals your design and adds shine, making it last longer.
- Nail Polish Remover: Essential for fixing mistakes (we all make them!) and cleaning up cuticles.
- Base Coat: Protects your natural nails and helps polish adhere better.
You can find these tools at most beauty supply stores or even online. For example, sites like Ulta’s nail art section offer a wide variety of beginner-friendly options.
Step-by-Step Guide to Your First Cartoon Character Nail Design
Let’s get hands-on! We’ll use a simple, recognizable character as our example: Minnie Mouse. She’s a classic and her design is super achievable for beginners!
What You’ll Need for Minnie Mouse Nails:
- Red nail polish
- Black nail polish
- White nail polish
- Pink nail polish (optional, for a bow accent)
- Fine-tipped detail brush
- Dotting tool (or the tip of a toothpick)
- Base coat and top coat
Step 1: Prep Your Nails
Start with clean, dry nails. Apply a base coat to protect your nails and create a smooth surface. Let it dry completely.
Step 2: The Base Color
For a classic Minnie Mouse look, paint your nails with red nail polish. If you’re doing a full character on one nail and a simple design on others, you can choose different base colors for variety. Two thin coats usually work best for opaque coverage. Let this dry thoroughly.
Step 3: Create the Face (Accent Nail)
On one or two accent nails, you’ll paint Minnie’s head. Using black nail polish and your fine-tipped brush, carefully paint a rounded shape that will be Minnie’s head. Don’t worry if it’s not perfectly symmetrical – a little imperfection adds to the charm!
Step 4: Add the Ears
While the head polish is still wet (or after it dries, depending on your comfort level), add two black circles on top for Minnie’s ears. You can freehand these with your brush or use the end of a dotting tool dipped in black polish to create perfect circles.
Step 5: The Bow!
Now for Minnie’s iconic bow. You have a few options:
- Painted Bow: Use pink or red polish and your fine brush to paint a bow shape on top of her head or slightly off to the side. Add a small white dot in the center for detail.
- Polka Dots: Paint the rest of your nails with red polish (as per Step 2). Then, use a white polish and a dotting tool to add white polka dots on the red background. This gives a nod to Minnie’s classic look without needing to paint her face on every nail.
Step 6: Facial Features (Optional, for advanced beginners)
If you’re feeling brave, use a tiny amount of white polish and your finest brush to add a small white highlight to the eyes. You can also add a small pink dot for her nose. Keep it minimal for a classic look!
Step 7: The Finishing Touch
Once all your nail art is completely dry – this is crucial to prevent smudging – apply a generous layer of top coat. This will seal your design, add a beautiful shine, and help your cartoon character nail art last much longer.
More Fun Cartoon Character Nail Design Ideas
Minnie Mouse is just the beginning! The possibilities for cartoon character nail designs are endless. Here are a few more ideas categorized by complexity:
Easy & Iconic Characters
- Snoopy: Simple black and white shapes. A black bean for the head, white body, black ears, and a black nose. Easy to achieve with dotting tools and a fine brush.
- Pikachu: Yellow base, black ears with tips, red circles for cheeks, and black lines for eyes and mouth. Perfect for using yellow and black polish.
- Stitch: Light blue base, two black ear shapes on the side of the nail, a few black dots for eyes.
- Hello Kitty: White base, yellow nose, black eyes, and whiskers. Add a red or pink bow. Similar to Minnie but with simpler features!
Slightly More Detailed Characters
- Winnie the Pooh: Yellow/orange base, brown outline for a simple bear face, black dot eyes and nose. Ditch the face and just do his iconic honey pot!
- Olaf (Frozen): White base, black dots for eyes and mouth, brown lines for sticks as arms/legs (you could even use twig-like nail art stickers!), and I’d suggest a little orange dot for his carrot nose.
- Simba (The Lion King): Orange/yellow base. Use brown to paint a simple lion face outline with black dots for eyes and nose. Add some brown strokes for a mane.
Advanced Character Designs
- Characters with Intricate Details: Think characters like characters from Spirited Away, My Neighbor Totoro, or detailed superhero logos. These often require more precise brushwork, potentially stencils, or even nail stickers if freehanding is too daunting.
- Character Silhouettes: Paint a solid color background and then use black polish to create the silhouette of a character (like Peter Pan flying). This is easier than full detail but still very recognizable.
Tips for Flawless Cartoon Nail Art
Even the most seasoned nail artists encounter challenges! Here are some tips to help you achieve smooth, professional-looking cartoon character nail designs:
- Patience is Key: Let each layer of polish dry completely before adding the next. Rushing will lead to smudging and a messy finish.
- Thin Coats are Better: Instead of one thick, gloppy coat, apply two or three thin coats of polish. This ensures even drying and a smoother finish.
- Clean Up Mistakes Immediately: Keep a small brush (or even a toothpick) dipped in nail polish remover handy. Use it to carefully clean up any stray polish around your nail edge or cuticle before it dries. This makes a HUGE difference in the final look.
- Practice on a Flat Surface: Before painting on your nails, try drawing the character or pattern on a piece of paper or a nail art practice mat. This helps you get a feel for the brush strokes and proportions.
- Use a Magnifying Lamp: If you’re struggling with tiny details, a magnifying lamp can be a game-changer. It helps you see every little line and dot.
- Lock in Your Design: Always finish with a good quality top coat. It protects your artwork and adds a beautiful shine.
Choosing the Right Character for Your Skill Level
It’s important to be realistic about your abilities, especially when starting. Here’s a little guide to help you pick the perfect character:
| Character Type | Design Complexity | Required Skills | Example Characters |
|---|---|---|---|
| Simple Shapes & Icons | Beginner | Basic color application, painting simple circles and lines. | Minnie Mouse (bows/dots), Mickey Mouse (ears), Snoopy (face outline), Pokemon balls. |
| Basic Faces | Beginner-Intermediate | Painting smooth curves, adding small details like eyes and mouths. | Hello Kitty, Winnie the Pooh, Olaf, simple animal faces. |
| Full Character Portrayals | Intermediate-Advanced | Detailed linework, shading, color blending, fine detail brushes. | Complex anime characters, detailed superheroes, full scenes. |
Remember, even simple characters can look incredibly chic when done well. Don’t feel pressured to tackle something super complex right away. Building confidence with easier designs will make you eager to try more challenging ones later!
Beyond Freehand: Alternative Methods for Cartoon Nail Art
Not everyone is a natural artist, and that’s perfectly okay! There are fantastic tools and techniques that can help you achieve amazing cartoon character nail designs without being a brush master:
- Nail Stickers/Decals: These are pre-made designs that you simply peel and stick onto your nails. They come in every character imaginable and are incredibly easy to use. Just apply your base coat, place the sticker, and seal with a top coat. It’s a quick way to get professional-looking results! Check out options on sites like Amazon’s vast selection.
- Water Decals: Similar to stickers but they soak in water for a few seconds and then the design can slide off its backing onto your nail. They often blend more seamlessly with the nail polish.
- Stencils: You can buy stencils or create your own from sticky tape. Paint through the cut-out areas to get crisp shapes. This is great for backgrounds or specific elements like Pikachu’s cheeks.
- Stamping Plates: These metal plates have etched designs. You apply polish over the design, scrape off the excess, and then “stamp” the design onto your nail using a special stamper. Many plates feature cartoon characters.
- Nail Pens: These are like markers specifically for nails, often with fine tips that are easier to control than a brush for some people.
Experimenting with these methods can open up a whole new world of nail art possibilities and make achieving complex designs much more accessible.
Cartoon Character Nail Designs for Kids: Making it Fun and Safe
When creating cartoon character nail designs for kids, safety and fun are the top priorities. Here’s how Nailerguy recommends approaching it:
- Use Kid-Friendly Polish: Opt for water-based or peel-off nail polishes designed for children. These are non-toxic and wash off easily, so you don’t have to worry about harsh removers. Brands like Piggy Paint offer eco-friendly, non-toxic options.
- Keep Designs Simple: Focus on bright colors and recognizable shapes. A simple character face, paw prints, or character-themed colors are perfect.
- Involve Them! Let the child choose the characters and colors. If they’re old enough, let them try applying some of the polish with supervision. This makes it a fun activity, not just a manicure.
- Avoid Small Embellishments: Steer clear of glitter, rhinestones, or other small pieces that could be a choking hazard or get lost.
- Supervise Application: Always be present to help guide their hands and ensure they don’t ingest any product.
- Don’t Stress Perfection: For kids, it’s all about the fun and the characters they love. Embrace the wobbly lines and smudges – they’re part of the charm!
Cartoon Character Nail Designs: Maintenance and Removal
Once your masterpiece is complete, you’ll want it to last! Regular nail care will help:
- Wear Gloves: When doing chores like washing dishes or cleaning, wear gloves to protect your nails and the artwork from harsh chemicals.
- Avoid Using Nails as Tools: Try not to open cans or scratch labels with your nails, as this can chip the polish.
- Moisturize: Keep your cuticles and hands moisturized with a good hand cream daily. Healthy nails and cuticles make for a better canvas and help polish adhere.
Removal:
When it’s time to change your design, removal is simple:
- Regular Polish: Use your regular nail polish remover and cotton pads. For nail art with multiple layers, you might soak a cotton ball, place it on your nail, wrap it in foil for a few minutes to let the remover penetrate, and then wipe away.
- Peel-Off Polish: These are designed to simply peel off your nail, often with warm water helping the process.
For detailed information on nail care from a professional perspective, the American Academy of Dermatology Association offers excellent, reliable advice on nail health which is always a good resource.
Frequently Asked Questions about Cartoon Character Nail Designs
Q1: How long does cartoon nail art usually take to do?
A: For simple designs like Minnie Mouse bows or Snoopy’s face, it might take 30-60 minutes per hand. More intricate characters can take several hours, so patience is key!
Q2: What if I’m really bad at drawing? Can I still do cartoon nail art?
A: Absolutely! As discussed, nail stickers, water decals, stencils, and stamping plates are amazing alternatives to freehand drawing. You can achieve fantastic results without needing to be an artist.
Q3: Do I need special brushes for cartoon nails?
A: While you can get by with toothpicks and regular polish brushes for some designs, fine-tipped detail brushes are highly recommended for creating clean lines and small features that make cartoon characters pop. Dotting tools are also very useful.
Q4: How can I make my cartoon nail designs last longer?
A: The most critical step is a good quality, fast-drying top coat applied evenly over your entire design. Also, try to avoid harsh chemicals and physical stress on your nails.
Q5: Can I do these designs on acrylic or gel nails?
A: Yes! Cartoon character nail designs work wonderfully on artificial nails like acrylics and gels, as they provide a smooth and durable surface. Just ensure your artificial nails are properly prepped and cured before applying polish or art.
Q6: Are there specific characters that are easier for beginners?
A: Yes! Characters made of simple shapes like circles and lines are easiest. Think Mickey Mouse ears, Snoopy’s face outline, or a simple colored background with character icons like Pokemon balls. Hello Kitty and Minnie Mouse without complex facial features are also great starting points.