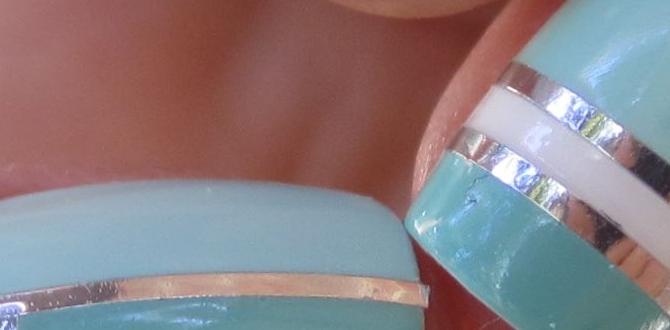
Bridesmaid nail designs with pastel shades offer a soft, romantic, and elegant touch to any bridal party look. These delicate hues are universally flattering and can be customized to match any wedding theme or color palette, ensuring every bridesmaid feels beautiful and perfectly coordinated.
Planning a wedding is all about the beautiful details, and often, those details extend right down to your fingertips! If you’re a bridesmaid or a bride-to-be looking for the perfect manicure for your bridal party, you’ve come to the right place. Choosing nail designs can feel a little overwhelming with so many options, but we’re here to make it super simple and fun. Pastel shades are a dream for wedding nails because they’re so soft, romantic, and work with almost any wedding color scheme. Get ready to discover some gorgeous ideas that will make your bridal party nails absolutely perfect!
Why Pastels Are Perfect for Bridesmaids
Pastel colors are like a gentle hug for your nails, and that’s exactly the vibe you want for a wedding! They’re soft, elegant, and subtly romantic, making them a fantastic choice for bridesmaids. Unlike bold colors that can sometimes clash or feel too overpowering, pastels blend beautifully with various wedding themes and color palettes. Think of delicate baby blues, soft blushes, sweet lavenders, mint greens, and creamy peaches – they all have a lovely way of complementing, rather than competing with, the bride’s overall vision.
Here’s why pastels are a winner for your bridal party:
Universally Flattering: Pastels tend to look good on a wide range of skin tones. They offer a gentle pop of color without being too intense.
Romantic & Elegant: The softness of pastel shades naturally lends itself to the romantic atmosphere of a wedding.
Versatile Pairing: They pair wonderfully with different dress colors, floral arrangements, and even jewelry.
Subtle Cohesion: You can have each bridesmaid in a slightly different pastel shade, creating a beautiful, cohesive gradient effect, or have everyone wear the same soft hue.
Timeless Appeal: Pastel palettes are classic and won’t look dated in wedding photos years from now.
Choosing Your Pastel Palette
The first step to achieving pastel perfection is selecting the right shades. This is where you can really have some fun and tailor the look to your wedding’s theme and color scheme. You can go for a monochromatic look with variations of one pastel, or create a beautiful rainbow effect with a mix of complementary pastels.
Consider these popular pastel pairings:
Soft & Sweet: Baby pink, peach, and a very light creamy white.
Ethereal Dream: Sky blue, lavender, and misty silver.
Garden Fresh: Mint green, pale yellow, and blush pink.
Simply Chic: A mix of dove grey, pale lavender, and a hint of rose gold.
When in doubt, ask the bride what colors are central to her wedding. Even if her main colors are bolder, you can often find a pastel version of that color to incorporate! For example, if the wedding has deep burgundy, a soft rose or dusty pink pastel can be a lovely nod to it.
How to Select Pastels Based on Wedding Colors
| Wedding Color Theme | Recommended Pastel Shades | Why it Works |
| :—————— | :———————— | :———- |
| Classic White/Ivory | Any pastel shade | Versatile – complements neutral bases. |
| Blush Pink/Rose Gold | Soft pinks, peachy pink, pale rose | Harmonious and subtly amplified. |
| Navy Blue/Deep Blues | Baby blue, periwinkle, light lavender | Creates a beautiful contrast. |
| Emerald Green/Forest | Mint green, seafoam, pale jade | Softens the richness of deep green. |
| Burgundy/Marsala | Dusty rose, pale mauve, soft peach | Adds a delicate touch to deeper tones. |
| Yellow/Gold | Pale yellow, buttercup, champagne | Lightens and brightens the palette. |
Easy Pastel Bridesmaid Nail Designs for Beginners
You don’t need to be a nail art pro to achieve stunning bridesmaid nails! Many beautiful looks can be created with simple techniques. Here are some ideas perfect for beginners.
The Classic Single-Shade Manicure
This is the easiest and often most elegant option.
What you’ll need:
Your chosen pastel polish
Base coat
Top coat
Nail file and buffer
Cuticle pusher (optional but recommended)
Steps:
1. Prep your nails: Start by filing your nails to your desired shape. Gently push back your cuticles. Buff the surface of your nails to create a smooth canvas.
2. Apply base coat: This protects your natural nails and helps the polish adhere better. Let it dry completely.
3. Apply first coat of pastel polish: Apply one thin coat of your chosen pastel shade. Don’t worry if it’s streaky; this is normal with lighter colors.
4. Apply second coat of pastel polish: Once the first coat is dry to the touch, apply a second, slightly thicker coat. This will give you an even, opaque finish.
5. Apply top coat: Finish with a generous layer of top coat to seal in the color, add shine, and prevent chipping.
6. Dry completely: Be patient and let your nails dry thoroughly.
The Chic Ombré Effect
Ombré nails look super sophisticated but are surprisingly simple to achieve with a sponge!
What you’ll need:
Two or three complementary pastel polishes (e.g., light pink fading to a slightly darker rose pink)
Base coat
Top coat
Cosmetic sponge or makeup sponge
Petroleum jelly or liquid latex (for cleanup)
Steps:
1. Prep and base coat: Prepare your nails as usual and apply a base coat.
2. Apply lighter shade: Paint your entire nail with the lightest pastel shade and let it dry.
3. Create the ombré:
Apply petroleum jelly liberally around your nails to protect your skin from polish. Alternatively, use liquid latex for a cleaner finish.
On a piece of paper or a plastic lid, create a striped pattern with your chosen pastel polishes, applying them side-by-side where they will blend slightly. For a two-color ombré, place the lighter shade and then the darker shade next to it.
Dab a cosmetic sponge into the stripes of polish.
Gently but firmly dab the sponge onto your nail, starting from the cuticle area and moving upwards. Re-apply polish to the sponge as needed and repeat the dabbing motion until you achieve a smooth gradient. See YouTube tutorials for visual guidance – they are incredibly helpful!
4. Clean up: Immediately remove the petroleum jelly or liquid latex. Use a small brush dipped in nail polish remover to clean up any stray polish on your skin.
5. Apply top coat: Once the ombré is dry, apply a generous top coat. This will also help to meld the colors together for a seamless look.
The Simple Accent Nail
This design adds a touch of personality without being too much.
What you’ll need:
A primary pastel polish
A secondary coordinating pastel polish (lighter or darker, or with a subtle shimmer)
Base coat
Top coat
Optional: Nail art brush or toothpick
Steps:
1. Prep and base coat: Prepare your nails and apply a base coat.
2. Paint most nails: Apply two coats of your primary pastel shade to all nails except one finger (usually the ring finger).
3. Paint accent nail: Apply two coats of your secondary pastel polish to the accent nail.
4. Optional embellishment: While the polish on the accent nail is still wet, you can carefully use a toothpick or a fine nail art brush to create a tiny dot or a simple swirl. Keep it minimal!
5. Top coat: Apply top coat to all nails, ensuring you cap the free edge to prevent chipping.
Delicate French Tips with a Pastel Twist
A modern take on a classic! Forget the stark white; opt for a soft pastel.
What you’ll need:
Sheer nude or milky pink base polish
Pastel polish for the tips (e.g., baby blue, pale mint, soft lavender)
Base coat
Top coat
Fine detailing brush or French tip guide stickers
Steps:
1. Prep and base coat: Prepare nails and apply base coat.
2. Apply sheer base: Apply one or two thin coats of the sheer nude or milky pink polish to all nails. Let dry completely.
3. Create pastel tips:
Freehand: Using a very fine detailing brush dipped in your pastel polish, carefully paint a thin line along the free edge of each nail. Look up “freehand French tip tutorial” for visual guides.
Using stickers: Apply French tip guide stickers to your nails, just below where you want the tip to be. Paint the exposed tip with your pastel polish. Let it dry slightly before carefully peeling off the sticker.
4. Top coat: Apply a thin layer of top coat over the entire nail.
Advanced Pastel Bridesmaid Nail Designs
If you or your bridesmaids are feeling a bit more adventurous with your nail art, these designs offer a step up in complexity but are still achievable with patience and the right tools.
Floral Accents in Pastel Hues
Delicate flowers are a beautiful way to incorporate softer colors.
What you’ll need:
Base pastel polish (e.g., soft white, creamy beige)
Various pastel polishes for flowers (pinks, blues, yellows, lavenders)
Green polish for leaves
Base coat & Top coat
Dotting tools of various sizes or a fine nail art brush
Optional: Rhinestones or glitter for centers
Steps:
1. Prep and base: Prepare nails, apply base coat, and then apply two coats of your base pastel polish on all nails.
2. Create flowers:
Using dotting tools: Dip a clean dotting tool into a pastel polish. Create small dots on the nail where you want your petals. You can make clusters of 3-5 dots to form a flower. For multi-colored flowers, alternate pastel shades.
Using nail art brush: Dip a fine brush into pastel polish and create small petal shapes. You can also try a simple “wisp” stroke for more organic flowers.
3. Add leaves/stems: Use green polish and a fine brush or a dotting tool to add small leaf shapes or delicate stems.
4. Add details: If using, add a tiny dot of shimmer polish or a small rhinestone to the center of some flowers.
5. Top coat: Apply a clear top coat once everything is completely dry.
Geometric Pastels
Clean lines and simple shapes in soft colors can be very modern and chic.
What you’ll need:
Two or three coordinating pastel polishes
Base coat & Top coat
Fine nail art striping tape or thin striping tape
Nail art brush or clean-up brush
Steps:
1. Prep and base: Prepare nails, apply base coat, and then apply one coat of a lighter pastel polish as your base on all nails. Let it dry completely.
2. Apply striping tape: Carefully place thin striping tape onto the nail to create geometric patterns (e.g., triangles, diagonal lines, grids). Press the tape down firmly to ensure a clean line.
3. Paint over tape: Apply a second pastel polish over the taped sections, or paint the whole nail with a second color and then carefully peel off the tape.
4. Careful removal: While the polish is still wet, use tweezers to carefully lift off the striping tape. If the polish starts to dry, it can peel up with the tape, creating a mess.
5. Cleanup: Use a fine brush dipped in nail polish remover to clean up any edges.
6. Top coat: Apply a top coat.
Sparkle and Shine with Glitter or Chrome
A touch of sparkle can Elevate any pastel design.
What you’ll need:
Your chosen pastel base polish
Fine iridescent glitter polish OR pastel chrome powder
Base coat & Top coat
Optional: Glitter glue or a tackier top coat. For chrome, a special chrome top coat or no-wipe gel top coat is often needed.
Steps (Glitter):
1. Prep and base: Prepare nails, apply base coat, and paint with your pastel polish. Let it dry completely.
2. Apply glitter:
Glitter polish: Apply one or two coats of a fine iridescent glitter polish over the pastel base.
Loose glitter: If using loose glitter, apply a glitter glue or a sticky top coat to the nail and gently press the glitter onto the nail bed. Tap off excess.
3. Top coat: Apply a generous top coat to seal in the glitter and create a smooth finish. You may need 2-3 coats of top coat to make the glitter smooth.
Steps (Chrome):
1. Prep and base: Prepare nails, apply base coat, and paint with your pastel polish. Crucially, allow the pastel polish to dry completely. For many chrome powders, a special “no-wipe” gel top coat is applied next and cured under a UV/LED lamp before applying the powder.
2. Apply chrome powder: Using a silicone tool or your fingertip (if using a formula that allows), gently rub the chrome powder onto the cured top coat. It should create a foiled, reflective effect.
3. Brush off excess: Gently brush away any loose powder.
4. Seal with top coat: Apply a final layer of top coat to seal the chrome effect. You may need to encapsulate the edges carefully.
Essential Tools for Bridesmaid Nail Designs
Having the right tools can make all the difference, especially when you’re aiming for polished results as a beginner.
Base Coat: Protects natural nails and creates a smooth surface for polish.
Top Coat: Seals polish, adds shine, and prevents chipping. Opt for a quick-dry formula if time is short!
Nail File & Buffer: For shaping and smoothing nails. A fine-grit buffer is great for creating a smooth canvas.
Cuticle Pusher/Orange Stick: Gently push back cuticles for a clean nail bed.
Cosmetic Sponges: Essential for achieving ombré effects easily.
Fine Detailing Brush/Dotting Tools: For creating small details, flowers, or clean lines. You can find affordable sets online.
Striping Tape: Perfect for creating crisp geometric designs and French tips.
Clean-up Brush: A small, flat brush (like an angled eyeliner brush) used with nail polish remover to clean up mistakes around the cuticle and sidewalls.
Petroleum Jelly or Liquid Latex: To protect the skin around your nails from polish messes.
Maintaining Your Bridesmaid Manicure
You want your nails to look fabulous throughout the wedding festivities! Here’s how to keep them looking their best.
Start with strong nails: Ensure your nails are healthy before you start. Using a nail strengthener in the weeks leading up to the wedding can help. Organizations like the Nail Manufacturers Council offer great tips on nail health.
Proper application is key: A good base coat and thorough application of color and top coat are your first line of defense against chips.
Cap the free edge: When applying your top coat, run a little bit over the very edge of your nail. This seals the polish and significantly reduces the chance of chipping.
Wear gloves: When doing any chores that involve water or chemicals (washing dishes, cleaning), wear rubber gloves. This is one of the best ways to protect your manicure.
Carry a mini top coat: A tiny bottle of quick-dry top coat can be a lifesaver for quickly refreshing color or smoothing a minor chip.
Avoid using nails as tools: Don’t use your nails to open cans, scrape labels, or pry things open. This is a fast track to chips and breaks.
Moisturize: Keep your hands and


