Luxury salon & professional nail designs aren’t just about trends; they’re about creating an aura of essential elegance. Mastering these looks involves understanding quality products, precision techniques, and thoughtful application, achievable for anyone with a desire for sophisticated nails.
Ever looked at magazine-worthy nails and thought, “How do they get them so perfect?” The world of luxury salon and professional nail designs can seem a bit intimidating, with its flawless finishes and intricate art. But guess what? That level of chic isn’t exclusive to salons! It’s all about understanding the building blocks of elegant nails, from the tools you use to the designs you choose. We’re going to break down how to achieve that sophisticated, salon-fresh look right at home. Get ready to elevate your nail game!
The Foundation of Elegance: Understanding Luxury Nail Care
Before we dive into dazzling designs, let’s talk about what makes those professional looks stand out. It’s not just the paint; it’s the entire experience and the quality that goes into it. Think of it like building a beautiful home – you need a strong foundation. For nails, that means top-notch care.
Nail Prep: The Unsung Hero
This is where the magic truly begins. A bit of time spent on preparation makes a world of difference. It ensures your polish lasts longer and looks smoother.
- Cleanliness is Key: Start with clean, dry nails. Gently push back your cuticles using an orange wood stick or a cuticle pusher. Avoid cutting them if you’re new to this, as it can lead to infection—just gently nudge them back.
- Shaping with Care: Choose a nail file that suits your nail type. For strength, fine-grit files are excellent. File in one direction to prevent splitting and weakening. Aim for your desired shape (square, round, almond, or squoval) with smooth, even strokes.
- Buffing for Smoothness: A gentle buffing block can smooth out any ridges and create a perfectly even surface for polish. Don’t over-buff; a few light passes are all you need.
- Moisture Matters: Apply a good quality cuticle oil. This keeps your surrounding skin soft and healthy, which is crucial for an elegant look. A quick massage with the oil feels luxurious, too!
Product Choices: Quality Over Quantity
Luxury designs often rely on high-quality products that perform beautifully and last. This doesn’t always mean the most expensive option, but rather products known for their performance and ingredients.
- Base Coat: This is non-negotiable. A good base coat protects your natural nail from staining and provides a smooth canvas for your color. It also helps your manicure adhere better.
- Nail Polish: Opt for polishes with a good formula – smooth, opaque, and chip-resistant. Brands known for their “5-free,” “7-free,” or “10-free” formulations exclude certain potentially harmful chemicals, making them a healthier choice for your nails.
- Top Coat: A high-shine, quick-drying top coat seals your polish, adds gloss, and protects against chips and smudges. Gel-like top coats can give a super-smooth, salon-quality finish without the lamp.
Essential Elements of Professional Nail Designs
What sets a luxury nail design apart? It’s often the attention to detail, the choice of palette, and the sophistication of the style. These aren’t always complicated; sometimes, simplicity is the ultimate sophistication.
Color Palettes: The Language of Elegance
Professional designers often select color palettes that are refined and cohesive. Think beyond just picking your favorite shade.
- Classic Neutrals: Soft beiges, creamy whites, sophisticated grays, and deep nudes are timeless and exude understated elegance. They pair well with any outfit and occasion.
- Rich Jewel Tones: Emerald green, sapphire blue, ruby red, and amethyst purple can feel incredibly luxurious, especially in matte finishes or with subtle metallic accents.
- Metallics with a Twist: Gold, silver, and rose gold are classic, but consider brushed metal finishes, holographic sheens, or subtle chrome effects for a modern luxury feel.
- Monochromatic Magic: Sticking to different shades of the same color family creates a harmonious and chic look. For example, a gradient of blues from light sky to deep navy.
Finishes: Adding Depth and Dimension
The finish of your polish can dramatically change the perceived luxury of your nail. Exploring different finishes is key.
- High Gloss: The traditional, super-shiny finish is a staple for a reason. It looks polished and makes colors pop.
- Matte: A matte finish instantly adds a sophisticated, velvety texture that feels very modern and chic. It’s particularly stunning with darker or jewel-toned polishes.
- Satin: A softer, less intense sheen than high gloss, satin finishes offer a subtle elegance.
- Chrome/Mirror: These metallic finishes offer a high-impact, futuristic luxury that demands attention.
Simple Shapes & Lines: Sophistication in Simplicity
You don’t need elaborate art to achieve a professional look. Sometimes, the most elegant designs are the simplest.
- The Perfect French Manicure: Update the classic by using modern color pairings (e.g., nude base with a thin white or metallic tip) or an “apricot” or “milky” base for a softer look.
- Minimalist Accents: A single, thin stripe of metallic polish down the center of the nail, a tiny dot at the base, or a delicate outline can elevate a solid color beautifully.
- Geometric Designs: Clean lines, half-moon shapes at the nail base, or minimalist color-blocking done with precision can look incredibly sophisticated.
DIY Luxury: Mastering Professional Nail Designs at Home
Ready to translate this into your own manicure? It’s all about patience, practice, and the right techniques. Here’s how to get started on some popular elegant looks.
Design 1: The Chic Monochromatic Fade
This design uses shades of one color to create a subtle, sophisticated gradient across your nails. It’s easier than it looks!
Tools You’ll Need:
- Base Coat
- 3-4 nail polishes in varying shades of the same color (e.g., light pink, medium pink, deep rose)
- Makeup sponge (a clean, dense one works best)
- Top Coat
- Clear tape or a cleanup brush and remover
Step-by-Step Guide:
- Prep Your Nails: Start with clean, shaped, and buffed nails. Apply a base coat.
- Protect Your Skin: Apply clear tape around your nail, leaving just the nail plate exposed. This makes cleanup a breeze!
- Create the Gradient on the Sponge: Apply thin stripes of your lightest polish, then the next shade, and finally your darkest shade onto the makeup sponge. Work quickly!
- Dab and Blend: Gently dab the sponge onto your nail. You might need to pick up more polish on the sponge and dab again to build color intensity and blend the shades smoothly.
- Repeat for Other Nails: Clean up any excess polish from your skin with your tape or brush. Repeat steps 3-4 for your other nails, using the same color progression. You can also experiment with reversing the color order on some nails for variation.
- Apply Top Coat: Once completely dry, apply a generous layer of top coat. This will meld the gradient colors together, making it look seamless and adding shine.
Design 2: The Minimalist Metallic Stripe
This is the epitome of understated elegance. A single metallic line can elevate a solid color to salon-professional status.
Tools You’ll Need:
- Base Coat
- Your chosen solid polish color (a classic nude, deep navy, or elegant gray works well)
- Metallic nail polish (gold, silver, or rose gold)
- Thin striping brush OR a fine-tipped nail art pen
- Top Coat
Step-by-Step Guide:
- Prep and Base: Apply base coat and let it dry.
- Apply Solid Color: Paint your nails with your chosen solid color. Apply two thin coats for opaque coverage, allowing each to dry completely.
- The Metallic Touch: Dip your striping brush into the metallic polish. For a pen, ensure the tip is ready.
- Create the Line: Diagonally down the center is popular, or try a thin line curving up one side from the cuticle. Hold your breath slightly for steady hands! If painting on the nail tip, you can often rest your pinky finger on the table for stability.
- If Using a Brush: Start at the cuticle and draw a single, smooth line to the tip. Don’t press too hard; let the polish do the work.
- If Using a Pen: Draw the line in one fluid motion.
- Allow to Dry: Let the metallic line dry thoroughly – metallic polishes can sometimes take longer to set.
- Seal with Top Coat: Apply a thin layer of top coat carefully, ensuring you don’t smudge the stripe.
Design 3: The Sophisticated Matte & Gloss Combo
This design plays with textures, creating a high-contrast, luxurious look with a simple color. It’s a favorite in many high-end salons.
Tools You’ll Need:
- Base Coat
- Your chosen nail polish color (a deep red, black, or emerald green is stunning)
- Matte Top Coat
- Regular High-Gloss Top Coat
- Thin striping brush or a dotting tool (optional)
Step-by-Step Guide:
- Prep and Base: Apply base coat to clean, dry nails.
- Apply Color: Paint your nails with your chosen color, applying two thin coats for perfect opacity. Let them dry completely.
- Apply Matte Top Coat OVER the Entire Nail: Once the color is totally dry, apply a layer of matte top coat to all nails. Let this dry completely according to the product’s instructions. This gives all your nails that velvety, sophisticated finish.
- Add Glossy Accents: Once the matte top coat is dry, take your regular glossy top coat.
- Option A (Full Gloss Nail): Choose one accent nail (like your ring finger) and apply a layer of glossy top coat over the entire nail to bring back the shine.
- Option B (Glossy Design): Use a thin striping brush or dotting tool to add small glossy details on top of the matte finish. Think a thin line along the cuticle edge, a few neat dots, or a thin French tip.
- Final Check: Let the glossy accents dry fully.
The Role of Tools in Professional Nail Art
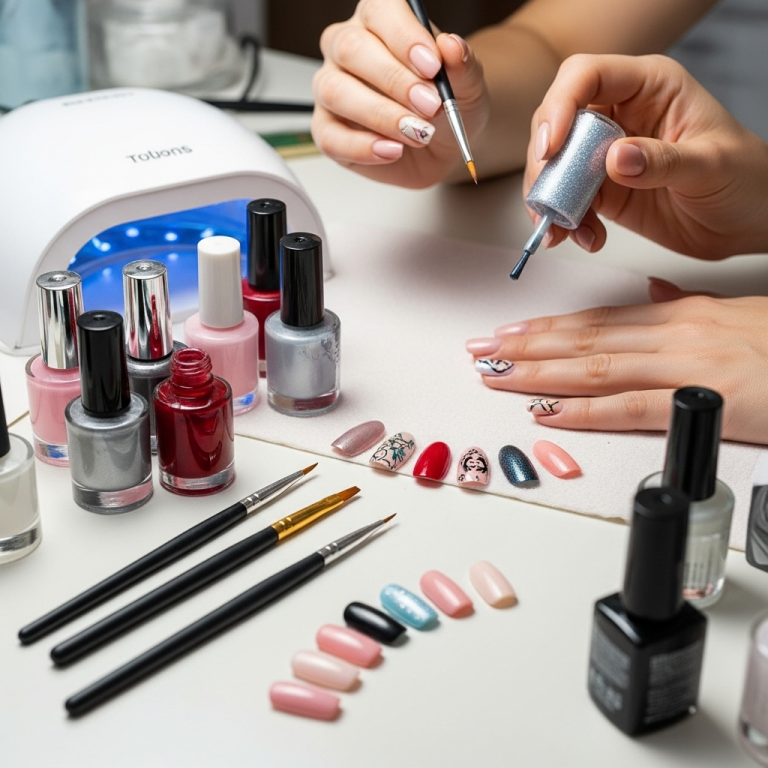
High-quality tools can make all the difference between a struggle and a seamless application. For professional-looking designs, investing in a few key items can be a game-changer.
Essential Tool Kit for Elegant Nails
While you can get by with basics, a few specialized tools can elevate your DIY game significantly.
| Tool | Purpose | Why it’s Essential for Luxury Designs |
|---|---|---|
| Fine-Grit Nail File | Shaping nails smoothly | Prevents snags and splits, creating clean, defined edges crucial for a polished look. |
| Cuticle Pusher/Orange Wood Stick | Gently pushing back cuticles | Creates a clean nail bed for polish application, making nails appear longer and more elegant. |
| Buffing Block | Smoothing nail surface | Removes ridges and imperfections for an ultra-smooth canvas, allowing polish to lay perfectly flat. |
| Thin Striping Brush | Creating fine lines and details | Essential for minimalist accents, French tips, and geometric designs that define luxury. |
| Dotting Tool Set | Creating dots and small designs | Allows for precise placement of small details, adding subtle artistic flair without overwhelming the nail. |
| Makeup Sponge (Dense) | Creating smooth gradients | Ideal for achieving seamless ombre and faded effects, a hallmark of sophisticated nail art. |
| Cleanup Brush (Angle/Fine Tip) | Removing polish mistakes | Allows for precise cleanup around the cuticle and sidewalls, ensuring a super-clean, professional finish. You can find great options from manufacturers like <a href="Sephora Makeup Brushes“>e.g., “this reputable beauty tool brand” or specialized nail art suppliers. |
Maintaining Your Tools for Longevity
Just like fine art brushes, your nail tools need care to perform their best.
- Cleaning: After each use, wipe metal tools (like cuticle pushers or dotting tools) with rubbing alcohol to sanitize them.
- Files: Replace emery boards when they become worn down, as they lose their filing power.
- Brushes: Clean nail art brushes with acetone or nail polish remover and reshape them before storing. Store them bristle-up if possible to prevent damage.
- Sponges: Makeup sponges are disposable and should be replaced when they show wear or become too difficult to clean.
FAQs: Your Beginner’s Guide to Luxury Nail Designs
Here are some common questions beginners have about achieving salon-worthy nails.
Q1: How can I make my at-home manicures look as smooth as salon ones?
The key is thorough prep and good application. Always use a base coat and a high-quality top coat. Apply polish in thin, even coats, allowing each to dry before adding the next. Don’t rush! Proper drying time and a good top coat are crucial for that smooth, glossy finish.
Q2: My nail polish always chips quickly. What’s the secret to making it last?
First, ensure your nails are completely free of oils and moisture before applying polish. A good base coat is essential for adhesion. Apply your color coats and then seal everything with a high-quality, quick-drying top coat. Make sure to cap the free edge of your nail by running the top coat lightly along the tip.
Q3: What are “5-free,” “7-free,” “10-free” nail polishes?
These terms refer to nail polishes that are formulated without certain potentially harmful chemicals. For example, “5-free” polishes are free from formaldehyde, toluene, DBP (dibutyl phthalate), formaldehyde resin, and camphor. The “free-from” numbers (7, 9, 10) indicate even more excluded chemicals, offering a healthier option for your nails and overall well-being.
Q4: I have short nails. Can I still achieve elegant designs?
Absolutely! Short nails are fantastic for elegant designs. Think clean, solid colors, sophisticated matte finishes, delicate minimalist details like a single dot or thin stripe, or a modern take on the French tip. Shorter nails often look very chic and put-together.
Q5: How do I get perfect lines for designs like French tips or stripes without shaky hands?
Stability is key! Rest your wrist and hands on a stable surface. Use thin, precise brushes or nail art pens. For French tips, consider using stencils or guide stickers if freehand is too tricky. Practice makes perfect; don’t get discouraged!
Q6: Is it okay to cut my cuticles?
While it’s common in salons, cutting cuticles can increase the risk of infection if not done properly with sterile tools. For beginners, it’s safer to gently push them back with an orange wood stick or cuticle pusher. This provides a clean nail plate for polish without the associated risks of cutting.
Q7: How can I avoid those tiny air bubbles in my polish?
Air bubbles are usually caused by applying polish too thickly, reapplying polish before the previous coat is dry, or shaking the polish bottle vigorously. Always apply thin coats, and let them dry sufficiently before layering. Roll the bottle between your hands to mix the polish instead of shaking it.
The Art of Elegance: Conclusion
Achieving luxury salon and professional nail designs is truly about embracing the principles of good care, quality products, and thoughtful application. It’s not about having the most complicated art, but about creating a polished, cohesive, and sophisticated look that makes you feel confident and beautiful. From the foundation of proper


