Your go-to guide for unique nail design ideas for beginners! Discover simple yet stunning looks that boost your confidence and creativity with easy-to-follow steps and essential tips. Get ready to transform your nails!
Ever look at those gorgeous nail designs online and feel a pang of “I could never do that”? We’ve all been there! It’s easy to feel intimidated by intricate nail art. But guess what? Creating beautiful, unique nails doesn’t require years of practice or a magic wand. With a few clever tricks and some fun ideas, you can totally rock amazing nail designs right at home. It’s all about finding clever shortcuts and focusing on designs that are as easy as they are eye-catching.
This guide is your new best friend for exploring unique nail design ideas for beginners. We’re going to break down some super simple yet incredibly effective techniques that anyone can master. Get ready to feel inspired and empowered to express your unique style, one nail at a time. No more complicated steps, just pure, fun nail artistry.
Why Unique Nail Designs Matter for Beginners
Nails are a fantastic canvas for self-expression. They’re a small detail that can make a big impact on your overall look and how you feel. For beginners, experimenting with unique nail designs is a brilliant way to:
- Boost Your Confidence: Rocking a cool design you created yourself is a serious mood-lifter!
- Unleash Creativity: It’s a low-pressure way to explore artistic sides you might not even know you have.
- Stay on Trend: Even simple touches can make your manicure look super modern and stylish.
- Save Money: Skip costly salon visits and craft amazing looks from the comfort of your home.
It’s not just about following trends; it’s about putting your own spin on things. Unique designs show off your personality and can be a fun conversation starter!
Essential Tools for Beginner Nail Artists
Before we dive into the fun designs, let’s talk tools! You don’t need a pro kit to get started. Here are a few essential items that will make your nail art journey much smoother:
Base Coat and Top Coat: These are non-negotiable for a long-lasting, professional-looking manicure. A good base coat protects your nails from staining, and a top coat seals your design and adds shine.
Nail Polish Remover: For fixing mistakes and cleaning up edges.
Cotton Balls or Lint-Free Wipes: Essential for applying remover and cleaning brushes.
Orange Stick or Cuticle Pusher: To clean up polish around the cuticles.
Fine-Tipped Nail Art Brushes: You don’t need a whole set! One or two fine-tipped brushes are perfect for detail work. You can find these at most drugstores or beauty supply stores.
Dotting Tools: These have little balls on the end and are amazing for creating dots, flowers, and abstract patterns. They’re super forgiving!
Optional but Helpful:
- Striping Tape: Creates clean, sharp lines for geometric designs.
- Stencils: Pre-cut designs that you can place on your nail for easy application.
- Dotting Tool Alternative: The end of a bobby pin or a toothpick can work in a pinch for dots!
Having the right tools makes all the difference. It’s like having the right ingredients for a recipe – it just makes things easier and tastier (or in this case, prettier!).
My Top 5 Genius & Essential Unique Nail Design Ideas for Beginners
Let’s get to the good stuff! These designs are chosen specifically for beginners because they’re easy to execute but look incredibly chic and unique. They require minimal technique, and even if you’re a bit wobbly, they’ll still turn out fantastic!
1. The Elegant Gradient (Ombre) Nails
Gradient nails, also known as ombre nails, create a beautiful seamless blend of two or more colors. It looks sophisticated but is surprisingly easy!
What you’ll need:
- Two or three nail polish colors (e.g., a dark shade and a lighter shade of the same color family, or contrasting colors)
- A makeup sponge (a regular cosmetic sponge cut into small pieces works great!)
- Base coat and top coat
- Nail polish remover and cotton swab for cleanup
How to do it:
- Apply your base coat and let it dry completely.
- Paint your first chosen color onto your nail. Let it dry.
- On a piece of paper or plastic bag, carefully paint stripes of your chosen colors next to each other. Don’t overlap too much.
- Immediately press your makeup sponge onto the polish stripes, picking up the color.
- Gently dab the sponge onto your nail, transferring the gradient. You might need to dab a few times to get the blend you like.
- Repeat on all nails.
- Once the polish is dry, apply a generous layer of top coat to smooth out the texture.
- Clean up any polish that got on your skin with a cotton swab dipped in nail polish remover.
Pro Tip: Start with colors that are similar in tone for a softer blend. For a bolder look, try contrasting colors.
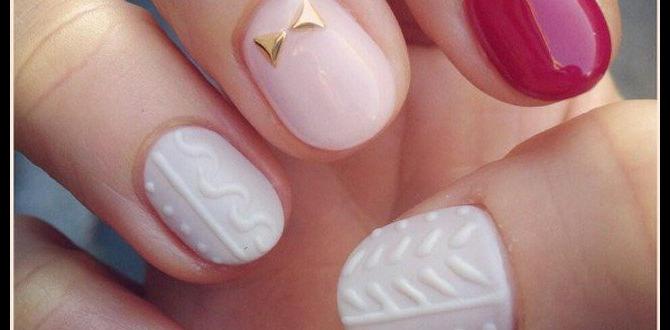
2. Simple but Stunning: The Accent Nail
This is a classic for a reason! It’s the easiest way to incorporate a unique element without committing to a full-blown art design on every nail.
What you’ll need:
- Your main nail polish color
- A contrasting or complementary color, or a metallic shade
- Optional: Glitter polish, nail art stickers, or rhinestones
- Base coat and top coat
How to do it:
- Apply base coat and let dry.
- Paint all your nails with your main color, except for one accent nail (usually the ring finger).
- Paint your accent nail with your contrasting color, glitter, or apply your sticker/rhinestones.
- Once dry, apply top coat to all nails.
Why it’s genius: It’s incredibly versatile. You can go subtle with a slightly different shade or bold with a metallic or glitter accent. If you’re new to nail art, this is your secret weapon!
3. Dotted Delight Dots
Dots are your best friend as a beginner. They are foolproof and can be turned into so many different patterns!
What you’ll need:
- Base coat and top coat
- Your primary polish color
- A contrasting polish color for the dots
- A dotting tool (or the tip of a toothpick, pin, or even the end of a pen)
How to do it:
- Apply base coat and let dry.
- Paint all your nails with your primary polish color. Let it dry completely.
- Dip your dotting tool into the contrasting polish. Don’t overload it!
- Gently press the dotting tool onto your nail to create a dot. Lift straight up.
- You can create random polka dots across the nail, a neat single line of dots, or even cluster them to make mini flowers.
- Let the dots dry thoroughly, then apply a thin layer of top coat, being careful not to smudge.
Beginner’s Charm: The beauty of dots is that even if they’re not perfectly uniform, they look artsy and intentional. Try different color combinations: a black base with white dots, a pastel base with metallic dots, or even a clear polish with bright colored dots.
4. The Chic French Tip Upgrade
The French manicure is a timeless classic, but let’s give it a modern, unique twist! Forget the plain white tips and open up a world of color possibilities.
What you’ll need:
- Base coat and top coat
- Your nude or sheer base polish
- A bright or metallic polish for the tips
- A fine-tipped striper brush or a steady hand
- Optional: Stencils for French tips if you want extra sharp lines.
How to do it:
- Apply base coat and let dry.
- Paint your nails with your nude or sheer base color. Let it dry completely.
- Dip your fine-tipped brush into the colored polish.
- Carefully draw a line along the tip of each nail. Aim for a smile-like curve.
- If you’re using stencils, place them along the tip of your nail, leaving the white tip area exposed, paint the color, remove stencil immediately.
- Let the tips dry, then apply a top coat.
Unique Twist Ideas: Try neon tips, metallic tips (gold, silver, rose gold), or even glitter tips! You can also do a ‘double French’ by adding a thin line of a second color just above the first tip line. Or, switch to a colored base coat and white tips for a playful take.
5. Glitter Bomb Statement
Glitter polish is your best friend for instant glam and a unique look with zero artistic skill required. It’s forgiving and always makes a statement!
What you’ll need:
- Base coat and top coat
- Your base polish color (optional, but recommended for some looks)
- A fabulous glitter polish
How to do it:
- Apply base coat and let dry.
- Option A: Full Glitter Coverage: Apply one or two coats of glitter polish directly over your base coat. Glitter polish often requires a bit of patience to get an even coat. Let it dry thoroughly.
- Option B: Glitter Accent: Paint your nails with your base color. Once dry, paint just the tips with the glitter polish (like a glitter French tip!), or apply it only to the cuticle area for a modern ‘halo’ effect.
- Option C: Glitter Gradient: Paint your nails with your base color. Then, apply glitter polish only to the tips, blending it downwards slightly with your brush or sponge to create a gradient effect.
- Apply a thick layer of top coat to smooth over the texture of the glitter. This is crucial for a smooth finish!
Why it’s a beginner win: Glitter hides imperfections and instantly elevates any simple polish. It’s perfect for parties, holidays, or just when you want to feel fabulous!
Choosing Colors and Combinations
The colors you choose can make a design go from nice to absolutely stunning. Don’t be afraid to experiment!
Color Theory Basics for Nails:
- Complementary Colors: Colors opposite each other on the color wheel (e.g., blue and orange, purple and yellow). They create high contrast and pop!
- Analogous Colors: Colors next to each other on the color wheel (e.g., blue, blue-green, green). They create a harmonious, blended look.
- Monochromatic: Different shades and tints of a single color. Very elegant and easy to pull off.
Beginner-Friendly Color Combos:
- Navy Blue + Gold Glitter
- Blush Pink + Rose Gold Glitter
- Mint Green + White Dots
- Coral + Peach Gradient
- Deep Burgundy + Nude Accent
Think about the occasion and your outfit, but most importantly, choose colors that make you happy!
Taking Care of Your Masterpieces
Once you’ve created your unique nail design, you’ll want it to last. Good nail care is key!
Keep Them Hydrated: Regularly apply cuticle oil to keep your nails and cuticles moisturized. Dry cuticles can chip polish.
Wear Gloves: When doing chores, especially washing dishes or cleaning, wear rubber gloves to protect your polish and nails from harsh chemicals and excessive water exposure.
Touch-Ups: If you get a small chip, you can often salvage it with a tiny bit of top coat or by carefully touching up the chipped area with the polish color.
Avoid Using Nails as Tools: Resist the urge to open cans or scrape things with your nails! They are for looking fabulous, not for heavy-duty tasks.
The Power of a Good Top Coat
I can’t stress this enough: a good top coat is your nail design’s best friend. It’s not just for shine; it’s a protective shield.
A quality top coat will:
- Seal in your polish colors and intricate designs.
- Prevent chipping and prolong the life of your manicure.
- Add a professional-looking sheen or matte finish.
- Smooth out any texture from glitter or multiple polish layers.
If your top coat starts to lose its shine after a day or two, a quick reapplication can often revive your manicure. Look for “quick-dry” or “gel-like” top coats for extra staying power and shine.
Troubleshooting Common Beginner Nail Art Issues
Don’t get discouraged if your first few attempts aren’t salon-perfect. Every nail artist started somewhere! Here are common issues and their fixes:
| Problem | Solution |
|---|---|
| Smudged polish | Wait longer between coats! If it’s a fresh smudge, try to gently smooth it with a brush dipped in top coat or remover. For minor smudges, a quick top coat application can sometimes blend it. |
| Uneven lines or dots | Practice makes perfect! For lines, use a steady hand and rest your pinky finger on the table. For dots, use a good quality dotting tool and a consistent amount of polish. Don’t be afraid to embrace the “wabi-sabi” – imperfectly perfect! |
| Polish too thick/streaky | Your polish might be old or drying out. Try adding a drop of nail polish thinner (not remover!) to revive it. In the meantime, apply thinner coats and use a good top coat to even out the finish. |
| Bubbles in polish | This usually happens when polish is applied too thickly, or if you shake your polish bottle vigorously. Roll the bottle gently between your hands instead of shaking. Apply thin coats. |
| Nail polish staining nails | Always use a base coat! If staining occurs, try rubbing your nails with a lemon wedge or using a whitening toothpaste paste. For stubborn stains, a nail whitener product can help. You can also find resources on nail health from organizations like the NHS which offer general advice on nail care. |
Taking the Next Step: Easy Additions
Once you’re comfortable with these beginner designs, you can slowly introduce a few more elements to elevate your game:
- Nail Art Stickers/Decals: These can be applied over dried polish and sealed with a top coat for instant intricate designs.
- Rhinestones & Gems: Use a dot of clear polish or nail glue to attach small rhinestones along the cuticle line or as accents.
- A Second Layer of Glitter: For extra sparkle, apply a fine glitter polish over a chunky glitter polish.
Remember, the goal is to have fun! Each attempt is a learning experience, and you’ll get better and more creative with every manicure.
FAQ: Your Beginner Nail Design Questions Answered
Q1: What is the easiest nail design for a complete beginner?
A1: The accent nail is incredibly easy! Paint all your nails one color, and one nail (usually the ring finger) a different, complementary color or add glitter. It’s simple but looks intentionally stylish.
Q2: Do I really need special nail art brushes?
A2: Not at first! You can achieve many designs with basic nail polish bottles, a toothpick, or even the end of a bobby pin. As you get more into it, a couple of fine-tipped brushes are a great investment.
Q3: How do I prevent polish from getting on my skin?
A3: Try to paint within the lines as best you can. For cleanup, dip a small brush (an old, clean makeup brush or a fine art


