Get ready for spring with adorable pastel Easter egg nail designs! This guide offers easy, step-by-step ideas perfect for beginners to create a festive and charming manicure that celebrates the season.
Easter is a time for new beginnings, and what better way to embrace the fresh, cheerful spirit than with a delightful Easter nail design? If you’re looking to add a pop of playful color and springtime charm to your look, pastel Easter eggs are the absolute cutest inspiration! Don’t worry if you’re new to nail art – these design ideas are super simple and designed for everyone to try. We’ll walk you through everything you need to create a beautiful, festive manicure that will make you smile with every glance. Get ready to hop into some creative fun!
Why Pastel Easter Egg Nails are Perfect for Spring
Pastel colors just scream spring. Think soft blues, gentle pinks, creamy yellows, and minty greens – they evoke the feeling of blooming flowers and warmer days. Easter eggs themselves are iconic symbols of this beautiful season, representing rebirth and new life. Combining these two elements in a nail design creates a look that’s not only visually appealing but also deeply connected to the joy and festivity of Easter.
This trend is incredibly versatile. Whether you prefer a subtle nod to the holiday or a full-on egg-stravaganza on your fingertips, there’s an Easter egg nail design that fits your style. Plus, pastel shades are universally flattering and easy to coordinate with most spring outfits. They bring a sweet, sophisticated touch rather than being overly loud, making them a fantastic choice for both casual gatherings and more formal Easter celebrations.
Gathering Your Easter Nail Design Supplies
Before we dive into the fun designs, let’s make sure you have the right tools. Don’t worry, you don’t need a professional nail technician’s kit! Most of these items are readily available at your local drugstore or online beauty suppliers.
Here’s a list of what you might need for your pastel Easter egg nails:
- Base Coat: Essential for protecting your natural nails and helping polish adhere better.
- Top Coat: Seals your design, adds shine, and prevents chipping.
- Pastel Nail Polishes: A variety of soft, spring-like colors (e.g., baby blue, pale pink, mint green, lilac, creamy yellow).
- White Nail Polish: Great for creating a bright base for vibrant pastel colors.
- Dotting Tools: These come in various sizes and are perfect for creating small, precise dots to mimic egg speckles.
- Fine-Tipped Nail Art Brush: Ideal for drawing delicate lines, swirls, or details.
- Toothpick or Orange Stick: Useful for fine detailing or cleaning up polish mistakes.
- Nail Polish Remover & Cotton Swabs: For any corrections you need to make.
- Optional: Glitter Polish: For an extra touch of sparkle!
For a deeper dive into essential nail care tools that can elevate any DIY manicure, check out resources like the U.S. Food & Drug Administration’s tips on cosmetic product safety. Understanding the basics ensures you’re using your tools effectively and safely.
Easy Easter Nail Design Idea 1: Speckled Pastel Eggs
This is perhaps the most classic and easiest Easter egg nail design. It’s simple, elegant, and undeniably festive!
Step-by-Step Guide:
- Prep Your Nails: Start with clean, dry nails. Apply a clear base coat and let it dry completely.
- Apply Your Base Pastel Color: Choose your favorite pastel shade (e.g., light blue, pale pink). Apply one or two thin coats, allowing each to dry thoroughly between applications. For a brighter, more even finish, you can apply a thin coat of white polish first and let it dry before applying your pastel color.
- Create the Speckles: This is where the magic happens!
- Using a Dotting Tool: Dip a small dotting tool into a slightly darker shade of your pastel color OR a contrasting pastel color (like a light brown or darker pink). Gently dab it onto your nail in random spots to create the “speckled” effect. Don’t aim for perfection; organic speckles look most natural!
- Using a Toothpick: If you don’t have a dotting tool, you can use the tip of a toothpick. Dip it into the polish and lightly tap it onto your nail.
- Using a Brush (for a different look): You can also use a very fine nail art brush and a slightly diluted pastel polish to “flick” tiny dots onto the nail.
- Add a Touch of Sparkle (Optional): If you want some shimmer, you can add a light dusting of clear glitter polish over the speckles or a single glitter stripe.
- Seal with Top Coat: Once everything is completely dry, apply a generous layer of top coat to protect your design and add incredible shine.
Tips for Speckled perfection:
- Practice the dotting technique on a piece of paper first to get the pressure and amount of polish just right.
- Don’t overdo the speckles! Less is often more for an elegant look.
- Experiment with different color combinations for your speckles. A light yellow nail with subtle brown speckles can be very chic.
Easy Easter Nail Design Idea 2: Painted Pastel Egg Shapes
This design is a step up in complexity but still very beginner-friendly, allowing you to draw cute, simple egg shapes on your nails.
Step-by-Step Guide:
- Base Coat: Apply your base coat and let it dry.
- Choose Your Background Color: Select a light pastel polish as your background color for each nail. Apply one or two coats until you have an opaque finish and let it dry completely. You can use the same color on all nails or different pastel shades.
- Draw the Egg Outline: Using a fine-tipped nail art brush and a contrasting polish (white or a different pastel), carefully draw a simple egg shape on each nail. Think of an elongated oval with a slightly rounded top and bottom. You can make them slightly irregular for a more realistic, hand-painted look.
- Fill in the Egg: With the same brush or a slightly larger one, fill in the outline with a different pastel color. You can fill each egg with a solid color, or create a gradient effect within the egg shape.
- Add Details (Optional): Once the main egg color is dry, you can use your dotting tool or brush to add tiny dots, swirls, or even simple floral patterns onto the painted eggs to make them look more decorative, just like real dyed eggs!
- Seal Your Masterpiece: Apply a clear top coat over the entire nail to seal in your painted egg designs and add a glossy finish.
Tips for Painted Eggs:
- Start with thin lines for the outline. It’s easier to thicken them than to correct thick mistakes.
- Having steady hands is helpful. You can rest your pinky finger on your desk for support.
- If drawing freehand feels daunting, you can use a nail art sticker as a stencil for the initial outline.
Easy Easter Nail Design Idea 3: Matte Pastel Gradient
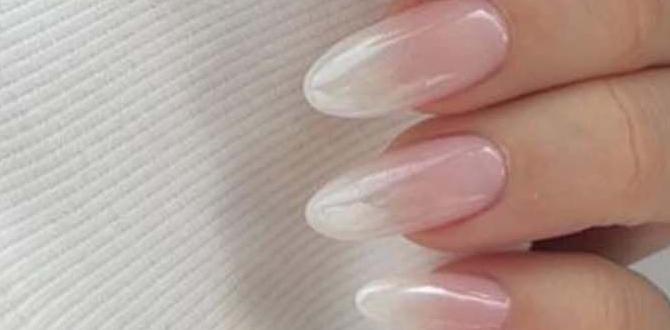
A gradient (or ombre) effect can look sophisticated and modern while still embracing the soft Easter theme. A matte finish adds an extra layer of chic and makes the pastel colors truly pop.
Step-by-Step Guide:
- Base Coat: Apply your base coat and let it dry.
- Choose Your Gradient Colors: Select two or three complementary pastel shades. For example, a soft pink fading into a light purple, or a mint green into a pale blue.
- Prepare for the Gradient: You can create a gradient using a makeup sponge or a nail art brush.
- Sponge Method: Apply stripes of your chosen pastel colors next to each other on a clean surface or a piece of foil. Gently dab a makeup sponge into the stripes, picking up the colors. Lightly dab the sponge onto your nail, blending the colors upwards or downwards. Repeat until you achieve your desired gradient.
- Brush Method: Apply one color to your nail. Then, take a clean, slightly damp nail art brush and gently blend the edges where you want the next color to start. Apply the second color and blend again. This method requires a bit more patience.
- Clean Up Edges: Use a small brush dipped in nail polish remover to clean up any polish that got onto your skin.
- Apply Matte Top Coat: This is the key step for this design! Once your gradient is dry, apply a matte top coat over the entire nail. This instantly transforms the glossy finish into a soft, velvety look.
- Add Subtle Details (Optional): To enhance the Easter theme, you could add a few tiny dots of a contrasting pastel color or a minimal metallic accent to one or two nails.
Tips for Matte Gradients:
- Ensure your gradient colors are fully dry before applying the matte top coat.
- A matte top coat can sometimes emphasize imperfections, so a smooth base polish application is important.
- If you want a glossy finish instead, simply use a regular shiny top coat!
Easy Easter Nail Design Idea 4: Cute Bunny Accents
Who can resist a bunny for Easter? This design uses simple bunny motifs on one or two accent nails to add a touch of whimsy.
Step-by-Step Guide:
- Base Coat: Apply base coat and let it dry.
- Choose Your Colors: Select pastel shades for your background colors for all nails. For the bunny, you’ll need white polish and a pink or black for features.
- Apply Background Color: Paint your nails with your chosen pastel background color(s). Let them dry completely.
- Create the Bunny Face: On your accent nail(s) (usually the ring finger), use a fine brush and white polish to paint a simple bunny face. This can be just two roundish white shapes for the ears and a small oval for the head, or a simpler single oval shape as the head with two small dots for ears on top. Let the white dry.
- Add Features: Using a very fine brush and pink or black polish, add small dots for the eyes and a little triangle or “Y” shape for the nose/mouth of your bunny.
- Optional: Bunny Tail: For an extra cute touch, use a dotting tool and white polish to add a fluffy dot for a bunny tail on a nail with a solid pastel background.
- Seal and Shine: Apply a clear top coat over all your nails.
Tips for Bunny Designs:
- Keep the bunny’s shape very simple for an easy, adorable look.
- A tiny black dot for the eye is often all you need.
- If painting a full bunny face is too tricky, focus on just the ears or tail!
Easy Easter Nail Design Idea 5: Floral Pastel Touches
Spring is all about flowers, and a few delicate floral details can elevate your pastel Easter nails.
Step-by-Step Guide:
- Base Coat: Apply base coat and let dry.
- Pastel Background: Paint your nails with your chosen pastel colors.
- Create Simple Flowers: Once the background polish is dry, use a fine nail art brush or a dotting tool to create simple floral designs.
- Dot Flowers: Use a dotting tool to create a small circle of dots in a contrasting pastel color to form a flower. For example, use pale pink dots on a mint green nail.
- Petal Flowers: With a fine brush, create simple petal shapes radiating from a central dot. You can use white for petals on a pastel nail, or a pastel color for petals on a white nail.
- Add Centers: For each flower, add a tiny dot of a contrasting color (yellow, white, or even a touch of metallic gold) in the center.
- Add Greenery (Optional): A tiny dot or two of green polish can represent leaves.
- Top Coat: Finish with a protective clear top coat.
Tips for floral accents:
- Start with very small designs. You can always make them slightly bigger if needed.
- Focus on one or two nails for floral accents so the design remains elegant and not overwhelming.
- Think about simple flowers like daisies or forget-me-nots for ease.
Pastel Egg Nail Design Color Palettes
Choosing the right color combination can make all the difference. Here are a few palette ideas to get you started:
| Theme/Vibe | Primary Pastel Colors | Accent/Speckle Colors | Example Design Element |
|---|---|---|---|
| Classic Spring | Baby Blue, Pale Pink, Mint Green | White, Light Yellow | Speckled eggs, simple flower dots |
| Sweet & Subtle | Creamy Yellow, Soft Peach, Lilac | White, Light Grey | Painted eggs with white outlines |
| Vibrant Easter | Bright Teal, Coral Pink, Lavender | White, Gold Glitter | Gradient with a single glitter accent nail |
| Gender Neutral Chic | Sage Green, Sky Blue, Soft Beige | White, Light Brown | Minimalist speckles on a solid background |
Don’t be afraid to mix and match these colors to create your own unique Easter nail art! The beauty of pastel nails is their gentle and harmonious nature.
When to Avoid Certain Nail Designs
While we encourage creativity, there are moments when simpler designs might be more appropriate. For instance, if you have a very busy pattern in your Easter outfit, opting for a single accent nail with a pastel egg design might be best to avoid clashing. Also, if your nails are brittle or prone to breakage, focusing on simpler applications and using reinforcing base coats is a good idea. Prioritizing nail health is always key to any beautiful manicure. For tips on strengthening nails, resources on dermatological care from the American Academy of Dermatology Association are very helpful.
Frequently Asked Questions about Pastel Easter Egg Nails
Q1: How do I make my nail polish dry faster?
You can use a quick-dry top coat, which is specifically designed to speed up the drying process and add shine. Alternatively, dipping your nails in a bowl of ice-cold water for a minute or two after the polish has become slightly tacky can help harden it faster. Avoid using heat (like a hairdryer) as it can sometimes cause bubbles or smudging.
Q2: My nail polish is streaky. How can I fix it?
Streaky polish is often caused by applying polish too thinly or unevenly. For better coverage, try applying polish in three thin, even strokes: one down the center and one on each side. Ensure you’re using enough polish on your brush but not too much. If streaking persists, a good base coat and a smoothing top coat can help. Sometimes, a second, slightly thicker coat once the first is dry can also even things out.
Q3: Can I use regular craft paint for nail art?
It’s generally recommended not to use regular craft acrylic paints directly on your nails for designs. Craft paints aren’t formulated for skin contact and can contain ingredients that may cause irritation or allergic reactions. They can also be difficult to fully seal with a top coat, potentially leading to chipping and exposure. Stick to polishes specifically made for nails, or use specialized water-based, cosmetic-grade nail art paints.
Q4: How do I remove glitter polish from my nails after an Easter design?
Glitter polish can be tricky to remove! A great method is to soak a cotton ball or pad with regular nail polish remover, place it directly onto the glitter polish, and wrap your fingertip tightly with a small piece of aluminum foil. Let it soak for 5-10 minutes. When you remove the foil, the glitter should lift off much more easily. For stubborn glitter, gently rub the soaked pad over the nail.
Q5: What’s the best way to apply pastel nail polish without it looking chalky?
Pastel colors can sometimes appear chalky if applied too thickly or if they are of a very matte formulation. To avoid this, always apply a shiny, clear base coat first. Apply pastel polishes in thin, even coats, allowing each to dry completely. Using a good quality, neutral-toned white polish as an undie (underneath the pastel color) can also make pastels appear more vibrant and less chalky. Finish with a glossy top coat for a smooth, luminous effect.
Q6: Can I do these designs on acrylic or gel nails?
Yes, absolutely! These Easter nail design ideas work beautifully on acrylic, gel, or even dip powder nails. The application process might slightly differ depending on whether the polish is UV-cured or air-dried, but the design principles remain the same. You can create these looks on your natural nail bed or on extensions for a different effect.
Conclusion: Hop into Spring with Fabulous Nails!
Creating your own pastel Easter egg nail


