Ballerina nail design ideas are for you if you crave a chic, elegant nail shape that elongates your fingers and offers a perfect canvas for dazzling looks. From simple and sophisticated to all-out glamorous, discover essential designs that are surprisingly easy to achieve.
Hello, beautiful nail lovers! Are you ready to give your fingertips a touch of pure elegance? Today, we’re diving headfirst into the wonderful world of ballerina nails, also known as coffin nails. This stylish shape is a favorite for a reason: it’s incredibly flattering, making your hands look longer and more slender. But a gorgeous shape is just the beginning! What truly makes ballerina nails a showstopper is the incredible variety of design ideas you can adorn them with. If you’ve been wondering how to get that perfect refined look or are simply searching for fresh inspiration, you’ve come to the right place. We’ll walk you through everything you need to know to rock this trend and explore some of the most glamorous and essential designs that are perfect for any occasion. Get ready to fall in love with your nails all over again!
What Exactly Are Ballerina Nails?
Ballerina nails, or coffin nails, are characterized by their straight side walls and a tapered, squared-off tip. Imagine a ballet slipper – hence the name – or a classic coffin shape. This distinct silhouette is achieved by filing the nail into a soft taper, ending with a straight, sharp edge. They’re a fantastic choice for those who love a longer nail but want something a bit more sophisticated than a rounded or stiletto shape. This shape is known for making fingers appear longer and more graceful.
Why Are Ballerina Nails So Popular?
Their enduring popularity stems from a blend of style and versatility. Ballerina nails offer a sleek, modern aesthetic that can be dressed up or down. They provide a larger surface area for intricate nail art, making them a favorite for creative designs. Plus, they’re known to be quite strong when maintained properly, which is always a bonus!
Pros and Cons of Ballerina Nails
Let’s break down the good and the not-so-good:
| Pros | Cons |
|---|---|
| Elegance and sophistication | Can be prone to tip breakage if not cared for properly |
| Flattering, elongating effect on fingers | May require professional help for the initial shaping |
| Excellent canvas for various nail art and designs | Can sometimes feel too long for certain daily activities if you’re not used to them |
| Modern and trendy appearance | The sharp tip can snag on clothing or hair if it becomes too sharp or chipped. |
| Can be achieved with natural nails or artificial enhancements (acrylics, gel extensions) | Requires consistent filing and maintenance to maintain the shape. |
Getting the Perfect Ballerina Shape: A Beginner’s Guide
Achieving this elegant shape can be done on natural nails or with the help of extensions like acrylic or gel. For beginners, starting with a nail file is key. Here’s a simple approach:
- Start with the Right Length: Ensure your nails are long enough to create the tapering effect. If your natural nails aren’t quite there, consider temporary extensions or a salon visit.
- File the Sides: Gently file the side walls of your nails straight, creating a uniform line. Follow the natural growth of your nail bed.
- Taper Inward: Begin filing from the side walls towards the center at the tip. Aim for a soft taper, not a sharp point like a stiletto.
- Create the Square Tip: Once you have your taper, carefully file the very tip straight across. Use a gentle sawing motion to get a crisp, clean line.
- Smooth and Refine: Use a finer grit file or a buffer to smooth any rough edges and perfect the shape. Ensure symmetry on all sides.
- Optional: Cuticle Care: Gently push back your cuticles for a clean, polished look that enhances the nail shape. For thorough cuticle care, explore tips from a trusted source like the National Center for Complementary and Integrative Health on skin and nail health.
Remember, patience is key! It might take a few tries to get the hang of it. If you’re struggling, don’t hesitate to ask a professional nail technician for assistance. They can expertly shape your nails and show you the best technique.
Glamorous & Essential Ballerina Nail Design Ideas
The ballerina nail shape is a fantastic foundation for virtually any design. Its clean lines and smooth surface are perfect for showcasing intricate patterns, vibrant colors, or subtle elegance. Let’s explore some must-try looks!
1. Minimalist Chic: Monochromatic Magic
Sometimes, less is more! A single, sophisticated color can make a huge statement on ballerina nails. This look is incredibly versatile and always in style. Whether you choose a classic nude, a deep burgundy, a crisp white, or a bold primary color, a monochromatic finish is effortlessly chic.
- Shades to Consider: Soft pastels, deep jewel tones, elegant neutrals, and classic reds.
- Finish: High gloss for a sophisticated sheen, or matte for a modern, velvety feel.
- Why it works: The clean lines of the ballerina shape are enhanced by a solid, uniform color, creating an illusion of longer, leaner fingers.
2. French Tip Reimagined: A Modern Twist
The classic French manicure gets a contemporary update on coffin nails. Instead of just a white tip, play with colors, shapes, and finishes.
- Color Play: Swap white for black, metallic shades, or even glitter.
- Double French: Add a thin line of a contrasting color above the main tip color.
- Reverse French: Paint a crescent shape at the base of the nail near the cuticle.
- Glitter Tips: A full glitter tip can be incredibly dazzling on this shape.
- Why it works: The defined tip of the ballerina nail is highlighted beautifully by the contrasting French tip, emphasizing the elegant taper.
3. Subtle Sparkle: Glitter Accents
Glitter adds instant glamour to any nail design, and ballerina nails are no exception! You don’t need to go full disco ball if you prefer something more understated.
- Accent Nail: Cover one or two nails entirely in glitter.
- Glitter Fade/Ombre: Blend glitter from the tip or base towards the center of the nail.
- Glitter Strip: Add a thin strip of glitter polish horizontally or vertically on a solid color nail.
- Why it works: Glitter catches the light beautifully, making those elegant lines of the ballerina shape pop.
4. Elegant Gradient: Ombre Perfection
Ombre (color fading) looks stunning on coffin nails, creating a seamless blend of hues. It’s a sophisticated way to incorporate multiple colors into your manicure.
- Classic Ombre: Fade from one color to another, like from nude to pink or pale blue to white.
- Reverse Ombre: Start with the darker color at the tip and fade to a lighter color at the base.
- Multi-Color Ombre: Blend multiple colors across the nail.
- Why it works: The smooth transition of colors complements the flowing lines of the nail, enhancing its length and grace.
5. Geometric Chic: Lines and Shapes
Clean lines pair perfectly with the clean lines of ballerina nails. Geometric designs offer a modern, artistic flair.
- Nail Tape Art: Use metallic tape to create sharp lines, triangles, or grids.
- Hand-Painted Shapes: Use a fine-tip brush to paint abstract shapes or minimalist designs.
- Color Blocking: Divide the nail into sections and fill them with contrasting colors.
- Why it works: Geometric patterns echo the architectural structure of the ballerina nail, creating a cohesive and striking look. For artistic inspiration on patterns and shapes, you might find geometry resources helpful.
6. Floral Fantasy: Delicate Blooms
Don’t shy away from delicate patterns! Tiny floral designs can look incredibly charming and feminine on ballerina nails.
- Minimalist Flowers: Small, scattered floral elements on a solid base.
- Vine Work: Delicate vines painted along the sides or curving from the tip.
- 3D Flowers: Small, sculpted 3D flowers for added dimension.
- Why it works: The length of the nail allows for intricate blooming patterns to unfurl beautifully, adding femininity.
7. Metallic Madness: Shimmer and Shine
Metallic finishes are inherently glamorous and add an immediate wow factor to ballerina nails.
- Chrome Powder: Apply chrome powder over a solid base for an iridescent, mirror-like finish.
- Metallic Polishes: Opt for metallic gold, rose gold, silver, or even a bold bronze.
- Metallic Accents: Use metallic polish for French tips, stripes, or geometric details.
- Why it works: The light-reflecting quality of metallic finishes makes the sharp yet elegant edges of ballerina nails truly pop.
8. Gemstone Glory: Rhinestones and Crystals
For the ultimate in glamour, embellish your ballerina nails with rhinestones and crystals. This is where you can truly go all out!
- Full Bling Nail: Cover an accent nail entirely in crystals for maximum impact.
- Crystal Accents: Place small crystals along the cuticle line, at the tip, or as part of a design.
- Crystal Cat-Eye: Combine a magnetic cat-eye polish with a few strategically placed crystals.
- Why it works: The strong shape of the nail can support larger embellishments and the sparkle of gemstones is a perfect match for the elegant silhouette.
9. Marble Magic: Sophisticated Swirls
Marble designs offer a luxurious and artistic feel, looking particularly refined on elongated nails.
- Classic White & Grey: The traditional marble look is timeless.
- Color Marble: Experiment with pinks, blues, greens, or even black marble.
- Gold Veining: Add subtle gold lines to mimic natural marble for an opulent touch.
- Why it works: The swirling patterns create depth and visual interest, beautifully complementing the sleek lines of the ballerina shape.
Essential Nail Art Tools for Your Masterpieces
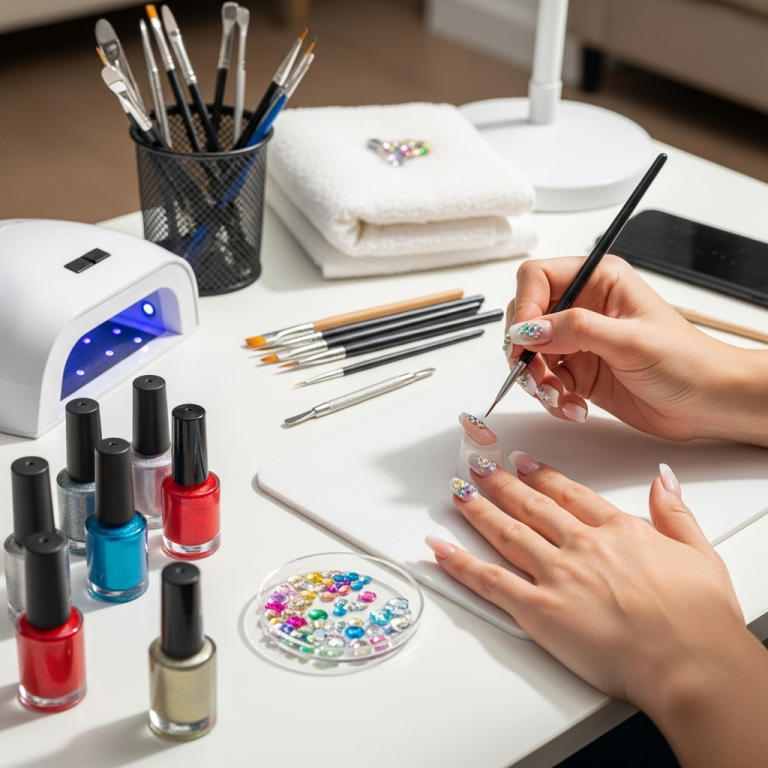
To bring these ballerina nail design ideas to life, a few key tools can make all the difference. These aren’t just for pros; they’re great for beginners too!
- Fine-Tip Brushes: Essential for detailed lines, dots, and small designs. Look for synthetic bristles for easy cleaning.
- Dotting Tools: Perfect for creating uniform dots, small flowers, and intricate patterns. They come in various tip sizes.
- Nail Art Tape: Self-adhesive strips that make creating sharp geometric lines and French tips incredibly easy.
- Stamping Plates & Stamper: For intricate, repeatable designs with minimal effort.
- Tweezers: Precision tweezers are a lifesaver for placing small gems, glitters, or decals exactly where you want them.
- Gel Polish & UV/LED Lamp: For durable, high-shine finishes that make designs last longer. You can find reputable lamps and gel polish brands widely available.
- Clear Top Coat: Crucial for sealing your design and adding shine.
- Buffer & Fine Grit File: For smoothing the nail surface and refining the shape.
Maintaining Your Ballerina Nails
Keeping your ballerina nails looking their best involves a little TLC. Since the tips are more delicate than rounded nails, proper care is essential.
- Be Gentle: Avoid using your nails as tools to pry, scrape, or open things.
- Moisturize: Regularly apply cuticle oil and hand cream to keep your nails and the surrounding skin hydrated and healthy. This prevents dryness and brittleness.
- Regular Filing: Keep a fine-grit nail file handy to gently touch up any snags or chips immediately to prevent further damage.
- Protect Your Hands: Wear gloves when doing household chores, especially washing dishes or using cleaning chemicals, as these can weaken your nails and polish.
- Regular Touch-ups: Depending on your polish and nail growth, plan for touch-ups or a fresh coat every 1-2 weeks to keep them looking pristine.
Frequently Asked Questions (FAQ)
Q: Are ballerina nails bad for your natural nails?
A: Not necessarily! If done carefully and with proper maintenance, they can be worn on natural nails. However, the tapered tip can be more prone to chipping or breaking than a rounded shape, so being gentle is key. Using a reinforcing base coat and avoiding harsh activities can help protect them.
Q: How long should ballerina nails be?
A: Ballerina nails can be any length! They are most striking at medium to long lengths, as this allows the distinctive shape to be fully appreciated. However, you can certainly have shorter, more practical ballerina-shaped nails if you prefer.
Q: Can I do ballerina nails at home?
A: Yes, you can! With a good quality nail file and a steady hand, you can shape your natural nails. For a more precise or defined look, or if your natural nails aren’t long enough, many people opt for acrylic or gel extensions at a salon. Watching some online video tutorials can also be very helpful for learning the technique.
Q: What colors look best on ballerina nails?
A: Almost any color looks fantastic! Classic choices like nudes, reds, and deep blues are always elegant. For a glamorous touch, metallics, glitter, or pastel shades work beautifully. The shape itself is so chic that it enhances all colors.
Q: How often should I get my ballerina nails done?
A: This depends on whether you have natural nails or extensions, and your personal preference. For natural nails, you might want to refresh the shape and polish every 1-2 weeks. If you have acrylic or gel extensions, you’ll likely need a fill every 2-3 weeks as your natural nail grows out.
Q: Are coffin and ballerina nails the same?
A: Yes, they are! The terms “coffin nails” and “ballerina nails” are used interchangeably to describe the same nail shape – one that tapers inwards and features a straight, squared-off tip.
Q: How do I prevent my ballerina nail tips from breaking?
A: To prevent tip breakage, keep your nails moisturized with cuticle oil, avoid using them as tools, wear gloves for chores, and be mindful of your nails’ position throughout the day. For extensions, ensuring they are applied correctly with proper structure can add strength. Filing any snags immediately is also crucial.
Embrace Your Elegant Edge
Ballerina nails are more than just a shape; they’re a statement of style and sophistication. Whether you’re drawn to the understated


