Round nail design with pastel shades is a soft, chic way to brighten your look. Get gorgeous, easy-to-achieve pastel round nails with these simple tips and tricks for a flawless manicure!
<h2>Unlock the Magic of Pastel Round Nails: Your Go-To Guide</h2>
Dreaming of nails that whisper sweetness and style? Pastel shades on round nails are a match made in heaven! They’re super versatile, adding a pop of gentle color without being overpowering. Whether you’re heading to a party, a meeting, or just want to feel a little extra special, this manicure is your answer. Sometimes, achieving that perfect, smooth pastel look can feel a bit tricky, right? You want lovely color, not streaks or dullness. Don’t worry, though! We’re here to make it easy. Get ready to learn some genius tips that will transform your round nails into soft, dreamy works of art. We’ll cover everything you need to know to create stunning pastel designs that everyone will admire!
<h2>Why We Love Round Nails with Pastel Shades</h2>
First things first, why are round nails and pastel colors such a winning combination for beginners and seasoned nail lovers alike?
<strong>Universally Flattering Shape:</strong> The natural, curved shape of round nails is incredibly complementary to most hand shapes and finger lengths. They tend to make fingers look longer and more elegant.
<strong>Soft & Sweet Aesthetic:</strong> Pastel shades—think pale pink, baby blue, mint green, lavender, and creamy yellow—evoke a sense of calm, innocence, and gentle beauty. They’re subtle yet sophisticated.
<strong>Perfect for Any Occasion:</strong> From a casual brunch to a wedding, pastel nails fit right in. They add a touch of class without being too loud.
<strong>Beginner-Friendly Canvas:</strong> A simple coat of pastel polish on a round nail can look incredibly chic. Plus, they’re a great base for more intricate designs when you feel ready to explore!
<strong>Seasonal Versatility:</strong> While often associated with spring and summer, soft pastels can be surprisingly lovely during fall and winter too, offering a gentle contrast to deeper hues.
<h2>Essential Tools for Your Pastel Nail Art Journey</h2>
Before we dive into the how-to, let’s gather our supplies. Having the right tools makes all the difference for a smooth, professional-looking manicure at home.
<h3>The Must-Haves:</h3>
<strong>Nail File:</strong> For shaping your nails into that perfect round tip. Look for a fine-grit file to avoid damaging your nails.
<strong>Cuticle Pusher/Orange Stick:</strong> To gently push back your cuticles for a clean nail bed.
<strong>Nail Buffer:</strong> A multi-sided buffer can smooth ridges and create a shiny base.
<strong>Base Coat:</strong> Crucial for protecting your natural nail from staining and helping polish adhere better.
<strong>Pastel Nail Polishes:</strong> Choose your favorite soft shades!
<strong>Top Coat:</strong> To seal your design, add shine, and prevent chips.
<strong>Lint-Free Wipes:</strong> For cleaning your nails and removing excess polish.
<strong>Nail Polish Remover:</strong> For any little oops moments.
<h3>Nice-to-Haves for Extra Flair:</h3>
<strong>Dotting Tools:</strong> Small metal balls on handles for creating dots.
<strong>Thin Nail Art Brushes:</strong> For drawing delicate lines or patterns.
<strong>Stencils or Stickers:</strong> For quick, easy designs.
<strong>Glitter or Shimmer Polish:</strong> To add a little sparkle!
<h2>Step-by-Step: Creating Your Perfect Pastel Round Nails</h2>
Let’s get those hands ready for a pastel makeover! Follow these simple steps for salon-worthy results.
<h3>Step 1: Prep Your Nails for Perfection</h3>
This is the foundation of any great manicure.
<strong>Remove Old Polish:</strong> Start by thoroughly removing any lingering nail polish with a good quality nail polish remover and lint-free wipes.
<strong>Shape Your Nails:</strong> Gently file your nails into a soft, rounded shape. Always file in one direction to prevent splitting. Imagine a gentle curve from side to side, meeting at a smooth apex.
<strong>Cuticle Care:</strong> Apply a cuticle remover or warm water to soften your cuticles. Then, use an orange stick or cuticle pusher to gently press them back. Trim any hangnails if necessary, but be careful not to cut cuticles too deeply, as this can lead to infection.
<strong>Buff to Smoothness:</strong> Lightly buff the surface of your nails with a buffer to smooth out any ridges and create a slightly porous surface for polish to grip onto. This helps prevent chipping.
<strong>Cleanse Your Nails:</strong> Wipe down each nail with nail polish remover or rubbing alcohol on a lint-free wipe to remove any dust, oil, or residue. This ensures the polish will adhere perfectly.
<h3>Step 2: Apply Your Base Coat</h3>
Don’t skip this vital step! A good base coat:
<strong>Protects Your Nails:</strong> It acts as a barrier, preventing darker or vibrant pastel shades from staining your natural nail bed.
<strong>Creates a Smooth Surface:</strong> It fills in minor imperfections, giving you a smoother canvas for your color.
<strong>Improves Polish Adhesion:</strong> This can help your manicure last longer and reduce the chances of chipping.
Apply one thin, even coat and let it dry completely (usually about 60 seconds).
<h3>Step 3: The Pastel Polish Application</h3>
This is where the magic begins!
<strong>Choose Your Shade(s):</strong> Pick one lovely pastel or plan a gradient of color across your nails.
<strong>The Three-Stroke Method:</strong> For a smooth, streak-free finish, use the three-stroke method:
1. Dip your brush into the polish and wipe off the excess on the neck of the bottle.
2. Start with a stroke down the center of your nail, from the cuticle to the tip.
3. Apply a stroke to one side, then another stroke to the other side.
<strong>Thin Coats are Key:</strong> Apply two thin coats of your pastel polish rather than one thick one. Thin coats dry faster and are less likely to develop bubbles or streaks.
<strong>Allow Drying Time:</strong> Let the first coat dry for at least two minutes before applying the second. Patience here pays off!
<h3>Step 4: Adding Your Design (Optional)</h3>
Once your pastel base is dry, it’s time for some fun!
<strong>Simple Dots:</strong> Use a dotting tool or the tip of a toothpick dipped in a contrasting or complementary pastel shade to create polka dots along the tip or base of your nail.
<strong>French Tips with a Twist:</strong> Instead of white, use a different pastel shade to create a soft, rounded French tip on your round nails.
<strong>Gradient Effect:</strong> Apply different pastel shades to each nail, or blend two shades on one nail for a soft sunset effect.
<strong>Stickers & Decals:</strong> For super easy artistry, apply cute pastel stickers, flowers, or geometric shapes. Seal them well with your top coat.
<strong>Metallic Accents:</strong> A thin line of gold or silver polish at the base or tip can add a touch of glamour to your soft pastel look.
<h3>Step 5: Seal with a Top Coat</h3>
The grand finale!
<strong>Full Coverage:</strong> Apply one to two coats of a good quality top coat. Make sure to cap the free edge of your nail (paint a tiny bit on the very edge of the tip) – this helps prevent chips.
<strong>Shine & Protection:</strong> A top coat not only adds a brilliant shine but also protects your design from everyday wear and tear.
<strong>Drying Time:</strong> Let your top coat dry thoroughly. Consider using a quick-dry spray or drops if you’re in a hurry.
<h2>Genius Tips for Flawless Pastel Round Nails</h2>
Want to elevate your pastel round nail game from good to absolutely stunning? These pro tips will help you achieve that perfect, dreamy finish every time.
<h3>1. The Sheer Pastel Power</h3>
Sheer pastels are incredibly forgiving and sophisticated. Instead of opaque creams, opt for translucent formulas. They offer a soft wash of color that looks ethereal and is much less prone to showing streaks. If you have a favorite opaque pastel, you can often layer it over a sheer white or nude polish to achieve a similar sheer effect.
<h3>2. Layering for Depth and Opacity</h3>
Pastel polishes can sometimes be sheer and require multiple coats. Don’t be afraid to apply 2-3 thin coats. Crucially, let each coat dry mostly before applying the next. This prevents smudging and ensures an even color payoff. If a pastel is particularly streaky, try applying it over a milky white or slightly opaque nude base coat. This provides a uniform surface for the pastel to shine on. For a vibrant look, consider a white polish as your first color coat, then apply the pastel over it. This will make the pastel color pop more intensely.
<h3>3. Color Combos That Wow</h3>
Pastels are beautiful solo, but they also play wonderfully with other colors.
<strong>Monochromatic Magic:</strong> Use different shades of the same pastel color family on each nail. For example, a pale mint on one finger, a slightly deeper sage on another, and a mint-green with silver shimmer on a third. This creates a cohesive yet dynamic look.
<strong>Contrasting Pops:</strong> Pair soft pastels with a surprising accent. Think a soft lavender nail with a single accent nail featuring a delicate white lace pattern, or pale pink with tiny silver glitter tips.
<strong>The Gradient Dream:</strong> Blend multiple pastel shades across your nails. Start with your lightest shade at the cuticle and blend into a darker pastel towards the tip. You can achieve this using a makeup sponge or a fine brush.
<h3>4. Mastering the Round Shape</h3>
The round nail shape is naturally soft, making it ideal for pastels. To maintain this shape:
<strong>Gentle Filing:</strong> Always file in one direction with a medium-grit file to avoid weakening the nail edge.
<strong>Avoid Over-Filing:</strong> Don’t file aggressively down the sides, as this can thin and weaken the nail. Focus on creating a smooth, even curve at the tip.
<strong>Regular Maintenance:</strong> Touch up your shape weekly to keep that perfect roundness.
<h3>5. The Art of the Accent Nail</h3>
Not all nails need to be identical! An accent nail is a fantastic way to add interest.
<strong>Simple Swirls:</strong> Use a fine brush to add delicate white or cream swirls over a pastel base.
<strong>Tiny Details:</strong> A few strategically placed rhinestones or tiny pearls at the base of the nail can add a touch of elegance.
<strong>Negative Space:</strong> Combine a pastel shade with bare nail space for a modern, chic look. For example, a French tip in pastel or geometric blocks of color leaving some nail showing.
<h3>6. Dealing with Streaks and Bubbles</h3>
Streaks often happen with pastel polishes because they can be more pigmented or have a different formula.
<strong>Thin Application</strong> is key. Don’t try to get full opacity in one coat.
<strong>Wipe Excess Polish:</strong> Before painting each nail, wipe your brush on the bottle neck to remove excess polish. This prevents globs that can cause streaks or bubbles.
<strong>Avoid Over-Brushing:</strong> Once you lay down a stroke, try not to go back over it too many times. This can lift previous polish and create streaks. Wait for it to dry slightly before the next coat.
<strong>Use a Good Top Coat:</strong> A high-quality top coat can help smooth out minor imperfections. Some top coats even have leveling properties.
<h3>7. Longevity Tips for Your Pastel Masterpiece</h3>
To keep your pastel round nails looking fresh:
<strong>Cap the Edges:</strong> Always swipe your base coat, color coats, and top coat horizontally across the free edge of your nail. This seals the tip and prevents lifting.
<strong>Hydrate Your Cuticles:</strong> Dry cuticles can look unkempt and detract from a perfect manicure. Use cuticle oil daily.
<strong>Wear Gloves:</strong> When doing household chores, especially anything involving water or harsh chemicals, wear rubber gloves. This is the best way to protect your polish from damage.
<strong>Avoid Using Nails as Tools:</strong> Resist the urge to open cans or scratch things with your nails. This is a sure way to chip your beautiful polish.
<h2>Inspiration Gallery: Pastel Round Nail Design Ideas</h2>
Sometimes, seeing is believing! Here are a few popular and easy-to-recreate ideas for your pastel round nails.
<h3>1. The Ombre Fade</h3>
Create a seamless blend of two or three pastel shades across each nail, or have a different shade on each finger for a rainbow effect.
<h3>2. Pastel French Manicure</h3>
Swap the classic white tip for a soft hue like mint, lavender, or baby pink. The rounded shape of the nail makes this design particularly charming.
<h3>3. Delicate Floral Accents</h3>
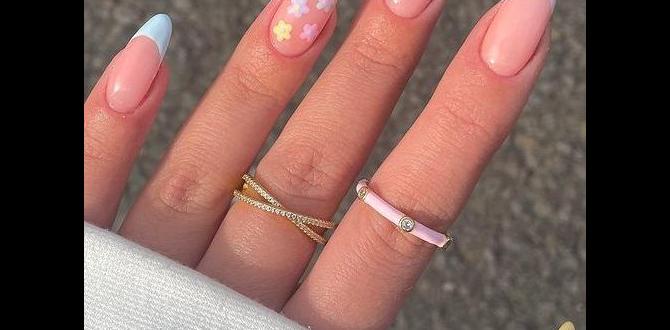
Paint tiny, simple flowers (like daisies or forget-me-nots) in white or a contrasting pastel on one or two accent nails.
<h3>4. Speckled Egg Effect</h3>
After applying your base pastel color, lightly dab a slightly darker pastel or white polish with a stiff brush or toothbrush to create a textured, speckled look reminiscent of Easter eggs.
<h3>5. Geometric Color Blocking</h3>
Use tape or stencils to create clean lines and blocks of different pastel colors on your nails. This minimalist approach is very chic.
<h3>6. The Kawaii Cluster</h3>
Add tiny, cute charms or decals—like little stars, moons, or hearts—in white or a pearl finish to one or two nails. Keep it subtle for an elegant touch.
<h2>Understanding Nail Shapes and Their Care</h2>
Choosing the right nail shape is as


