Want stunning rainbow nails with a super shiny finish? This guide reveals the simple secrets to creating vibrant, glossy rainbow manicures at home. We cover everything from choosing colors to achieving that salon-smooth, high-shine top coat. Get ready for nails that pop with color and gleam!
Hello, gorgeous nail lovers! Are you ready to add a burst of playful color to your fingertips? Rainbow nail designs are a fantastic way to express yourself and bring a little joy to your day. But sometimes, getting that perfect, seamless blend of colors and that oh-so-coveted glossy finish can feel like a puzzle. Don’t worry, I’m Lisa Drew from Nailerguy, and I’m here to break it all down for you. We’ll explore how to create dazzling rainbow manicures that look like they came straight from a professional salon, without the fuss. Get ready to unlock the essential secrets for vibrant, glossy rainbow nails that will make you smile every time you glance at your hands!
Frequently Asked Questions about Rainbow Nails with Glossy Finish
What are the basic colors for a rainbow nail design?
The classic rainbow order is Red, Orange, Yellow, Green, Blue, and Violet (ROYGBIV). You can stick to this order or get creative with shades and finishes!
Can I do rainbow nail designs without special tools?
Absolutely! While some tools can help, you can create beautiful rainbow nails with just nail polish, a steady hand, and a good top coat. Even a toothpick can be useful for blending!
How do I get a really glossy finish on my nails?
The secret to a super glossy finish is a high-quality, non-wipe gel top coat, or a really good, thick clear nail polish top coat. Make sure to apply it evenly and let it cure properly (if using gel).
What’s the easiest way to paint a rainbow on my nails?
For beginners, the easiest methods are often painting each color on a different nail or using a sponge to create a gradient effect. We’ll cover these and more!
How long do rainbow nail designs with a glossy finish usually last?
With proper application and good quality polish, especially gel polish, rainbow designs with a glossy finish can last from one to three weeks. Regular polish might last 3-7 days.
Can I combine different textures with a glossy rainbow finish?
You sure can! You could have a matte rainbow base with glossy accents, or vice-versa. However, for this guide, we’re focusing on the full glossy effect!
Understanding the Magic of Glossy Rainbows
Rainbow nail designs are all about celebrating a spectrum of colors. Adding a glossy finish takes them to a whole new level, making the colors pop and giving your nails a sleek, professional look. It’s like putting the perfect shine on a beautiful piece of art! A high-gloss finish reflects light beautifully, making your rainbow manicure eye-catching and sophisticated, no matter how playful the colors are.
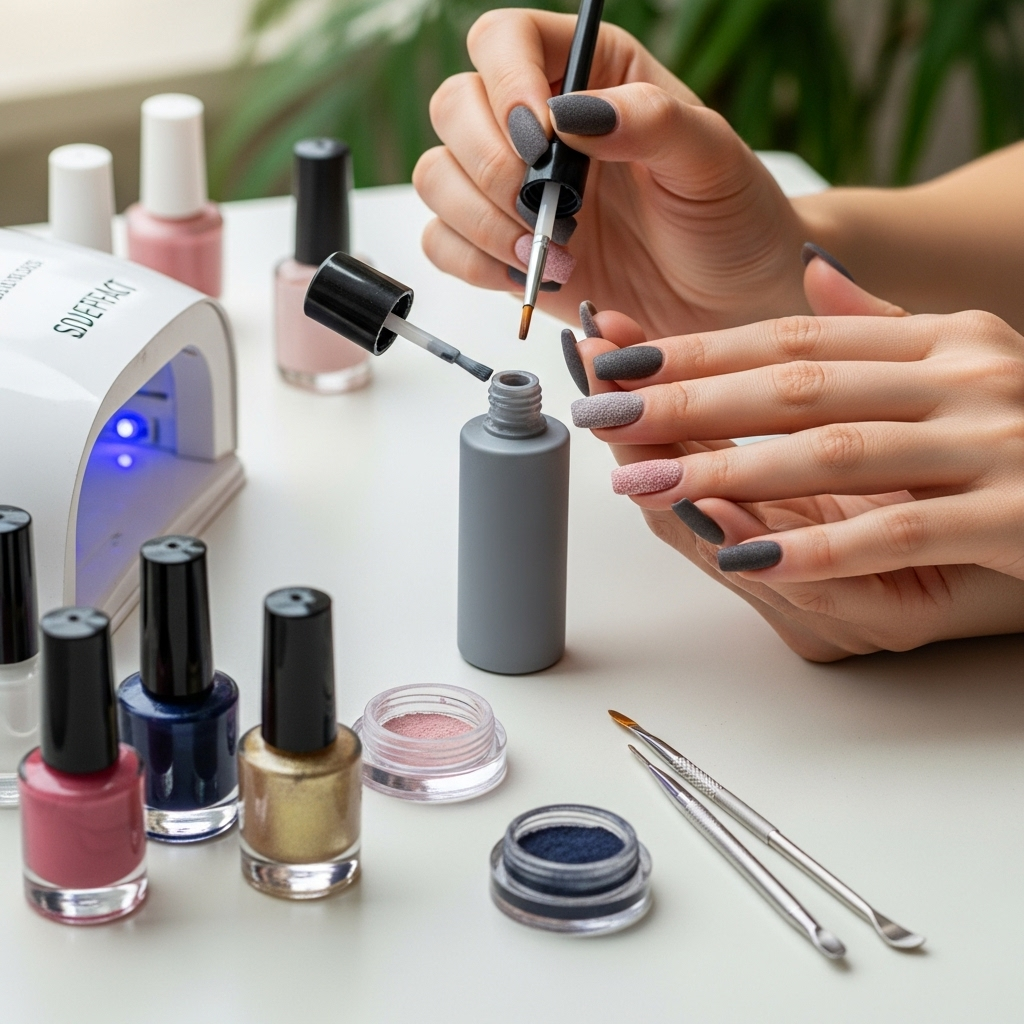
Essential Tools and Materials for Your Glossy Rainbow Manicure
Before we dive into the fun part – painting! – let’s make sure you have everything you need for a smooth and successful experience. Having the right supplies makes all the difference, turning potential frustration into pure creative joy.
Nail Prep Essentials
- Nail Polish Remover: To start with a clean slate.
- Cotton Pads/Balls: For applying the remover.
- Nail File: To shape your nails perfectly.
- Nail Buffer: To smooth the nail surface.
- Cuticle Pusher/Orange Stick: To gently push back cuticles.
- Cuticle Oil: To nourish your cuticles after prep.
The Color Palette
- Base Coat: Essential for protecting your nails and helping polish adhere.
- Rainbow Colors: You’ll need at least 5-6 vibrant nail polishes in rainbow shades (e.g., red, orange, yellow, green, blue, violet).
- White or Black Base (Optional): A white base can make colors brighter, while a black base can create a more dynamic, vibrant effect.
- Glossy Top Coat: This is KEY for that high-shine finish! A gel top coat with a sticky layer that needs wiping will give the most durable, high-gloss shine, but a great regular top coat works too.
Application Tools (Choose your adventure!)
- Thin Nail Art Brushes: Perfect for creating clean lines and detailed rainbows.
- Cosmetic Sponges: Ideal for creating smooth, blended gradients.
- Toothpicks: Great for blending and minor touch-ups.
- Dotting Tools: Can be used for individual color dots or for blending edges.
Finishing Touches
- Rubbing Alcohol or Gel Cleanser: If using a gel top coat that requires wiping.
- Lint-Free Wipes: For cleaning up and wiping the gel top coat.
- Quick-Dry Drops/Spray (Optional): To speed up drying time for regular polish.
Step 1: Perfect Prep – The Canvas
Every masterpiece starts with a clean, smooth surface. Proper nail preparation is the foundation for any long-lasting, beautiful manicure, especially for vibrant designs like rainbows. This step is non-negotiable for achieving that flawless glossy finish!
- Remove Old Polish: Start by removing any old nail polish completely. Grab your nail polish remover and cotton pads.
- Shape Your Nails: Gently file your nails into your desired shape. Always file in one direction to avoid weakening the nail.
- Smooth the Surface: Use a nail buffer to lightly buff the surface of each nail. This removes ridges and oils, creating a smooth base for the polish to adhere to. Be gentle; you’re not trying to thin your nails, just create a good grip.
- Clean Up Cuticles: Gently push back your cuticles using a cuticle pusher or an orange stick. This makes your nail bed appear longer and provides a cleaner area for your design.
- Wipe and Clean: Wash your hands to remove any dust or residue. Then, swipe each nail with nail polish remover or rubbing alcohol on a lint-free wipe. This ensures there are no oils left that could prevent polish from sticking.
- Apply Base Coat: Apply one thin layer of your base coat. This protects your natural nails from staining (especially important with vibrant colors!) and provides an even surface for your polish. Let it dry completely.
Step 2: Choosing Your Rainbow Method
There are several fun ways to create a rainbow effect on your nails, each offering a slightly different look. Let’s explore the most popular and beginner-friendly techniques!
Method 1: The Individual Nail Rainbow (Classic & Easy)
This is a great starting point for beginners. You paint a mini rainbow arc on each nail.
- Plan Your Arc: Mentally (or lightly with a pencil) plan where you want your rainbow arc to sit on the nail.
- Paint the Colors: Using a thin nail art brush, carefully paint stripes of your rainbow colors across the nail, following your planned arc. Start with red at one end, then orange, yellow, green, blue, and violet at the other.
- Blend Edges (Gently): If the lines are too harsh, you can use a clean, slightly damp brush or a toothpick to very gently feather the edges where the colors meet. Do this quickly before the polish dries!
- Let it Dry: Allow the colors to dry completely before moving to the top coat.
Method 2: The Gradient Rainbow with a Sponge (Soft & Blended)
This technique creates a beautiful, seamless blend that looks super professional.
- Prep the Sponge: Cut a cosmetic sponge into small, manageable pieces. You can lightly dampen it if you wish, but avoid saturation.
- Apply Polish to Sponge: Paint stripes of your rainbow colors directly onto the sponge, side-by-side, in the order you want them to appear. Work quickly!
- Dab onto Nail: Gently press the sponge onto your nail, dabbing from the cuticle to the tip. You might need to dab a few times, reapplying polish to the sponge if needed to build up the color and blend.
- Repeat for Other Nails: Clean off the sponge (or use a new section) and repeat for each nail that you want to have a gradient effect.
- Clean Up Edges: Use a small brush dipped in nail polish remover to clean up any color that got onto your skin.
- Let it Dry: Allow the polish to dry thoroughly.
Method 3: The Striped Rainbow (Bold & Defined)
This method uses distinct stripes of color, perfect for a more graphic look.
- Base Color: Apply your chosen base color (white or black works great here) and let it dry completely.
- Paint Stripes: Using thin nail art brushes, carefully paint crisp, horizontal or diagonal stripes of your rainbow colors across the nail.
- Keep Lines Clean: Take your time to ensure the lines are straight and the colors are distinct.
- Let it Dry: Ensure all stripes are fully dry before applying the top coat.
Step 3: Achieving That Irresistible Glossy Finish
This is where the magic happens! The right top coat transforms your vibrant colors into a dazzling, high-shine spectacle. Whether you’re using traditional nail polish or gel, the technique is similar: a smooth, even application is key.
| Top Coat Type | Application Tips | Pros | Cons |
|---|---|---|---|
| Regular Nail Polish Top Coat | Apply a generous, even layer over completely dry color. Don’t be too stingy, but avoid thick, lumpy patches. Ensure you cap the free edge (paint a tiny bit along the tip of your nail) to prevent chipping. | Easily accessible, no special equipment needed. Great for quick manicures. | May not be as durable or as high-shine as gel. Can take longer to dry fully. |
| Gel Top Coat (Wipe/Non-Wipe) | Apply a smooth, even layer over completely dry color. For wipe top coats, carefully cure under a UV/LED lamp according to the product’s instructions. For non-wipe, just cure. Then, if it’s a wipe coat, use a lint-free wipe with rubbing alcohol or cleanser to remove the sticky residue for ultimate shine. Cap the free edge. | Incredible durability, chip-resistance, and high-gloss shine that lasts. | Requires a UV/LED lamp and specific gel products. Can be more expensive upfront. |
Tip for Maximum Shine:
To get that ultra-glossy, almost-wet look, ensure your top coat application is flawless. If using a regular top coat, consider a quick-dry formula or drops to speed up the process and lock in shine. For gel, a good quality non-wipe top coat is your best friend for that effortless, mirror-like finish. Check out resources on proper gel application techniques from reputable sources like the U.S. Food & Drug Administration (FDA) for safe practices.
Step 4: Extra Tips for Rainbow Perfection
Want to elevate your already awesome rainbow nails? Here are some pro tips to help you achieve salon-quality results every time.
Making Colors Pop
- White Base: Applying a crisp white base coat before your rainbow colors will make all your chosen shades appear more vibrant and true to their original pigment. This is especially effective for pastels or lighter shades.
- Black Base: For a more dramatic and intense look, a black base coat can make jewel-toned or neon rainbow colors truly electrify.
- Quality Polish: Invest in good quality nail polishes. Pigmented polishes mean fewer coats are needed, leading to a smoother finish and less chance of streaking.
Blending Boundaries
- Use the Sponge Wisely: Don’t press too hard with the sponge; gentle dabbing is key to a seamless gradient. Reapply color to the sponge as needed rather than smearing.
- Toothpick Power: After painting adjacent color stripes, a toothpick can be used to very lightly drag the wet edges together. This requires a very steady hand and should be done quickly before polish dries.
- Clean Brush Magic: A fine-tipped brush dipped in nail polish remover can be used to clean up any fuzzy edges where colors meet, or where polish has smudged onto your skin.
Preventing Streaks and Chipping
- Thin Coats are Key: It’s almost always better to apply two thin coats of color than one thick, gloopy one. Thin coats dry faster and smoother.
- Cap Your Free Edge: This is crucial! After applying your color coats and your top coat, run the brush along the very tip (the free edge) of your nail. This seals the polish and dramatically reduces chipping and lifting.
- Patience is a Virtue: Let each layer of polish dry completely before applying the next. Rushing this step is a one-way ticket to smudges and dents.
Creative Rainbow Variations
- Pastel Rainbow: Use softer, lighter shades for a dreamy, ethereal look.
- Neon Rainbow: Go bold with vibrant neon polishes for a fun, energetic vibe.
- Metallic Rainbow: Experiment with metallic or glitter polishes in rainbow shades for extra sparkle. You can even use foil transfers for a chrome rainbow effect!
- Rainbow French Tips: Instead of white tips, use a rainbow gradient or stripes for a playful twist on the classic French manicure.
Troubleshooting Common Rainbow Nail Issues
Even with the best intentions, sometimes things don’t go according to plan. Don’t get discouraged! Here are solutions to some common rainbow nail design hiccups.
Issue 1: Streaky Colors
Why it happens: The polish might be too thin, or you aren’t applying enough coats. It can also happen if the polish is old and starting to thicken.
The Fix:
- Apply creamier, more pigmented polishes.
- Use at least two thin coats of each color.
- Try adding a nail polish thinner (not remover!) to revitalise old polish.
- For gradients, ensure you’re rebuilding color on the sponge and dabbing, not smearing.
Issue 2: Colors Muddying Together
Why it happens: The colors are still wet when they touch, or you’re over-blending.
The Fix:
- Let each stripe or dab of color dry for at least a minute before applying the next adjacent one.
- Use a clean, barely damp brush or toothpick for gentle blending, not aggressive mixing.
- For striped rainbows, use thin art brushes and take your time to keep lines crisp.
Issue 3: Top Coat Dulls the Color
Why it happens: Some top coats can have a slightly milky or dimming effect if applied too thickly or if they react with the polish beneath.
The Fix:
- Use a high-quality, crystal-clear top coat. Gel top coats are excellent for maintaining vibrancy.
- Ensure your color coats are completely dry before applying the top coat.
- Apply the top coat in one smooth, even layer.
Issue 4: Chipping After One Day
Why it happens: Lack of proper prep, not sealing the edges, or applying color coats too thickly.
The Fix:
- Go back to Step 1! Ensure your nails are clean, buffed, and oil-free.
- ALWAYS cap the free edge with your color coats AND your top coat.
- Apply polish in thin, even layers.
- If using regular polish, consider a quick-dry top coat or drops.
Conclusion: Your Rainbow Masterpiece Awaits!
And there you have it! Creating stunning rainbow nail designs with that irresistible glossy finish is absolutely achievable right at home. We’ve walked through everything from getting your nails perfectly prepped to mastering different application techniques and sealing it all with a high-shine top coat. Remember, the key is patience, good preparation, and using quality products. Don’t be afraid to experiment with different color combinations or methods – your nails are your canvas for self-expression! Whether you choose the classic individual nail rainbow, the soft sponge gradient, or crisp stripes, the goal is to have fun and embrace the vibrant beauty. So grab your polishes, put on your favorite tunes, and get ready to create a dazzling, glossy rainbow masterpiece that will bring a smile to your face every single day. Happy painting, and may your nails always be as bright and beautiful as a rainbow!