Get ready for a dreamy, pastel rainbow nail design that’s surprisingly easy to create! This tutorial breaks down the simple steps to achieve a soft, multicolor manicure perfect for spring and summer, adding a touch of effortless beauty to your look.
Welcome, lovely nail enthusiasts! Are you dreaming of whimsical colors and a manicure that just screams happiness? The pastel rainbow nail design is the perfect way to bring a little magic to your fingertips. Sometimes, achieving that perfect, soft gradient or clean separation of colors can feel like a challenge, leaving you frustrated with streaky lines or muddy hues. But don’t worry! With a few simple tricks and the right approach, you can create a stunning pastel rainbow that looks professionally done. We’re going to guide you through each step, making it super simple and fun, so you can confidently rock this beautiful trend. Get ready to dive into the best way to achieve effortless pastel rainbow beauty!
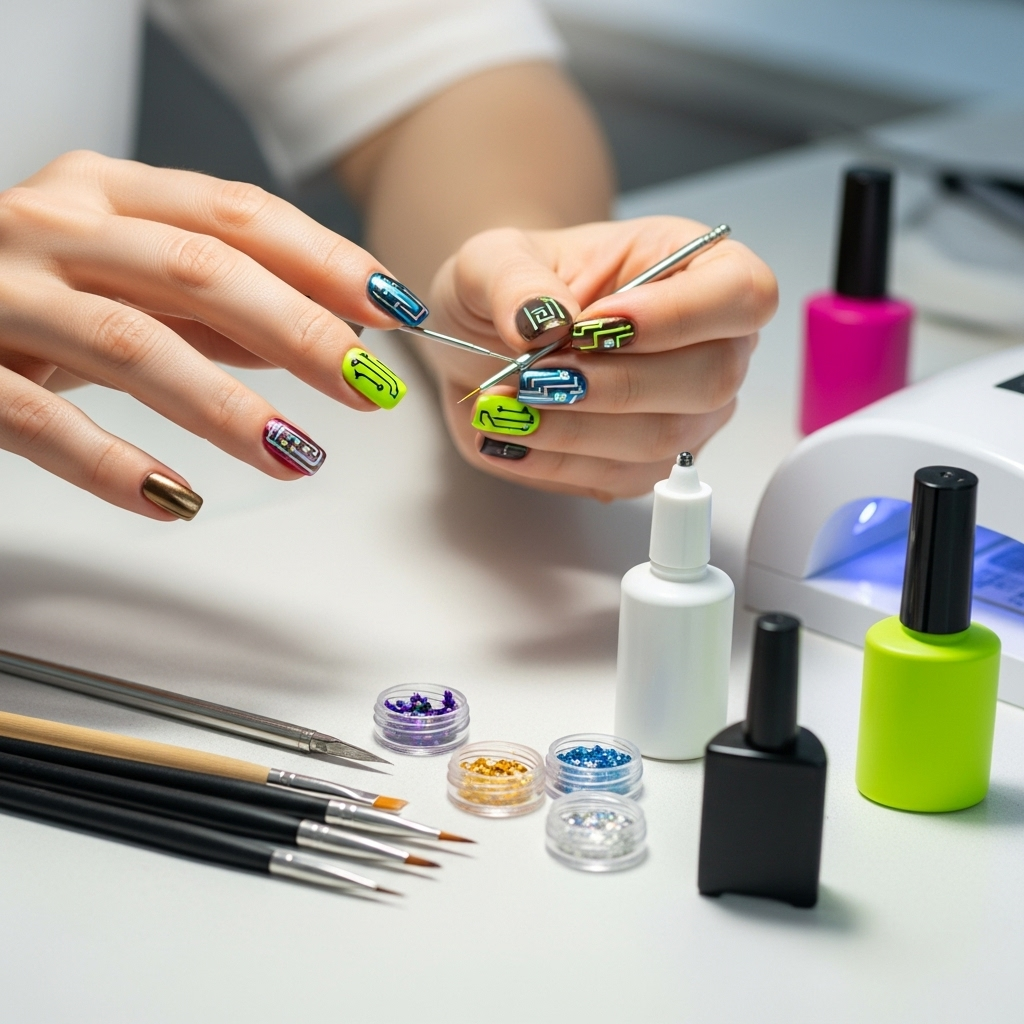
Your Essential Pastel Rainbow Nail Design Toolkit
Before we start painting, let’s gather the essentials. Having the right tools makes all the difference in achieving a smooth, professional-looking finish. Think of this as your artist’s palette for your nails!
Must-Have Polishes
For that signature pastel rainbow look, you’ll need a selection of soft, muted shades. Aim for the classic ROYGBIV colors, but in their gentler iterations:
- Soft Pink (like a baby pink or blush)
- Light Peach or Coral
- Pale Yellow
- Mint Green or Light Aqua
- Baby Blue
- Lavender or Lilac
Don’t be afraid to choose shades that complement each other or your personal style!
Essential Tools
Aside from your beautiful polishes, here are the other heroes of our pastel rainbow journey:
- Base Coat: Crucial for protecting your nails and ensuring a smooth canvas.
- Top Coat: Seals your design and adds that gorgeous shine.
- Nail Polish Remover: For quick clean-ups between colors.
- Cotton Balls or Pads: For the remover.
- Small Nail Art Brushes or Sponges: Depending on the technique you choose (we’ll cover options!).
- Toothpicks or Dotting Tools: For precision and clean-up.
- Paper Towel or Palette: To test colors or create gradients.
- Clear Tape (Optional): For creating sharp lines.
Effortless Pastel Rainbow Nail Design: Step-by-Step
Let’s get painting! We’ll explore a couple of popular methods to achieve this lovely look. Choose the one that feels most comfortable for you.
Method 1: The Gradient Rainbow (Dreamy Blend)
This technique creates a seamless transition of colors, like a soft sunset on your nails. It’s incredibly forgiving and looks stunning.
- Prep Your Nails: Start with clean, dry nails. Apply your base coat and let it dry completely. This step is vital to prevent staining and ensure your polish lasts.
- Apply a White Base (Optional but Recommended!): For the most vibrant pastel colors, apply a thin layer of white polish and let it dry. Pastels pop beautifully over white.
- The Sponge Technique:
- Cut a makeup sponge into small pieces, or use a makeup wedge sponge.
- On a paper towel or palette, apply stripes of your chosen pastel polishes next to each other. Don’t load too much polish, just enough to get a good blend. Think pink, peach, yellow, green, blue, purple, arranged in rainbow order.
- Lightly dab the sponge onto the polish stripes, allowing the colors to blend slightly on the sponge.
- Gently press and roll the sponge onto your nail, starting from the cuticle to the tip. You might need to re-apply polish to the sponge and repeat a few times to build up the color.
- Crucial Tip: Clean up the excess polish around your nails immediately with a brush dipped in nail polish remover. This makes a huge difference!
- Repeat for Other Nails: Once you’ve perfected the gradient on one nail, repeat the process for your other nails. You can vary the color order for a unique look on each.
- The Single Nail Rainbow: If you prefer one rainbow per nail, apply your base color (e.g., a soft pink), then use a fine art brush dipped in remover to gently blend the edges of your next color (e.g., peach) into the pink. Repeat with each color.
- Apply Top Coat: Once all your nails are dry, apply a generous layer of top coat to seal the design and add shine.
Method 2: The Striped Rainbow (Sharp & Chic)
This method uses tape to create clean, distinct bands of color. It’s perfect if you love crisp lines and a more graphic look.
- Prep Your Nails: As always, start with a clean nail and base coat. Apply your optional white base coat if desired.
- Apply the First Stripe: Paint one section of your nail with your first pastel color (e.g., pink). Let it dry completely.
- Apply Tape: Cut a thin strip of clear tape (nail art tape works best if you have it) and carefully apply it over the dried polish, creating a clean edge. Press down firmly to ensure no polish seeps underneath.
- Apply the Second Stripe: Paint the next section of your nail with your second pastel color (e.g., peach), making sure the polish goes right up to the edge of the tape. Let this layer dry completely.
- Remove Tape and Repeat: Carefully peel off the tape while the second color is still slightly wet (this helps prevent lifting). If it’s fully dry, use a brush dipped in remover to gently run along the tape edge to help release it. Wait for the second color to fully dry, then apply tape again, leaving a new section exposed, and repeat the process with your next color (yellow, green, blue, purple).
- Clean-Up: Use a small brush dipped in nail polish remover to tidy up any stray marks around the cuticle and nail edges for a polished finish.
- Apply Top Coat: Once all your stripes are dry and you’re happy with the look, finish with a protective top coat.
Tips for Perfect Pastel Rainbow Nails
Achieving that flawless pastel rainbow is all about a few key techniques and a little patience. Here’s what helps make your manicure truly shine.
Patience is a Virtue (Especially with Polish!)
Dry Time is Key: Resist the urge to rush! Ensure each layer of polish is completely dry before applying the next color or tape. This prevents smudging and ensures clean lines. A quick-dry top coat can be your best friend here.
Thin Layers are Best: Avoid thick, gloopy coats of polish. Thin, even layers dry faster and look much smoother. You can always add another thin coat if needed.
Color Blending and Placement
Nail Art Brush Magic: For the gradient method, a small, stiff nail art brush dipped in nail polish remover is your secret weapon for cleaning up edges and blending where colors meet.
Toothpick Trick: A toothpick can be incredibly useful for picking up tiny bits of dried polish on your skin or for making minor adjustments to polish placement.
Color Order: While the traditional rainbow ROYGBIV (Red, Orange, Yellow, Green, Blue, Indigo, Violet) is a great starting point, feel free to adapt it. Pastel shades often look beautiful in a slightly different sequence. Consider pink, peach, yellow, mint, baby blue, and lavender for a softer vibe.
Tool Hygiene
Clean Brushes: If you’re using dedicated nail art brushes, clean them thoroughly with nail polish remover immediately after use. This keeps them in good condition for future designs.
Sponge Longevity: Makeup sponges can get saturated quickly. Have a few pieces cut and ready, and don’t press too hard, to get the most out of each application.
Protecting Your Masterpiece
Generous Top Coat: Don’t skimp on the top coat! A good layer protects your design from chipping and adds that high-gloss, salon-quality finish. Reapply every couple of days to extend the life of your manicure.
Cuticle Oil: Keeping your cuticles hydrated with cuticle oil daily will prevent them from drying out and looking unkempt, making your entire manicure look fresher for longer.
Understanding Nail Polish Ingredients and Safety
As nail art enthusiasts, it’s great to have a basic understanding of what we’re putting on our nails. Most nail polishes today are formulated to be safe for cosmetic use. However, some brands may use ingredients that certain individuals prefer to avoid.
The “Big Three” (Historically)
You might sometimes hear about the “big three” chemicals – Formaldehyde, Toluene, and Dibutyl Phthalate (DBP). These were historically used to improve polish durability and texture. However, many manufacturers have voluntarily removed or reduced them.
“3-Free,” “5-Free,” “7-Free,” “10-Free,” and Beyond
Many brands now label their polishes as “X-Free,” indicating they are formulated without a certain number of potentially undesirable chemicals. For instance:
3-Free: Free from Formaldehyde, Toluene, and DBP.
5-Free: Adds Camphor and Formaldehyde Resin to the list of exclusions.
7-Free: Also excludes Xylene and Triphenyl Phosphate (TPHP).
10-Free & Up: Further excludes parabens, animal ingredients, gluten, and more.
Choosing a “free” nail polish can be a personal preference. For everyday users, especially beginners, most standard nail polishes from reputable brands are safe to use with proper application and removal. Always ensure good ventilation when using nail polish. For more detailed information on cosmetic ingredients, the U.S. Food & Drug Administration (FDA) website provides comprehensive resources on cosmetic safety regulations. You can explore their cosmetic ingredient database for ingredient information.
Choosing Your Pastel Rainbow Palette: Beyond the Basics
While the classic pastel rainbow is beautiful, don’t feel limited! You can customize your palette to create unique variations.
Monochromatic Pastels
Instead of a full rainbow, focus on shades within one color family. Imagine a gradient of light pinks, from blush to rose, or a spectrum of soft blues, from sky blue to robin’s egg. This offers a subtle yet striking effect.
The “Cool” or “Warm” Rainbow
Cool Tones: Focus on blues, purples, and greens. Think lavender, periwinkle, mint green, and baby blue.
Warm Tones: Embrace yellows, oranges, and pinks. Consider pale yellow, peach, coral, and soft rose.
The Neutral Rainbow
For a super sophisticated take, use very pale, muted shades that are almost neutral – think soft greys, muted lilacs, pale blushes, and off-whites. This creates a textured, ethereal look.
Pastel Rainbow Nail Design Variations & Pros/Cons
Here’s a quick look at popular variations and what makes them great:
| Design Variation | Description | Pros | Cons |
|---|---|---|---|
| Classic Gradient | Seamless color transition across the nail. | Very forgiving, soft and dreamy look, easy to blend. | Can be tricky to get perfectly smooth without practice, requires careful color blending. |
| Clean Striped | Distinct bands of color separated by crisp lines. | Sharp, modern look, precise. | Requires patience with tape, can be prone to bleeding if tape isn’t sealed well. |
| Ombre French Tips | Pastel rainbow colors blended onto the tips of the nails. | Unique twist on the classic French manicure, adds a pop of color. | Requires precision to keep colors contained to the tips. |
| Accent Nail Rainbow | One or two nails feature the full rainbow, others are a solid color. | Less commitment to a full rainbow look, easy to achieve. | May not feel like a “full” rainbow design for some. |
| Rainbow French Tips | Each tip is a different pastel color of the rainbow. | Playful and chic, adds color to a classic style. | Can be time-consuming to paint each tip individually. |
Frequently Asked Questions About Pastel Rainbow Nail Designs
Q1: How do I make my pastel colors look brighter?
A: The best way to make pastel colors pop is to apply a thin layer of white nail polish as a base coat before your pastel shades. White acts as a neutral canvas, allowing the true tone of each pastel to shine through without being dulled by the natural color of your nail.
Q2: Can I use regular makeup sponges for the gradient technique?
A: Yes, absolutely! Regular makeup sponges, especially the wedge-shaped ones, work wonderfully for creating a pastel rainbow gradient. Cut them into smaller pieces so you can easily dab and roll them onto your nails. Just make sure to use a clean piece for each nail or each color application.
Q3: My nail polish keeps bleeding under the tape. What can I do?
A: The key to preventing bleeding is to ensure each layer of polish is completely* dry before applying the tape. Also, press the tape down firmly all around the edges to create a good seal. If the polish is still wet, it can lift the tape or seep underneath. Another trick is to apply a thin layer of clear polish over the dried color after applying tape, letting that dry, then peeling the tape before applying the next color. This strengthens the edge.
Q4: How long should I wait between applying colors in a gradient design?
A: For the sponge gradient method, work relatively quickly once the polish is on the sponge. The key is to dab it onto the nail while the colors are still slightly wet and blendable. For the tape method, each color layer should be dry to the touch and ideally a bit longer – at least 5-10 minutes, depending on the polish formula and thickness.
Q5: What if I don’t have all the rainbow colors in pastel shades?
A: No problem! You can create a beautiful pastel rainbow with fewer colors as well. Opt for 3-4 complementary pastels (like pink, yellow, mint, and blue) and arrange them. Alternatively, you can mix a tiny drop of white polish into a regular bright polish to create your own custom pastel shade. Just be sure to mix thoroughly!
Q6: How can I make my pastel rainbow nail design last longer?
A: To ensure your pastel rainbow lasts, always start with a good base coat and finish with at least two layers of a high-quality top coat. Avoid using your nails as tools (like opening cans!) and try to wear gloves when doing household chores involving water or harsh chemicals. Reapply top coat every 2-3 days to refresh the shine and protect the design.
The Joy of Pastel Rainbows
Creating a pastel rainbow nail design is more than just a manicure; it’s a little act of self-care and a beautiful way to express your creativity. Whether you opt for a soft, blended gradient or sharp, defined stripes, the result is always cheerful and uplifting. Remember, the beauty of DIY nail art is that perfection isn’t the goal – enjoyment and self-expression are! Use these steps as your guide, experiment with colors, and don’t be afraid to adjust the techniques to fit your style.
Pastel rainbows are not only visually stunning but also incredibly versatile. They’re perfect for a spring wedding, a summer festival, or just brightening up an ordinary Tuesday. They add a touch of whimsy and a hint of magic to your day, one nail at a time. So, gather your polishes, find your favorite method, and get ready to create some effortless beauty. Your nails will thank you for the colorful treat, and you’ll feel a wonderful sense of accomplishment stepping out with your own unique, handmade masterpiece. Happy painting!