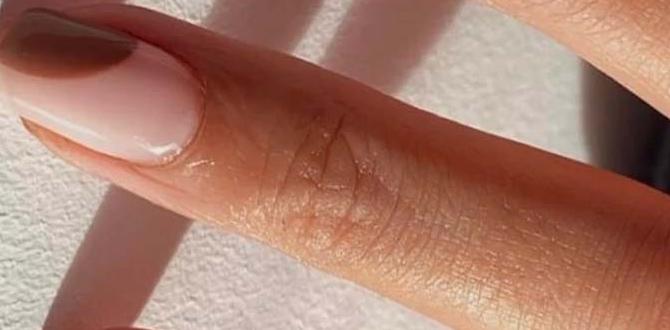
Nude nail designs offer an elegant, versatile, and timeless way to achieve a sophisticated look. These subtle shades complement any skin tone and outfit, making them perfect for everyday wear or special occasions. Discover simple, chic nude nail art ideas that are easy to achieve for a polished, confident style.
Looking for a manicure that’s always in style? Nude nails are your secret weapon! They’re like the little black dress of the nail world – always chic, always appropriate, and incredibly flattering. If you’ve ever felt overwhelmed by complicated nail art or unsure what polish color to pick for a polished look, you’ve come to the right place. Nude nails are surprisingly simple to master, and they’ll instantly elevate your style. Let’s dive into how you can achieve this effortless elegance right at home, and explore some gorgeous design ideas that are surprisingly easy to create. Get ready to fall in love with your nails!
Why Nude Nails Reign Supreme
Nude nail designs have earned their superstar status for a reason. They’re more than just a color; they’re a statement of understated elegance.
Think about it: nude shades, often called “your nails but better,” offer a clean, polished finish that enhances your natural beauty. They create an illusion of longer, slimmer fingers, and seamlessly blend with any outfit, from your workday power suit to your weekend casual jeans. Plus, they are incredibly forgiving; chips and nicks are far less noticeable on a nude polish than on a bright or dark color. This makes them ideal for busy individuals who need their manicures to last and look good in all situations.
The Universal Appeal of Nude
The magic of nude lies in its adaptability. What qualifies as “nude” can actually span a wide spectrum of pale, creamy, and earthy tones. From soft blush pinks and peachy beiges to warm taupes and creamy ivories, there’s a perfect nude shade out there for literally every skin tone. Finding your perfect match is key to unlocking the full potential of this minimalist chic. A well-chosen nude polish can make your hands look more refined and sophisticated with minimal effort.
Nude Nails: The Ultimate Versatile Canvas
Beyond being a beautiful standalone color, nude polish is the ultimate canvas for subtle nail art. It allows delicate details, metallic accents, or minimalist designs to truly shine without overwhelming the look. This makes nude nail designs perfect for those who want a touch of personality without veering into overly trendy or bold territory. It’s about refined beauty and a look that’s always appropriate.
Your Nude Nail Toolkit: What You’ll Need
Before we get to the fun designs, let’s make sure you have the right tools for a flawless nude manicure. You don’t need a professional salon setup to achieve salon-worthy results!
Having the right supplies makes all the difference. It’s like having the right ingredients for a delicious recipe – it ensures a smooth, beautiful outcome. Don’t worry if you don’t have everything right away; many of these are staples in any nail lover’s collection!
Essential Nail Care & Prep Tools
Nail File & Buffer: For shaping your nails and smoothing the surface.
Cuticle Pusher/Remover: To gently push back and tidy up your cuticles.
Nail Polish Remover: Acetone-free is often gentler for removing old polish.
Cotton Pads/Balls: For applying remover.
Hand Cream: To moisturize after filing and before polishing.
The Core Polishing Essentials
Base Coat: Crucial for protecting your natural nails and helping polish adhere better.
Nude Nail Polish(es): Choose one or a few shades you love!
Top Coat: To seal in your color and add shine, preventing chips.
Optional: Quick-Dry Drops/Spray: If impatient drying is your nemesis, these are game-changers!
For Adding That Extra Sparkle (Optional, but Fun!)
Fine-Tip Nail Art Brush or Dotting Tool: For creating simple accents.
Metallic Striping Tape or Gold Flakes: For adding a touch of glam.
Stencils or Stickers: For easy, precise designs.
Choosing Your Perfect Nude Shade
The “nude” shade you choose is personal and depends on your skin tone. Finding the right one will make your manicure look sophisticated and intentional.
This is where the beauty of nude really comes into play! It’s not a one-size-fits-all situation. Think of it as finding your perfect foundation shade, but for your nails. A shade that’s too light might wash you out, while one that’s too dark might look a bit jarring. The goal is a harmonious blend.
Finding Your Nude Match: A Simple Guide
Here’s a general guide to help you find the nude that sings on your skin tone. Remember, these are just guidelines, and personal preference is always key!
| Skin Tone | Recommended Nude Shades | Description |
|---|---|---|
| Fair to Light | Pale Pink, Soft Beige, Creamy Ivory | These shades add a touch of warmth without looking stark. Look for polishes with pink or peachy undertones. |
| Medium to Olive | Warm Beige, Peachy Nude, Light Tan | These tones complement the natural warmth of medium skin. Look for shades with golden or subtle brown undertones. |
| Deep to Rich | Caramel, Mocha, Deep Taupe, Rich Berry Tones | These deeper nudes provide beautiful contrast and richness. Look for shades with warm brown or even hints of red undertones. |
A great resource for understanding undertones is often found in makeup guides, as the principles are very similar. For example, understanding whether your skin has more pink (cool), yellow (warm), or neutral undertones can help you pick the most flattering polish. Many beauty blogs and even dermatology sites offer guides on identifying skin undertones, like this piece from the National Center for Biotechnology Information (NCBI), which discusses Fitzpatrick skin typing, a related concept that can inform color choices.
Testing Before You Buy
If possible, try polish in a store that offers testers. You can paint a small stripe on your nail or fingertip to see how it looks in natural light before committing. Online, look for swatches on different skin tones to get a better idea.
Effortless Nude Nail Designs for Beginners
Now for the exciting part! These designs are all about adding a little something extra to your nude manicure without needing advanced skills. They’re chic, modern, and surprisingly easy to achieve.
Ready to elevate your nude mani? These ideas are perfect for anyone who’s just starting out with nail art or prefers a minimalist yet stylish approach. We’re talking simple additions that make a big impact.
1. The Subtle Accent Nail
This is perhaps the easiest way to add a touch of personality to your nude nails.
How-to:
- Prep your nails as usual: file, buff, and apply a base coat.
- Paint all nails with your chosen nude polish, applying two thin coats for full opacity. Let them dry completely.
- On one or two nails (your accent nails – usually ring fingers), add a simple design. This could be:
- A single vertical or horizontal stripe in a complementary metallic shade (gold, silver, rose gold).
- A small dot at the base of the nail (the “moon” area).
- A thin line across the tip or cuticle.
- Seal everything with a top coat.
2. Minimalist Metallic Lines
A delicate metallic line can transform a plain nude nail into something truly special.
How-to:
- Complete steps 1 and 2 from the Accent Nail design.
- Using a fine-tip brush dipped in metallic polish (or a metallic striper polish), carefully draw a thin line. Popular placements include:
- Along the free edge (the tip) of the nail.
- Following the curve of your cuticle.
- As a single stripe down the center or side of the nail.
- Let the metallic polish dry thoroughly before applying a top coat.
3. The Perfect French Twist
The classic French manicure gets a modern update with nude polish.
How-to:
- Prep your nails and apply your nude polish to all nails. Let dry.
- For the French tip, you have a few options:
- Freehand: With a steady hand and a fine brush, paint a thin white or cream line across the tip of each nail.
- Using Guides: Place French tip sticker guides across the tip of the nail, then paint the tip. Remove the guide while the polish is still slightly wet.
- Reverse French (Half-Moon): Apply a small dotting tool or a fine brush to create a semi-circle shape at the base of the nail, near the cuticle.
- Allow tips to dry completely before applying a top coat.
4. Subtle Geometric Accents
Simple shapes add a contemporary edge.
How-to:
- Prep and apply your nude polish to all nails. Let dry.
- Using a fine-tip brush or dotting tool, create simple geometric shapes on one or two accent nails. Think:
- Tiny squares or triangles near the cuticle.
- A single small circle.
- Parallel lines.
You can use a contrasting color (like white, black, or metallic) or even a slightly darker or lighter shade of nude for a tonal look.
- Once dry, apply a top coat.
5. Glitter Fade or Ombre
A touch of sparkle adds glamour without being over the top.
How-to:
- Prep and apply your nude polish to all nails. Let dry.
- For a glitter fade:
- Take a fine glitter polish (like a champagne or rose gold).
- Start applying it at the tips of your nails, gradually fading it down towards the cuticle. You can use the brush to dab and blend.
- For a simple ombre:
- Apply your nude polish.
- On an accent nail, carefully dab a slightly lighter or darker nude shade or a shimmer polish onto the center of the nail, blending outwards with a clean brush or sponge.
- Seal with a top coat.
Nude Nail Designs with a Touch of Texture
Want to move beyond simple color and lines? Texture adds an intriguing dimension to nude nails. These are still beginner-friendly and offer a sophisticated finish.
These techniques might sound a little more advanced, but I promise they’re quite achievable with a little practice! They’re a fantastic way to make your nude nails stand out while keeping the overall vibe chic and elegant.
Velvet Nails (Cat Eye Effect)
This popular technique uses magnetic polish to create a mesmerizing, shimmering effect reminiscent of velvet or a cat’s eye.
How-to:
- Prep your nails and apply a dark, solid color base coat (a deep brown, black, or navy often works best as a base for the magnetic polish to truly pop). Let it dry completely.
- Apply a thin coat of your magnetic nude polish.
- While the polish is still wet, hold the magnet (usually included with the polish or sold separately) close to the nail surface for about 10-15 seconds. Move the magnet around to achieve your desired “eye” effect. Don’t let the magnet touch the polish.
- Apply a second coat of the magnetic polish and repeat the magnetizing process.
- Once you’re happy with the effect, apply a clear or the recommended top coat (some magnetic polishes require specific top coats).
A great tip is to follow the magnetizing steps in a controlled environment, perhaps with a dedicated nail mat, to avoid accidental smudges. For more on the science of magnetic polishes, you can often find explanations on cosmetic chemistry blogs or manufacturer’s websites.
Matte Finish with Shine Accents
The contrast between matte and glossy finishes is incredibly sophisticated.
How-to:
- Prep and apply your nude polish to all nails. Let dry.
- Apply a matte top coat over all nails. Let it dry completely.
- Now, choose one or two accent nails. Using a regular glossy top coat (or a colored polish), add a simple design element – perhaps a few dots, a thin line, or a small shape. The contrast between the matte nail and the glossy design will be striking.
- Let the glossy accent dry thoroughly.
Subtle Embossed or 3D Designs
Using special 3D or gel paints, you can create subtle raised patterns.
How-to (Basic Embossing):
- Prep and apply your nude polish. Cure under a UV/LED lamp if using gel.
- Take a small amount of 3D gel paint or a thick builder gel.
- Using a fine-tip brush or a dotting tool, create a simple raised design. Think small raised dots, delicate swirls, or minimalist lines.
- Cure under the lamp if using gel materials. If using a non-UV 3D paint, allow it to air dry as per product instructions.
- If desired, you can cap the design with a thin layer of top coat (ensure it doesn’t flatten the 3D effect) or leave it as is.
Pro Tips for Flawless Nude Nails
Achieving a perfect nude manicure isn’t just about the color; it’s about the application and the finishing touches.
Even with the simplest designs, paying attention to the details makes a world of difference. These tips will help you get that smooth, professional finish every time.
- Prep is Paramount: Always start with clean, dry nails. Push back cuticles gently and file them to a uniform shape. A smooth nail surface is the best base.
- Thin Coats are Key: Apply your nude polish in two or three thin, even coats rather than one thick one. This prevents streaking and ensures faster, more even drying.
- Cap Your Tips: When applying your color and top coat, run the brush horizontally across the tip of your nail. This “seals” the edge and helps prevent chipping.
- Clean Up Edges: Use a small brush (an old, clean eyeliner brush works well) dipped in nail polish remover to carefully clean up any polish that got onto your skin before it dries.
- Let it Dry: Resist the urge to touch your nails too soon! Even quick-dry top coats need a few minutes to fully set. Consider using quick-dry drops for added insurance.
- Moisturize: After your manicure is completely dry, massage cuticle oil and hand cream into your skin. This keeps your hands looking as polished as your nails.
Nude Nail Designs: A Comparison of Techniques
When choosing a nude nail design, consider the time investment and the desired effect. Here’s a quick look at some popular approaches:
| Design Technique | Skill Level | Time Commitment | Key Materials | Visual Effect |
|---|---|---|---|---|
| Solid Nude Color | Beginner | Low (15-20 mins) | Base coat, Nude Polish, Top coat | Clean, polished, natural |
| Accent Nail with Simple Art | Beginner | Medium (20-30 mins) | Base coat, Nude Polish, Accent Polish/Metallic, Top coat | Subtle detail, personality |
| Minimalist Metallic Lines | Beginner-Intermediate | Medium (25-35 mins) | Base coat, Nude Polish, Metallic Polish/Striper, Top coat | Elegant, modern, precise |
| Velvet/Cat Eye | Intermediate | Medium-High (30-45 mins) | Base coat, Dark Polish, Magnetic Nude Polish, Magnet, Top coat | Shimmering, dimensional, unique |
| Matte with Glossy Accents | Beginner | Medium (25-35 mins) | Base coat, Nude Polish, Matte Top Coat, Glossy Top Coat/Polish | Sophisticated contrast, chic |

