Nail design ideas for beginners are easy to achieve with simple techniques like dots, stripes, and glitter. Focus on clean application, basic tools, and playful, minimalist patterns to create stunning manicures at home.
Dreaming of gorgeous nails but feel like intricate designs are out of reach? You’re not alone! Many beginners get intimidated by fancy nail art. The good news is, creating beautiful, eye-catching nails doesn’t require years of practice or expensive tools. With a few simple tricks and straightforward ideas, you can transform your fingertips into mini masterpieces. This guide is packed with easy-to-follow nail design ideas perfect for anyone just starting out. We’ll cover everything from essential tools to simple yet stunning looks that will boost your confidence and your style.
Effortless Brilliance: Your Beginner’s Guide to Stunning Nails
Welcome to your nail art adventure! As Lisa Drew from Nailerguy, my mission is to make nail care and design accessible, fun, and totally doable for everyone. Forget complicated step-by-step tutorials that leave you more confused than creative. We’re diving into effortless brilliance, focusing on techniques and designs that are beginner-friendly, budget-conscious, and incredibly satisfying to achieve. You’ll be rocking salon-worthy nails in no time!
Getting Started: Essential Tools for Beginner Nail Artists
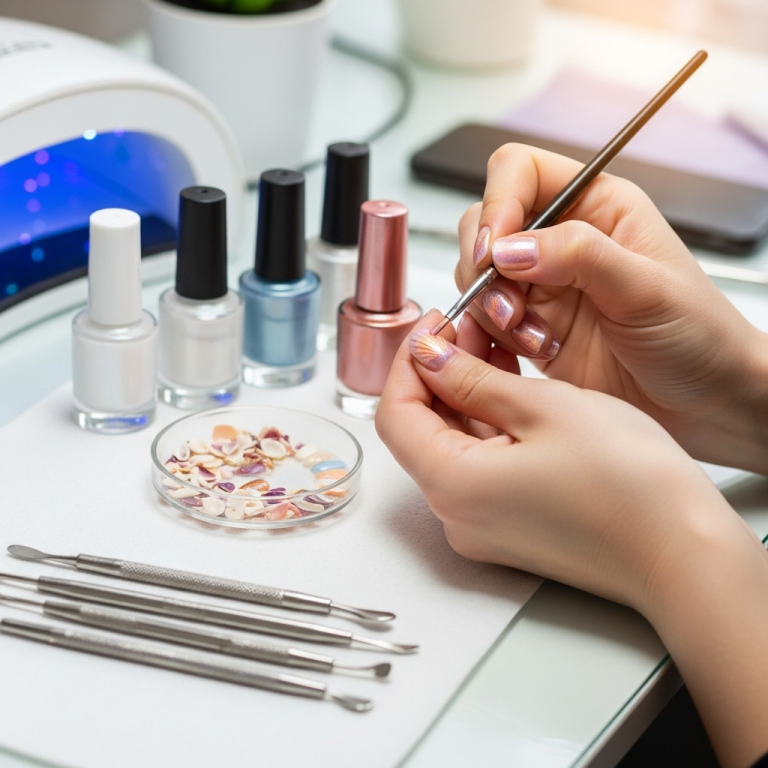
Before we jump into the fun designs, let’s gather your toolkit. You don’t need a mountain of supplies. A few key items will set you up for success. Having the right tools makes the process smoother and the results so much better. Think of these as your trusty sidekicks in the world of nail art.
Here’s a breakdown of what you’ll need:
- Nail Polish: A collection of your favorite colors. Start with a good base coat and a durable top coat – these are non-negotiable for a lasting manicure.
- Dotting Tools: These come with different sized ball tips, perfect for creating perfect dots and simple patterns. You can often find a set affordably.
- Thin Striping Brush: Ideal for drawing fine lines, French tips, or adding delicate details.
- Toothpicks or a Fine-Tipped Applicator: Excellent for intricate details or fixing small mistakes.
- Regular Nail File and Buffer: For shaping and smoothing your nails.
- Cotton Balls/Pads and Nail Polish Remover: Essential for clean-up and corrections.
- Clear Nail Polish or Gel: Your secret weapon for sealing designs and adding shine.
- Optional: Glitter Polish or Loose Glitter: For that extra sparkle!
Don’t feel overwhelmed! You probably already have some of these. The goal is to have the basics to start experimenting. Remember, practice makes perfect, and even a simple polish can look fantastic with a well-applied base and top coat.
The Foundation: Perfecting Your Base Manicure
Every great nail design starts with a great base. Taking a few extra minutes to prep your nails will make a huge difference in how long your manicure lasts and how professional it looks. It’s the canvas upon which you’ll create your art!
- Clean Your Nails: Start with clean, dry nails. Remove any old polish completely. Wash your hands to get rid of oils.
- Shape Your Nails: File your nails to your desired shape (square, round, oval). Always file in one direction to prevent splitting.
- Push Back Cuticles: Gently push back your cuticles with an orange stick or a cuticle pusher. This creates a clean edge for your polish application.
- Buff Your Nails: Lightly buff the surface of your nails. This smooths out any ridges and helps polish adhere better. Don’t over-buff!
- Apply Base Coat: This is crucial! A good base coat protects your natural nails from staining and helps your polish last longer. Let it dry completely.
- Apply Color Polish: Apply two thin coats of your chosen color. Let each coat dry for a minute or two before applying the next. Thin coats dry faster and look smoother.
- Apply Top Coat: Once your color is dry, apply a generous layer of a good-quality top coat. This seals the design, adds shine, and prevents chips.
A flawless base is truly half the battle. Once this is done, you’re ready to add those beautiful beginner-friendly designs!
Super Simple Nail Design Ideas for Beginners
Now for the fun part! These designs are incredibly easy to execute, require minimal tools, and deliver maximum impact. They’re perfect for adding a touch of personality to your everyday look or for special occasions.
1. The Perfect Dot
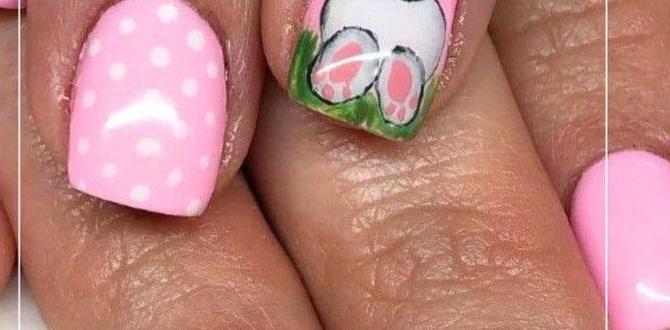
Dots are the quintessential beginner nail art. They are forgiving, quick, and can be as simple or as intricate as you like.
- What You Need: Dotting tool (or toothpick), two nail polish colors (one for the base, one for the dots).
- How-To:
- Apply your base coat and at least one color coat as usual. Let it dry completely.
- Dip the tip of your dotting tool into your contrasting polish color. You only need a little!
- Gently press the dotting tool onto your nail to create a perfect dot.
- Repeat to create a single large dot, multiple smaller dots, or even a pattern like a polka dot French tip.
Pro Tip: For a more advanced look, use different sized dotting tools on the same nail to create depth or patterns like ladybugs or flowers!
2. Chic Stripes
Lines are another fantastic way to add interest. Whether thin and delicate or bold and graphic, stripes are always in style.
- What You Need: Thin striping brush (or a steady hand with a regular brush), two or more nail polish colors.
- How-To:
- Paint your nails with your base color and let them dry thoroughly.
- Dip just the very tip of your striping brush into a contrasting polish color. Wipe off any excess on the opening of the bottle.
- Gently glide the brush across your nail to create a straight line. You can go vertically, horizontally, or diagonally.
- For multiple stripes, ensure the previous line is dry or nearly dry to avoid smudging.
Beginner Hack: If freehanding lines is tricky, try using striping tape! Apply polish, let it dry, stick on strips of tape, paint over them, and peel off the tape when the new polish is almost dry (but not wet). This creates super sharp lines!
3. Glitter Gradient (Ombre)
This is a dazzling and forgiving way to add sparkle. It looks complex but is incredibly simple to achieve.
- What You Need: A glitter polish, a base color polish, a makeup sponge (optional).
- How-To:
- Apply your base color and let it dry completely.
- For a sponge gradient: Apply a layer of glitter polish to the sponge. Gently dab the sponge onto the tip of your nail, gradually moving down to create a fade. Repeat for more intensity.
- For a brush gradient: Apply glitter polish just to the tips of your nails. Then, use your brush to gently blend the glitter down onto the base color, creating a fading effect.
- Apply a clear top coat to smooth out the glitter and seal everything in.
Lisa’s Tip: This is perfect for covering up minor imperfections from other designs or if you want a quick, glamorous look without much effort.
4. Minimalist Accents
Sometimes, less is more. A small, strategically placed accent can elevate your manicure.
- What You Need: Dotting tool or toothpick, contrasting polish, base color.
- How-To:
- Paint all nails with your base color.
- On one or two accent nails, add a single dot near the cuticle, a tiny line at the tip, or a small metallic accent.
- Let it dry, then apply your top coat to all nails.
Try This: A single gold dot at the base of each nail on a nude or navy background looks incredibly chic!
5. The Half-Moon Manicure
This vintage-inspired look is surprisingly simple and sophisticated.
- What You Need: Small circular stickers or tape, two contrasting nail polish colors.
- How-To:
- Apply your first color (this will be the color of your moon) and let it dry completely.
- Place a small circular sticker or a piece of tape just above the lunula (the white half-moon shape) at the base of your nail. Ensure it’s pressed down firmly to prevent polish bleeding underneath.
- Paint the rest of your nail with your second color, up to the edge of the sticker/tape.
- Carefully peel off the sticker/tape while the second color is still wet.
- Let it dry completely, then apply a clear top coat.
Variations: You can also do a reverse half-moon by painting the main part of your nail first, then using the sticker to create the moon shape at the base. You can also skip the sticker and carefully freehand the curve with a thin brush.
6. French Tips with a Twist
The classic French manicure is timeless, but you can easily adapt it for beginners with modern flair.
- What You Need: Thin striping brush or a fine-tipped liner brush, base color, white polish, and optional accent color.
- How-To:
- Apply your base and color coats, let them dry.
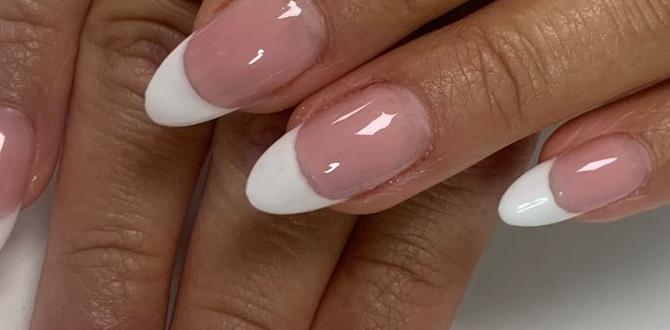
- Use your fine brush to paint thin white tips. For a softer look, use a nude or pastel color instead of white.
- For the Twist: Add a thin, solid line of a contrasting color just below the white tip, or use glitter polish for the tip itself.
Easy French Tip Guide: If freehanding the curve is tough, use guide stickers made for French tips. They give you a perfect line to follow. You can find them at most beauty supply stores or online.
7. Simple Geometric Shapes
Using tape or even just a steady hand can create striking geometric designs.
- What You Need: Tape (masking tape or striping tape), scissors, several polish colors.
- How-To:
- Paint your nails with your base color and let it dry thoroughly.
- Cut small pieces of tape and arrange them on your nail to create geometric shapes (triangles, squares, chevrons). Press the edges down firmly.
- Paint over the tape with a contrasting color.
- While the new polish is still wet, carefully peel off the tape.
- Let dry completely before applying a top coat.
Tip: For a modern, abstract look, try different color combinations and tape placements on each nail.
Tools Comparison: Dotting Tools vs. Toothpicks
When it comes to creating dots and small details, both dotting tools and toothpicks are popular choices for beginners. While they can achieve similar results, each has its own advantages.
| Feature | Dotting Tools | Toothpicks |
|---|---|---|
| Size Variety | Come in sets with multiple tip sizes (e.g., 1mm to 5mm), allowing for precise control over dot size. | Typically offer only one size, providing a standard dot. Can be used to spread polish for a larger dot. |
| Usability/Grip | Often designed with a handle for better grip and stability. | Thin and can be slippery, requiring a steadier hand. Can break easily. |
| Durability | Made of metal or plastic, designed for repeated use. | Single-use disposable items. |
| Accessibility | Widely available at beauty stores and online, often in affordable sets. | Readily available in most homes. |
| Technique Similarity | When used for dots, the application process is similar: dip in polish, press onto nail. | Can be used for dots, lines, and even picking up small glitters. |
| Beginner Recommendation | Generally recommended for beginners due to consistent sizing and better grip. | A great starting point if you don’t have dotting tools yet, or for quick clean-ups. |
Both are excellent for getting started. If you plan to do nail art regularly, investing in a set of dotting tools is highly recommended for consistency and ease of use. For a quick, one-off design, toothpicks are perfectly fine!
Taking Care of Your Nails: Beyond the Design
Beautiful nail designs are part of the experience, but healthy nails are the foundation. Here are some tips for keeping your nails strong and looking great, even between manicures.
- Hydrate: Keep your cuticles moisturized with cuticle oil. This prevents dryness and hangnails, which can detract from any design. Apply it daily.
- Protect: Wear gloves when doing chores like washing dishes or cleaning. Harsh chemicals can dry out and damage your nails.
- Don’t Pick: Resist the urge to pick at your nail polish or any lifting edges. This can peel off layers of your natural nail and cause damage.
- Strengthen: If your nails are prone to breaking or peeling, consider using a nail strengthener. Look for formulas with ingredients like biotin or keratin. You can find science-backed advice on nail health from the Mayo Clinic here: Mayo Clinic Nail Care.
- Nail Health During Polish Use: Give your nails a break from polish occasionally. This allows them to “breathe” and can help maintain their natural strength and hydration.
Healthy nails not only make polish application easier but also contribute to the overall aesthetic of your hands. A little care goes a long way!
Troubleshooting Common Beginner Nail Art Issues
Even with the simplest designs, you might run into a few snags. Don’t worry, these are common and totally fixable!
- Polish Smudging:
- Cause: Trying to add a new layer of polish before the previous one is dry.
- Solution: Be patient! Let each layer dry thoroughly. If you smudge, use a fine brush dipped in nail polish remover to carefully clean up the edge.
- Uneven Lines/Dots:
- Cause: Too much polish on the brush/tool, inconsistent pressure, or a shaky hand.
- Solution: Dip your tool lightly. Wipe off excess polish. Practice your strokes on a piece of paper to get a feel for pressure. For lines, a striping tape guide is your best friend!
- Chipping Polish Too Soon:
- Cause: Skipping the base coat or top coat, or not sealing the free edge of the nail.
- Solution: Always use a good base and top coat. When applying your top coat, carefully swipe it along the tip of your nail (the edge) to seal the polish and prevent chipping.
- Polish Bubbles:
- Cause: Applying polish too thickly, shaking the polish bottle vigorously, or painting in a hot/humid environment.
- Solution: Apply polish in thin coats. Roll the bottle between your hands instead of shaking it. Paint in a cool, dry place if possible.
Every nail art attempt, even the “fails,” is a learning experience. Embrace the imperfections and keep practicing!
FAQ: Your Beginner Nail Design Questions Answered
Q1: What is the easiest nail design for a complete beginner?
A1: The simplest designs involve single dots made with a dotting tool or toothpick, or applying glitter polish over a base color. Even a perfectly applied solid color with a great base and top coat is a stellar beginner achievement!

