Nail airbrush designs are a vibrant and fun way to elevate your manicure! Learn how to achieve stunning, professional-looking results with our beginner-friendly guide, covering essential tools, simple techniques, and genius tips for flawless nail art.
Hey nail lovers! Ever admired those incredibly smooth gradients and intricate designs on nails and wondered if it’s something you could actually do at home? You know, the ones that look like they leaped straight from a magazine cover? I totally get it! Sometimes, nail art can feel a bit intimidating, especially when fancy tools are involved.
The good news? Achieving beautiful nail airbrush designs is totally within your reach, even if you’re just starting out. It’s all about understanding the basics and having a few clever tricks up your sleeve. We’re going to break down everything you need to know, from the essential airbrush kit to simple techniques that will have you creating nail masterpieces in no time. Get ready to unlock your inner nail artist!
What Exactly is Nail Airbrushing?
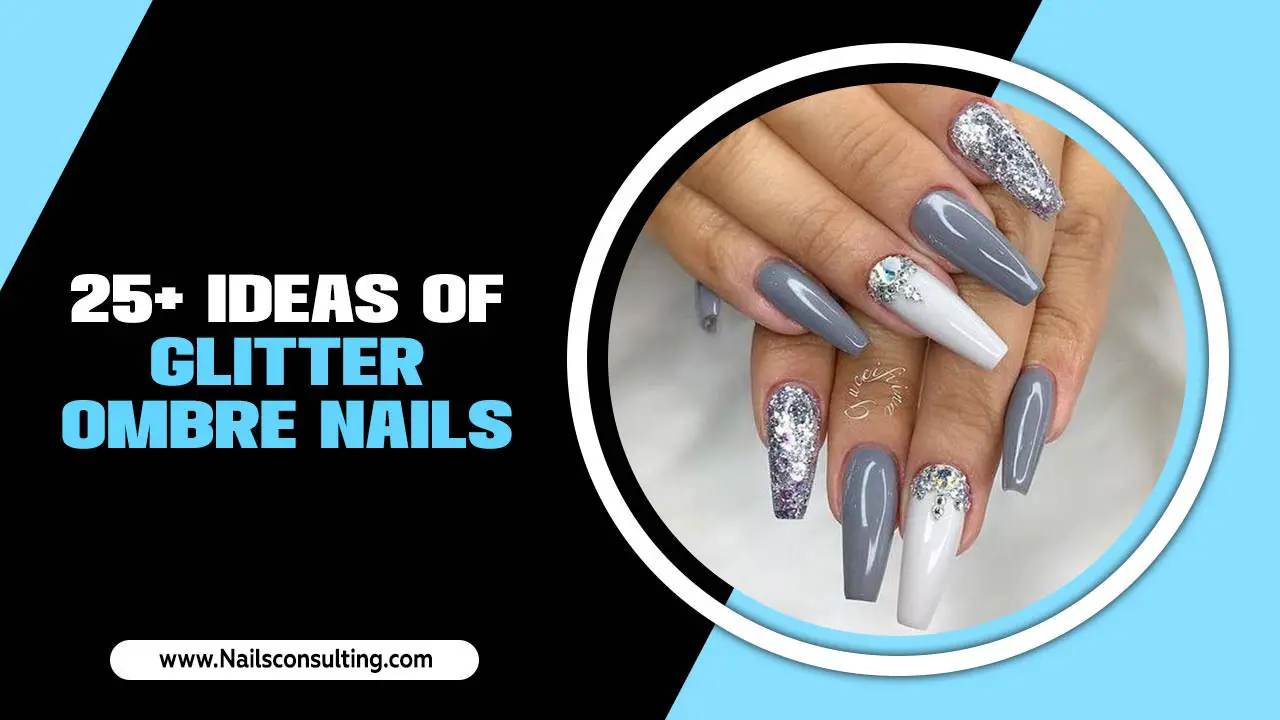
Nail airbrushing is a technique that uses an airbrush tool to spray a fine mist of nail polish or specialized airbrush inks onto your nails. Think of it like a mini, super-precise spray painter just for your nails! It allows for incredibly smooth color transitions (hello, flawless ombré!), stenciled patterns, and a professional, salon-perfect finish that’s difficult to achieve with traditional brushes.
It’s a fantastic way to get creative without needing a steady hand for intricate brushwork. The airbrush does the hard work of creating soft blends and crisp lines when used with stencils. This makes it a surprisingly accessible technique for beginners looking to add that extra ‘wow’ factor to their manicures.
Getting Started: Your Essential Nail Airbrush Toolkit
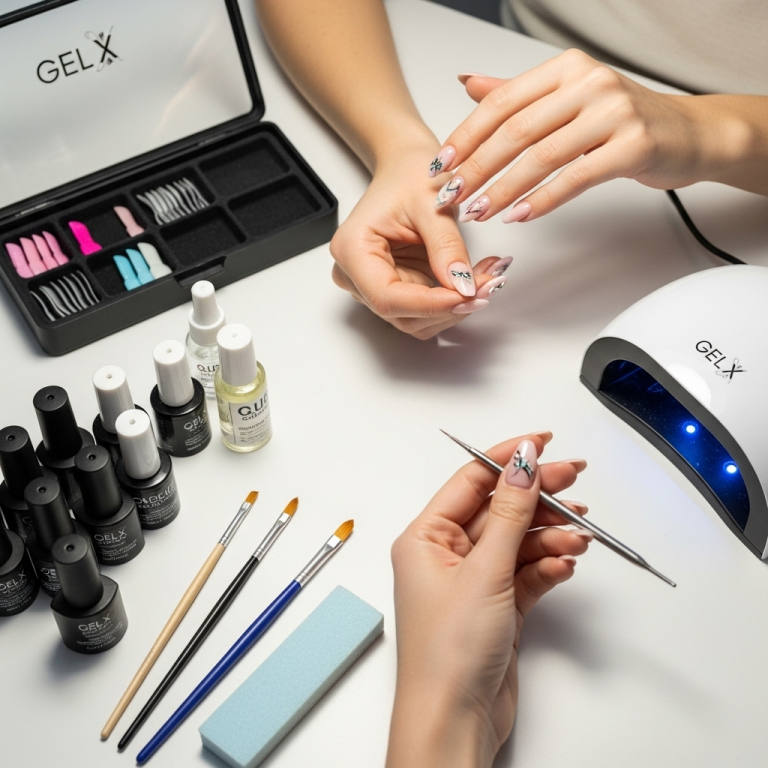
Jumping into nail airbrushing might seem like a big step, but the essentials are surprisingly manageable. You don’t need a professional studio setup to get started. Here’s what you’ll need to begin your airbrushing adventure:
The Airbrush Compressor and Gun
This is the heart of your airbrush setup. You have a few options here, from mini, portable compressors to more robust ones. For beginners, a compact, quiet compressor is a great choice. These usually come with a hand-held airbrush gun that connects to it. The compressor provides the steady airflow needed to spray the color.
Airbrush Nail Polishes or Inks
While you can sometimes thin regular nail polish for airbrushing, it’s best to use formulas specifically designed for airbrush use. These are often water-based or alcohol-based inks. They have the right consistency to flow through the airbrush gun without clogging and provide vibrant, smooth coverage. Look for kits that offer a variety of colors to expand your design possibilities.
Stencils
Stencils are your best friend when starting out! They help you create clean lines, intricate patterns, and repeatable designs. You can find a huge variety of pre-cut stencils for nail art – from delicate florals and geometric shapes to popular characters. Some are even reusable, making them a budget-friendly option!
Cleaning Supplies
Keeping your airbrush clean is crucial for its longevity and performance. You’ll need a specialized airbrush cleaner (often a type of solvent), a cleaning brush set (tiny brushes for getting into the nooks and crannies), and lint-free wipes. Regular cleaning after every use will prevent clogs and ensure your airbrush works like a charm every time.
Base and Top Coat
Just like with any manicure, a good base coat protects your natural nail, and a quality top coat seals your design, adds shine, and helps your masterpiece last longer. These aren’t specific to airbrushing but are essential for any nail art.
Prep Tools
Don’t forget your standard manicure prep tools! This includes nail files, buffers, cuticle pushers, and alcohol pads for cleaning the nail surface before application. A clean, smooth nail surface is key for any polish to adhere properly and look its best.
Masking Tape or Liquid Latex
These are optional but super helpful for protecting the skin around your nails from overspray, especially when you’re first learning. Liquid latex peels off easily, creating a barrier, while a precisely cut piece of masking tape can also do the trick for larger areas.
Basic Nail Airbrush Techniques for Beginners
Ready to make some color fly? Let’s get to the fun part – actually using your airbrush! Here are some fundamental techniques that are perfect for beginners:
1. Smooth Gradients and Ombré
This is perhaps the most popular nail airbrush technique, and for good reason! It’s surprisingly easy to achieve a flawless blend.
- Prepare your nail: Apply a base coat and let it dry completely. You can often start with a white or light-colored polish as your base to make your airbrushed colors pop.
- Load your color: Add a small amount of your first color (e.g., light pink) into the airbrush cup.
- Practice strokes: Hold the airbrush a few inches away from your nail, at a slight angle. Practice spraying on a piece of paper first to get a feel for the trigger and airflow. You want a light, even mist.
- Apply the first layer: Lightly spray the color onto the tip or base of your nail, moving the airbrush back and forth. Don’t spray too close or too long in one spot, or you’ll get drips!
- Build up color: Apply several thin coats rather than one heavy one. This gives you more control and prevents pooling.
- Introduce the second color: Clean out your airbrush cup thoroughly (more on cleaning later!). Load your second color (e.g., hot pink).
- Blend the transition: Spray the second color onto one end of the nail, overlapping slightly with the first color. Work your way back and forth, gradually moving the airbrush to blend the two colors where they meet. Keep the distance consistent and spray in light, sweeping motions.
- Refine: You can go back and forth between colors, adding tiny bursts, to achieve your desired gradient.
2. Using Stencils for Patterns
Stencils are fantastic for creating precise shapes and designs. They’re perfect for adding details like polka dots, stripes, or even more complex images.
- Apply base polish: Paint your nails with your desired base color and let it dry completely. A darker base color works well for lighter stenciled designs.
- Place the stencil: Carefully position your chosen stencil onto the nail using tweezers. Ensure it lies flat against the nail surface to prevent color from seeping underneath. For intricate stencils, a dab of stencil adhesive or a bit of latex can help keep them in place.
- Prepare the airbrush: Load your airbrush with your chosen color. For stenciled designs, you often want a slightly more concentrated application, but still keep it light enough to avoid bleeding.
- Spray gently: Hold the airbrush about 2-4 inches away from the stencil. Spray lightly and evenly over the stencil. Start with light passes and build up the color. Avoid spraying directly down onto the stencil; angle it slightly.
- Remove the stencil: This is the critical moment! Wait just a few seconds after spraying (don’t let the paint fully dry, but don’t spray while it’s too wet) and carefully peel away the stencil using tweezers. Peeling too soon can smudge, and waiting too long can make the paint adhere to the stencil.
- Clean and repeat: Clean your airbrush and stencil (if reusable) and repeat for other nails or add further details.
3. Fading and Splatter Effects
These techniques add texture and an artistic flair that casual viewers might not even realize came from an airbrush!
- Fading: This is similar to ombré but can be done with a single color, creating a softer, diffused effect. Spray the color lightly onto one area of the nail and gradually reduce the pressure or increase the distance as you move away, allowing the color to fade out naturally.
- Splatter: For this, you’ll want to hold the airbrush further away from the nail (maybe 6-10 inches). Use very short, quick bursts of air and paint. You can also try lightly tapping the airbrush gun while spraying or using a special “splatter cap” if your airbrush comes with one. Practice this on paper first – it’s a bit more unpredictable and fun!
Genius Tips for Flawless Nail Airbrush Designs
Beyond the basic techniques, a few insider secrets can really elevate your nail airbrush game. These tips are designed to make your designs smoother, cleaner, and more professional.
Tip 1: Thin Coats Are King
This bears repeating! It’s always better to build up color with multiple light, thin coats than to try and lay down a thick, opaque layer in one go. Thicker coats are more likely to drip, run, or smudge, especially when working with stencils. Light coats allow for better control and a smoother finish.
Tip 2: Master Your Distance and Angle
The distance you hold the airbrush from the nail directly impacts the appearance of the spray. Closer means more concentrated color, while further away means a softer, wider spray. Experiment! For gradients, a consistent distance is key. For stencils, a slightly closer, controlled spray works best. Always angle the airbrush towards the nail, not straight down, to avoid blowing paint under stencils or creating uneven coverage.
Tip 3: Cleanliness is Next to Godliness (for your Airbrush!)
Seriously, I can’t stress this enough. Clogged nozzles and dried paint are the enemies of smooth airbrushing. Clean your airbrush gun thoroughly after every color change and at the end of your session. Flush it with cleaner, use your small cleaning brushes to gently dislodge any stubborn bits, and then flush again with water or cleaner. A clean airbrush guarantees consistent airflow and color application. For a deeper dive into cleaning, check out resources from airbrush manufacturers like Badger Airbrush, a leading name in the industry.
Tip 4: Practice on Tips or Foils First
Before you commit a design to your actual nails, grab some nail tips or even a piece of foil. This is your practice ground! You can test out color combinations, stencil placement, spray distances, and get a feel for how the airbrush behaves. It’s a low-stakes way to build confidence and perfect your technique.
Tip 5: Protect Your Skin
Overspray can get everywhere! To keep your cuticles and skin clean, use liquid latex around the nail. Apply a thin layer, let it dry completely, do your airbrushing, and then peel it off carefully. Alternatively, you can use specialized stencil brushes or even small pieces of masking tape to block off the skin before spraying.
Tip 6: Use the Right Paint Consistency
As mentioned, use airbrush-specific paints or inks. If you must use regular nail polish, you’ll need to thin it very carefully with an airbrush thinner or alcohol. Too much thinner, and the color will be weak; too little, and it will clog your airbrush. It’s a delicate balance that beginners might find frustrating. Sticking to dedicated airbrush products is the easiest path to success.
Tip 7: Layering Colors for Depth
Don’t be afraid to layer different colors and effects. You can airbrush a gradient, then use a stencil with a contrasting color on top, and even add hand-painted details afterward. This layering is what creates those complex, multi-dimensional looks you see and admire.
Tip 8: Drying Time is Crucial
Allow each layer of airbrushed color to dry sufficiently before applying the next layer or handling it too much. Airbrush paints, especially water-based ones, dry relatively quickly, but it’s still important to be patient. For stencils, waiting for the paint to be almost dry but not fully cured is key for clean removal.
Tip 9: Consider Your Base Coat Carefully
A white or very pale nude base coat is usually best for airbrushing. It provides a bright, neutral canvas that allows your airbrushed colors to appear true to their shade and vibrant. Darker base colors can mute lighter airbrush paints.
Tip 10: Experiment with Different Airbrushes and Compressors
As you get more comfortable, you might explore different types of airbrush guns. Some have single actions (air comes out when you pull the trigger), while others are dual-action (pulling the trigger releases air, and pushing it down controls the paint flow). Dual-action offers more control but has a steeper learning curve. For compressors, look for ones with adjustable air pressure (PSI) for more versatility.
Airbrushing vs. Other Nail Art Techniques: Pros and Cons
Every nail art method has its strengths and weaknesses. Here’s how nail airbrushing stacks up:
| Technique | Pros | Cons |
|---|---|---|
| Nail Airbrushing |
|
|
| Nail Brushes & Polish Painting |
|
|
| Nail Stickers & Decals |
|
|
Frequently Asked Questions About Nail Airbrush Designs
Q1: Do I need a special compressor for nail airbrushing?
A: For nail art, a compact, quiet airbrush compressor


