Latest Nail Art Trends 2025: Stunning Looks – Get Ready to Shine!
Looking for fresh nail art ideas for 2025? This guide breaks down the hottest trends, offering achievable DIY looks for every skill level. From minimalist chic to bold statements, discover how to easily recreate stunning manicures that will turn heads and boost your confidence. Let’s dive into the must-try nail art styles for the upcoming year!
The world of nail art is always buzzing with new ideas, and 2025 is shaping up to be an exciting year! If you’ve ever felt overwhelmed by complex designs or unsure where to start with your manicure, you’re in the right place. We’re here to make learning about the latest nail art trends simple and fun. Think of me as your friendly guide, breaking down gorgeous looks into easy steps. Get ready to discover your next favorite nail design and express your unique style.
—
Unveiling the Hottest Latest Nail Art Trends 2025
Get ready for a year of creativity and self-expression on your fingertips! The nail art scene in 2025 is all about mixing elegance with a playful touch. We’re seeing a blend of natural beauty and daring artistry, with something for absolutely everyone. Whether you prefer subtle sophistication or a pop of vibrant color, these trends will inspire you to elevate your nail game. Let’s explore the looks that are set to dominate this year!
1. The “Quiet Luxury” Edit: Understated Elegance
This trend is all about sophisticated simplicity. Think clean lines, neutral palettes, and a focus on impeccable nail health. It’s minimalist but undeniably chic.
Key Features:
Sheer and milky nude polishes.
Subtle French tips with a modern twist (think micro-tips or colored tips).
Glossy finishes and satin textures.
Very fine metallic accents like a thin gold line.
Why it’s trending: It’s versatile, professional, and effortlessly stylish, making it perfect for busy individuals who want polished nails without a lot of fuss. It complements any outfit and occasion.
DIY Tip: For a perfect sheer nude, apply one to two thin coats. Ensure your cuticles are well-moisturized for that healthy glow.
2. Aura Nails: Ethereal & Dreamy
Inspired by color-shifting phenomena and a spiritual vibe, aura nails feature a soft, gradient-like blend of colors. They create a mesmerizing, almost glowing effect.
Key Features:
Often uses two or three harmonizing colors that blend seamlessly.
Can be achieved with airbrush techniques or careful sponging.
Popular colors include soft purples, pinks, blues, and peachy tones.
Sometimes enhanced with a glossy or iridescent top coat.
Achieving the Look:
1. Apply a base coat and your chosen base color. Let it dry completely.
2. Using a makeup sponge or a fine artistry brush, gently tap and blend the second color into the center of the nail, creating a soft halo effect.
3. Repeat with a third color if desired, blending outwards.
4. Finish with a glossy top coat.
Beginner-Friendly Approach: Start with two complementary colors and a small makeup sponge. Practice the blending on paper first!
3. Chrome & Metallics: Bold Shine
Chrome finishes continue their reign, evolving with new shades and textures. Think molten metal directly from your favorite jewelry.
Key Features:
Full chrome coverage in silver, gold, rose gold, and even vibrant colors like blue and green.
“Chrome powder” applied over a gel polish base is the key technique.
Beyond solid chrome, we’re seeing chrome accents, chrome French tips, and chrome swirls.
How to Apply Chrome Powder:
1. Apply a gel polish color (often black or white works best as a base, but clear also works for a translucent effect). Cure under a UV/LED lamp.
2. Apply a no-wipe gel top coat and cure.
3. Gently rub the chrome powder onto the tacky surface of the top coat with an applicator tool.
4. Brush off any excess powder.
5. Apply another layer of no-wipe gel top coat to seal and cure.
External Resource: For a deeper dive into gel polish application and curing, check out the National Center for Biotechnology Information for studies on UV nail lamp safety: UV Nail Lamp Safety Information.
4. 3D Accents & Embellishments: Texture Play
Get ready for nails with dimension! Think delicate floral charms, tiny pearls, rhinestones, and sculpted gel elements that pop right off the nail.
Key Features:
Small charms, pearls, beads, and miniature 3D sculpted flowers or bows.
Often seen on accent nails but can be used sparingly across all.
Applied with strong nail glue or builder gel for secure adhesion.
Styling Tips: Keep the rest of your manicure simple to let the 3D elements shine. A nude base or a classic color works wonders.
Caution: Be mindful of the practicalities – these can snag, so consider shorter lengths if you have an active lifestyle.
5. Gradient Ombre: Seamless Color Transitions
Ombre isn’t new, but 2025 brings softer, more blended gradients and unexpected color combinations.
Key Features:
Smooth transitions from one color to another, often fading vertically or horizontally.
Can be done with polish, gel, or even dip powder.
Softer, pastel blends are popular, as are bolder, contrasting hues.
Easy DIY Technique (Sponging):
1. Paint your base color and let it dry.
2. Apply two colors side-by-side (or one above the other) onto a makeup sponge.
3. Gently dab the sponge onto your nail, layering the color. You might need to reapply colors to the sponge and dab a few times to build opacity.
4. Clean up any excess polish around your cuticles.
5. Apply a top coat to smooth out the texture and seal the design.
6. Abstract Art & Doodles: Creative Freedom
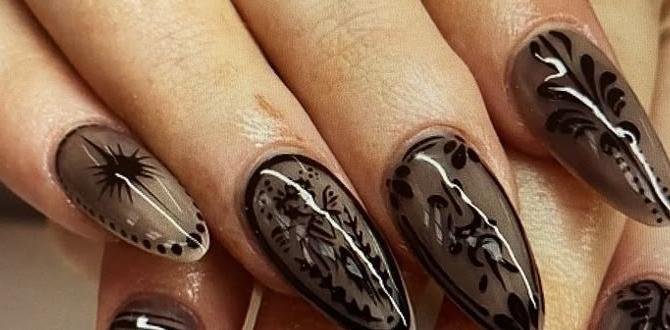
Embrace your inner artist with abstract shapes, squiggles, dots, and lines. This trend is all about playful, imperfect beauty.
Key Features:
Hand-painted geometric shapes.
Loose, artistic brushstrokes.
Color-blocking with unexpected combinations.
Minimalist line work on a sheer or nude base.
Tools for the Job: Fine-tip nail art brushes, dotting tools, and even toothpicks can be your best friends here.
Inspiration: Look at modern art, graphic design, or even just random doodles for ideas!
7. Velveteen & Matte Finishes: Sophisticated Texture
While glossy finishes are always in, matte and unique textures like “velveteen” or “sugar” finishes add a touch of luxurious depth.
Key Features:
A matte top coat applied over any color.
“Velveteen” effect achieved with specialized powders or flocking.
“Sugar” effect using fine glitter before a top coat.
Versatility: A matte finish can transform even the simplest color into something modern and chic.
8. Nature-Inspired Designs: Earthy & Organic
Bringing the outdoors in, these designs feature elements like pressed flowers, leaf patterns, and earthy color palettes.
Key Features:
Real pressed flowers sealed under gel or acrylic.
Delicate hand-painted leaves and vines.
Earthy tones: moss green, terracotta, deep browns, sandy beiges.
Marbled patterns resembling natural stones.
Pressed Flower Tip: Ensure the flowers are fully dried before applying them. Use tweezers for precise placement.
Tools & Must-Haves for Masterful Manis
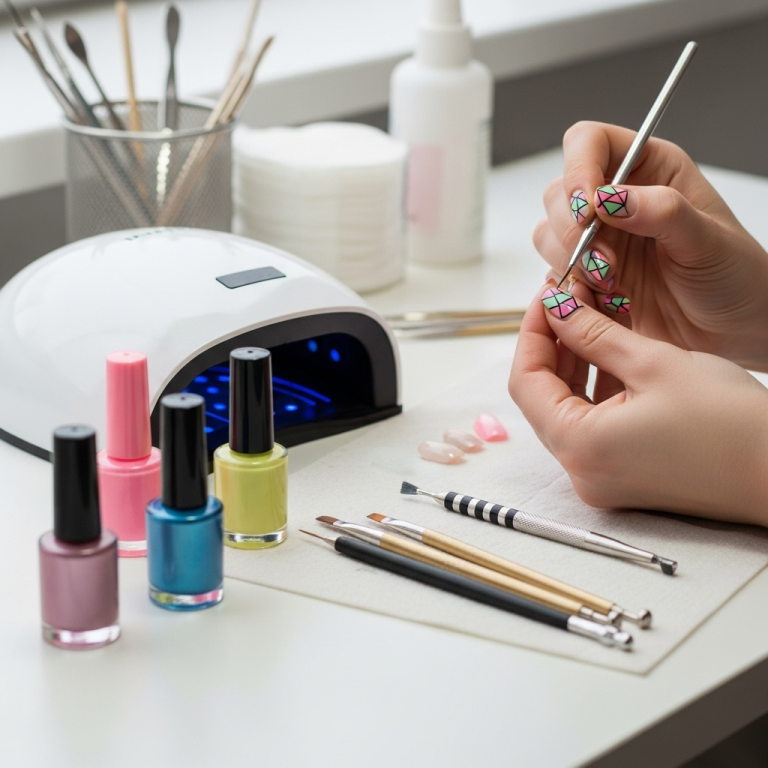
To conquer these latest nail art trends, having the right tools makes all the difference. You don’t need a professional salon’s worth of equipment, but a few key items will help you achieve stunning results at home.
Firstly, a good quality base coat and top coat are non-negotiable. They protect your natural nails and ensure your designs last.
Here’s a breakdown of essential tools for beginners:
- Nail Files & Buffers: For shaping and smoothing.
- Cuticle Pusher & Nippers: For neatening the nail bed.
- Nail Art Brushes: A variety of fine-tip brushes for lines, dots, and intricate details.
- Dotting Tools: For creating perfect dots and small circles.
- Makeup Sponges: Essential for ombre and gradient effects.
- Tweezers: For picking up small embellishments like rhinestones or tiny flowers.
- UV/LED Nail Lamp: Crucial if you’re working with gel polishes or chrome powders.
- Chrome Powder & Applicator: For that high-shine metallic look.
- Nail Polish Remover & Cotton Pads: For quick clean-ups.
- Cuticle Oil: To keep your nails and surrounding skin healthy and hydrated.
Understanding Your Polish Options
When tackling these trends, the type of polish you use matters.
| Polish Type | Pros | Cons | Best For Trends |
|---|---|---|---|
| Regular Nail Polish | Easy to use, widely available, quick drying (for some formulas), easy to remove. | Can chip easily, may not be as durable, less suitable for intricate 3D effects. | Abstract art, simple color blocking, basic French tips. |
| Gel Polish | Long-lasting (2-3 weeks), high shine, chip-resistant, perfect for chrome. | Requires a UV/LED lamp, can be harder to remove, takes longer for application. | Chrome, aura, glossy finishes, durable designs. |
| Dip Powder | Durable, often feels stronger than gel, variety of finishes. | Can be bulky if not applied correctly, requires specific kits, removal can be time-consuming. | Solid colors, French tips, some ombre effects. |
DIY Nail Art: Step-by-Step Guides for Beginners
Let’s get hands-on! Here are two popular trends broken down into super simple steps.
Trend 1: Easy Abstract Lines
This design is all about creative freedom. Don’t worry about perfection; embrace the artistic feel!
- Prep Your Nails: Cleanse, file, and buff your nails. Apply a base coat and let it dry.
- Choose Your Base Color: Apply one or two thin coats of your favorite nude, pastel, or even a sheer white polish. Let it dry completely.
- Gather Your Tools: You’ll need fine-tip nail art brushes and contrasting polish colors (e.g., black, white, gold, silver).
- Start Drawing: Dip a fine-tip brush into one of your chosen colors. Gently draw thin, varying lines across your nail. Think random squiggles, straight lines, or dots.
- Add More Lines: Pick up a different color and add more lines, overlapping or weaving them with the first set. Aim for a balanced yet asymmetrical look.
- Clean Up: Use a small brush dipped in nail polish remover to clean up any wobbly lines or smudges around your cuticle.
- Seal the Deal: Apply a generous coat of a good quality top coat to smooth everything out and add shine. Let it dry completely.
Trend 2: Simple Modern French Tips
A classic with a twist! This modern take is easier than you think.
- Prep and Base Coat: Clean, file, and apply a base coat. Then, apply one to two thin coats of a sheer nude or milky pink polish. Let it dry completely.
- Choose Tip Color: Decide on your tip color. Instead of just white, try metallic gold, silver, a pastel shade, or even a deep jewel tone.
- Create the Tip: There are a few ways to do this:
- Freehand: Use a fine-tip brush to carefully draw a thin line along the edge of your natural nail tip.
- Stamp Method: Use a silicone stamper and carefully stamp the tip of your nail in the color.
- Guide Sticker: Use French tip guide stickers (available at most beauty stores) for a crisp line.
- Refine the Line: If you’re not using stickers, a small cleanup brush dipped in remover can help you create a perfectly crisp line.
- Add a Daring Edge (Optional): For an extra trendy look, outline your colored tip with a super-fine metallic line using a detail brush.
- Top Coat: Apply a clear, glossy top coat to seal your design.
Nail Care Tips for Healthy, Beautiful Nails
The most stunning nail art looks best on healthy nails. Keeping your natural nails in good condition is the foundation of great manicures.
Hydration is Key: Regularly apply cuticle oil and hand cream. This prevents dryness and hangnails, which can detract from any design.
Gentle Filing: Always file your nails in one direction to prevent them from becoming brittle and splitting.
Protect Your Nails: Wear gloves when doing chores, especially washing dishes or using cleaning products.
Give Them a Break: If you wear gel or acrylics often, give your natural nails a break every so often. Use strengthening treatments during these times.
Balanced Diet: Believe it or not, what you eat can affect your nail health! Ensure you’re getting enough vitamins and minerals. For instance, biotin is known for its positive effects on hair and nail growth. Here’s a resource on nutritional impacts on skin and hair health from the National Institutes of Health.
* Avoid Harsh Removers: Opt for acetone-free nail polish remover when possible, as acetone can be very drying.
Frequently Asked Questions About Latest Nail Art Trends 2025
Here are answers to common questions from nail art beginners!
Q1: How can I make my nail art last longer?
A1: Always start with a good quality base coat to help polish adhere better. Apply thin, even coats of polish and let each layer dry before applying the next. Finish with a generous, high-quality top coat, and reapply it every few days to refresh the shine and protect your design.
Q2: What are the easiest nail art trends for beginners?
A2: Abstract lines, simple dots, and modern French tips are great starting points. Ombre effects using a sponge can also be surprisingly easy with a little practice. Quiet luxury styles, focusing on uniform color and finish, are also very achievable.
Q3: How do I prevent chipping with nail art?
A3: Ensure your nails are clean and free of oils before applying polish. Cap the free edge of your nail by swiping your top coat over the tip. Avoid submerging your hands in water for extended periods when your nails are wet, as this can soften the polish.
Q4: Do I need a UV/LED lamp for the latest trends?
A4: A UV/LED lamp is essential if you want to achieve trends like chrome, gel manicures, or durable gel designs. Regular polishes do not require a lamp, but gel formulas offer superior longevity

