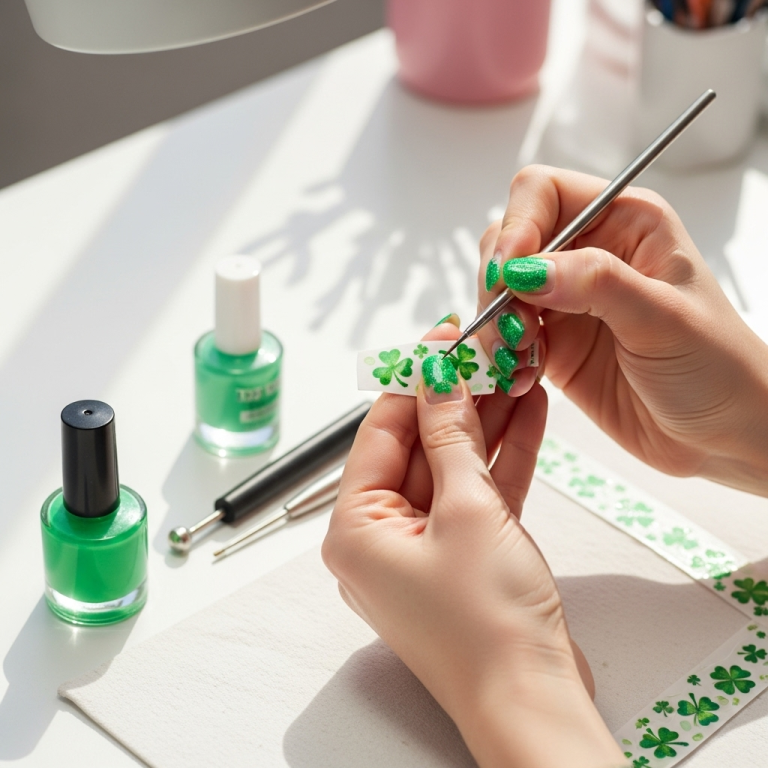
Unlock the secret to gorgeous gradient nails! Learn easy, beginner-friendly techniques to blend colors seamlessly, achieving stunning ombré effects right at home. Get ready for a flawless, salon-worthy manicure that’s surprisingly simple.
Ever dreamed of nails that look like a beautiful sunset or a soft, dreamy pastel blend? Gradient nails, also known as ombré nails, are super popular because they create a visually stunning effect. But sometimes, trying to get that perfect color transition can feel a little… intimidating. You might worry about messy blending or colors not playing nicely together. Don’t let it stop you! Achieving beautiful gradient nails at home is totally doable, even if you’re just starting out with nail art. We’re going to walk through the simplest ways to get that smooth, gorgeous color fade you’ll love. Get ready to transform your nails into a work of art!
What Exactly Are Gradient Nails?
Gradient nails are a nail art design where two or more colors blend into each other, creating a smooth transition. Think of the subtle shift of colors in a sunset, the gentle fade from light to dark, or even a rainbow effect! Unlike designs with distinct lines between colors, gradients offer a soft, flowing look that’s incredibly versatile and always chic. They can be as subtle or as bold as you like, making them a fantastic choice for anyone looking to add a little something special to their manicure.
Why Try Gradient Nails?
Gradient manicures are a fantastic way to express your creativity. They’re perfect for:
Adding a pop of color: Especially great for spring and summer, or whenever you need an uplifting boost.
Sophisticated style: A soft, neutral gradient can be incredibly elegant and professional.
Experimenting with trends: From neons to pastels, gradients embrace all the latest color trends.
Hiding minor imperfections: A well-blended gradient can actually be quite forgiving if your nail shape isn’t absolutely perfect.
Essential Tools for Your Gradient Nail Journey
Before we dive into the how-to, let’s gather your supplies. You don’t need a ton of fancy equipment to get started. Here’s what will make your gradient nail experience a breeze:
Nail Polish: Choose at least two colors that complement each other. Lighter colors closer to the cuticle and darker colors towards the tip (or vice versa!) is a classic look.
Makeup Sponge: A regular makeup sponge (the kind used for foundation) works wonders. Cut it into small, usable pieces. A cosmetic sponge offers a porous surface that helps blend the polish beautifully.
Base Coat: Essential for protecting your natural nails and helping your polish adhere better.
Top Coat: This seals in your design, adds shine, and prevents chipping.
Cotton Pad or Lint-Free Wipes: For cleaning up any polish that gets on your skin.
Nail Polish Remover: To clean up those inevitable little mistakes.
Optional: Clear Nail Polish or Glitter Polish: For a little extra sparkle or to help with blending.
Optional: Small Brush or Toothpick: For very fine-tuning.
Choosing Your Colors: A Quick Guide
The beauty of gradient nails lies in the color combinations. Here are some ideas to get you inspired:
Classic Sunset: Peach, coral, and a touch of pink or yellow.
Ocean Vibes: Teal, aqua, and a creamy white or light blue.
Pretty Pastels: Lavender, mint green, and baby pink.
Bold & Beautiful: Deep blue, purple, and black.
Monochromatic Magic: Different shades of the same color family, like light pink to a deeper rose.
When selecting colors, considering the finish can also elevate your design. Matte polishes can create a softer, more diffused gradient, while creams offer vibrant color payoff. Shimmer or glitter polishes can add an extra dimension, especially when used as a transition color.
Color Mixing Tips for Gradients
Think about contrast: Do you want a dramatic shift or a subtle blend?
Consider undertones: Cool tones blend well with cool tones, and warm tones with warm tones.
Test your combinations: Before you commit to your nails, try swatching the colors side-by-side on a piece of paper to see how they look together.
Method 1: The Makeup Sponge Technique (The Easiest Way!)
This is by far the most popular and beginner-friendly method for achieving a flawless gradient. It’s quick, easy, and gives you that beautiful, seamless blend.
Step-by-Step:
1. Prep Your Nails: Start with clean, dry nails. Apply a base coat and let it dry completely. This protects your nails and ensures a smooth canvas.
2. Apply Base Color (Optional but Recommended): Paint your nails with your lightest color polish. This acts as the base and helps any color show up better. Let it dry thoroughly.
3. Prepare Your Sponge: Cut a makeup sponge into small, manageable pieces, about 1-2 inches in size. Each piece can be used for one hand or even just a few nails. Some people prefer to use the smoother side, others the textured side. Experiment to see what works best for you!
4. Apply Polish to the Sponge: This is where the magic happens!
Lay down stripes of your chosen polishes directly onto the sponge. Place the colors next to each other in the order you want them to blend (e.g., color A next to color B). Don’t overload the sponge; a few thin stripes are better than one thick blob.
If using three colors, lay them down in a row: Color A, then Color B, then Color C.
Pro Tip: You can also dab a small amount of clear polish or a white polish on the sponge between colors to help them blend more smoothly.
5. Transfer the Color to Your Nail: Gently dab the sponge onto your nail. Start by pressing down lightly and then building up the pressure. Roll the sponge slightly from side to side to ensure the colors blend well. This is a dabbing motion, not a wiping one.
6. Reapply Polish to Sponge (If Needed): You might need to reapply polish to your sponge for each nail or even multiple times per nail to achieve the desired color intensity and blend.
7. Repeat for Other Nails: Continue dabbing the sponge onto your nails until you achieve the color saturation and blend you love. Work quickly, as the polish can start to dry on the sponge.
8. Clean Up Edges: This is crucial for a polished look! Use a cotton pad or lint-free wipe that has been dipped in nail polish remover to carefully clean away any polish that got onto your skin. A small brush or a toothpick dipped in remover can also be very helpful for precision.
9. Apply Top Coat: Once all your nails are done and the gradient is dry to the touch, apply a generous layer of your favorite top coat. This will smooth out the texture from the sponge, seal in your design, and add that beautiful shine. Don’t forget to cap the free edge of your nails to prevent chipping.
The Sponge Method: Pros and Cons
| Pros | Cons |
| :———————————– | :————————————— |
| Very beginner-friendly | Can be a bit messy if not careful |
| Creates a smooth, blended look | Sponge can absorb a lot of polish |
| Quick and efficient | Requires cleanup around the cuticles |
| Versatile for many color combos | Sponge pieces are disposable |
| Can achieve a vibrant color payoff | Might take a few tries to perfect the dab |
Method 2: The Brush or Toothpick Technique (For More Control)
If you prefer a more controlled approach, or if you don’t have a makeup sponge handy, you can achieve beautiful gradients using a small brush or even a toothpick. This method requires a steady hand but can give you a more precise blend.
Step-by-Step:
1. Prep Your Nails: As always, start with clean, dry nails and a base coat.
2. Apply Base Color: Paint your nails with your lightest polish color and let it dry fully.
3. Apply Your First Color: Apply your first polish color (usually the lighter one) all over the nail.
4. Apply Your Second Color: While the first color is still wet, apply your second polish color mainly to the tip of your nail, overlapping slightly with the first color.
5. Blend with a Brush/Toothpick: Now, it’s time to blend!
With a Brush: Dip a small art brush or a stiff-bristled nail brush into a tiny amount of nail polish remover (or sometimes clear polish can help). Gently brush back and forth where the two colors meet. Work quickly but delicately, blending the edges until you achieve your desired gradient. You’re essentially pushing the colors into each other.
With a Toothpick: Dip a toothpick into a small amount of nail polish remover. Use the toothpick to gently smudge and blend where the colors meet. This method is best for very fine blending.
6. Refine and Reapply: You might need to reapply a bit more polish to reinforce the colors or blend further. If you used nail polish remover on your brush, clean it thoroughly before reapplying polish.
7. Clean Up Edges: Use a cleanup brush or cotton swab dipped in remover to tidy up any stray polish around your nail.
8. Apply Top Coat: Once satisfied with the gradient and all polish is dry, apply a clear top coat to seal and protect your design.
The Brush/Toothpick Method: Pros and Cons
| Pros | Cons |
| :—————————————- | :————————————— |
| More control over the blending area | Requires a steadier hand |
| Less messy around the cuticles (potentially) | Can be more time-consuming |
| Uses less polish than the sponge method | Might result in a less diffused gradient |
| Good for intricate designs | Can be tricky to get a smooth transition |
Pro Tips for Gradient Nail Perfection
Ready to take your gradient game to the next level? Here are some insider secrets:
Work Quickly: Nail polish dries fast! Especially with the sponge method, aim to work efficiently so the colors blend while still wet.
Layering is Key: Don’t be afraid to go over your gradient a second or even third time with the sponge or brush to build up color intensity and smoothness. Let each layer dry slightly before adding the next.
Use a “Barrier” Polish: Applying a thin layer of white or pale nude polish all over the nail before starting your gradient can make your colors pop more and help them blend. It also creates a nice base for lighter shades.
Don’t Forget the Free Edge: Always cap the free edge of your nail with your top coat. This is the edge of your nail that extends past your fingertip. It helps prevent chipping and makes your manicure last longer. For gradients, ensure the color transition extends smoothly to this edge.
Practice on Nails/Tips First: If you’re feeling a bit nervous, try out a new color combination or technique on artificial nail tips or even on a piece of paper first. This allows you to get a feel for the colors and your application without the pressure of doing it on your actual nails.
Consider Glitter or Chrome: For an extra touch of glamour, consider using a glitter polish as a transition color between your main polishes, or dust a fine chrome powder over your dried gradient before the top coat for a holographic effect.
Watch Tutorials: Seeing the technique in action can be incredibly helpful! Search for “gradient nail tutorial” on YouTube and watch a few videos to see different approaches. Resources from reputable beauty sites can offer visual step-by-steps.
Understanding Nail Polish Ingredients and Their Impact
Knowing a bit about what’s in your nail polish can help you choose the best products for your DIY manicures. Most nail polishes contain a solvent (like ethyl acetate or butyl acetate), film formers (like nitrocellulose) that create the hard coating, plasticizers for flexibility, color pigments, and sometimes glitter or other effects.
Solvents: These evaporate as the polish dries, allowing the film formers to create the coating.
Film Formers: These are the backbone of the polish, forming the protective layer.
Pigments: These give nail polish its color. The type and fineness of the pigment can affect how smoothly a polish applies and blends. For gradients, finely milled pigments tend to create the smoothest transitions.
Additives: These can include shimmer particles, glitter, UV inhibitors (to prevent fading), and ingredients that improve adhesion or flexibility.
For best results with gradient nails, opt for polishes with a creamy or crème finish. These tend to have good pigment payoff and blend well. Quick-dry formulas can be a double-edged sword – they speed things up but can also make blending more challenging if you’re not working fast enough. For more information on nail polish formulations, resources like the Cosmetic Ingredient Review (CIR) provide detailed safety assessments, though this can be quite technical.
Maintaining Your Gradient Nails
To keep your gorgeous gradient nails looking fresh for as long as possible, follow these simple tips:
Reapply Top Coat: Every few days, apply an extra layer of top coat. This refreshes the shine and adds another layer of protection against chips and snags.
Be Gentle: Try to avoid using your nails as tools. Opening cans, scraping, or picking at things can quickly damage your manicure.
Moisturize: Keep your hands and cuticles hydrated with a good cuticle oil or hand cream. Healthy nails and skin will make your manicure look even better.
Avoid Harsh Chemicals: When doing chores, wear gloves to protect your nails from water and harsh cleaning products, which can dull the shine and weaken the polish.
Frequently Asked Questions About Gradient Nails
- Q1: How do I get the colors to blend without streaks?
- A: The key to a streak-free gradient is working quickly while the polish is still wet. For the sponge method, ensure you dab consistently and build up color. For the brush method, gentle, repeated blending strokes are essential. Using a slightly thicker polish or one with a good cream finish can also help reduce streaks.
- Q2: Can I do gradient nails with gel polish?
- A: Absolutely! Gel polish can be even more forgiving for gradients because it doesn’t dry down immediately. You can lay down your colors and blend them with a brush for a longer period. Just be sure to cure each layer under a UV/LED lamp as directed by the polish brand.
- Q3: My sponge is soaking up too much polish. What can I do?
- A: Try to apply thinner layers of polish to the sponge. You can also let the polish sit on the sponge for a moment before dabbing, which can sometimes help it transfer more efficiently. Ensure you’re pressing gently but firmly enough for the polish to transfer.
- Q4: How many colors can I use in a gradient?
- A: You can use as many colors as you like! Most beginners start with two or three colors. More colors can create a more complex and vibrant effect, but might require more practice and a slightly larger sponge piece to accommodate multiple stripes.
- Q5: What if my gradient looks uneven?
- A: Don’t worry! Uneven gradients can happen, especially on your first few tries. The best solution is often to apply another thin layer of polish to the sponge and gently dab over the uneven areas. A good top coat can also help smooth out minor imperfections.
- Q6: How long does a gradient manicure typically last?
- A: With proper application, including a good base and top coat, gradient manicures can last anywhere from 5-10 days, similar to a regular polish manicure. Using a gel polish will significantly extend the wear time.
Embrace Your Inner Nail Artist!
Gradient nails are such a fun and rewarding way to experiment with nail art. Whether you go for a bold, vibrant look or a soft, subtle blend, they’re guaranteed to turn heads. The sponge method is incredibly forgiving, making it the perfect starting point for anyone new to nail design. With a little practice and these easy-to-follow steps, you’ll be creating stunning ombré manicures that look like they came straight from a professional salon. Don’t be afraid to play with colors and find combinations that speak to your personal style. Each manicure is an opportunity for self-expression, so have fun with it! So grab your polishes, your sponge, and get ready to create some nail art magic. Your fingertips are about to become your most colorful canvas!

