Get ready for stunning holiday nail art! From dazzling holiday sparkle to festive winter designs, this guide offers easy-to-follow inspiration for beginners. Learn simple techniques and discover chic ideas to make your nails shine all season long.
The holiday season is almost here, and with it comes a wonderful opportunity to add some sparkle and cheer to your look! Are you looking for that perfect festive touch to complete your holiday outfit? Sometimes, finding the right inspiration for holiday nail art can feel a little overwhelming, especially if you’re just starting with DIY manicures. Don’t worry, I’m here to help! Together, we’ll explore some absolutely stunning, yet totally achievable, holiday nail art ideas that will make your fingertips festive and fabulous. Get ready to embrace the holiday spirit, one nail at a time!
Sparkle and Shine: Your Guide to Holiday Nail Art Inspiration
The holidays are all about joy, celebration, and a little bit of extra sparkle! And what better way to express that festive spirit than through your nails? Whether you’re heading to a cozy family gathering, a glamorous holiday party, or just want to add some cheer to your everyday, the right nail art can be the perfect finishing touch. At Nailerguy, I believe that everyone can rock beautiful, creative nails, no matter your skill level. This guide is packed with dazzling holiday nail art inspiration designed with beginners in mind, offering simple techniques and stunning ideas you’ll love.
Festive Colors to Light Up Your Holidays
Before we dive into specific designs, let’s talk about the foundation: color! Choosing the right polish hues is key to capturing the holiday mood. Think rich, deep tones and dazzling metallics.
- Classic Reds and Greens: You can’t go wrong with evergreen and classic holly berry red. They are timeless for a reason!
- Deep Blues and Purples: Think midnight sky or icy twilight. These shades add a touch of elegance and mystery.
- Golds and Silvers: Metallics are your best friend for holiday glamour. They instantly elevate any design.
- Winter Whites and Icy Blues: Perfect for a snowy, wonderland vibe. They create a beautiful, crisp backdrop for glitter or accents.
- Burgundy and Deep Emerald: For a more sophisticated, adult take on holiday colors, these shades are perfect.
Easy Holiday Nail Art Designs for Beginners
Don’t let intricate designs intimidate you! Many of the most impactful holiday looks are surprisingly simple to create. Here are some of my favorite beginner-friendly ideas:
1. The Glitter Gradient (Ombre) Accent Nail
This is a fantastic way to add a touch of sparkle without a lot of fuss. It looks sophisticated but is incredibly easy to achieve.
What You’ll Need:
- Your base color polish (e.g., deep blue, black, or even a nude)
- Glitter polish (gold, silver, or holographic works beautifully)
- A regular nail polish brush or a makeup sponge
- Top coat
How To:
- Apply two coats of your base color polish to all your nails. Let it dry completely.
- On one accent nail (usually the ring finger), apply the glitter polish. You can either:
- Brush Method: Start applying glitter polish from the tip of the nail, gradually brushing upwards towards the cuticle. Overlap your strokes less as you move up to create a gradient effect.
- Sponge Method: Dab some glitter polish onto a clean makeup sponge. Gently dab the sponge at the tip of your accent nail, then move upwards, dabbing with less pressure as you go. This creates a softer, diffused look.
- Let the glitter layer dry for a minute or two. You might want to add a second layer of glitter for more intensity, focusing on the tip of the nail.
- Once dry, apply a thick layer of top coat over all your nails, including the accent nail. This smooths out the texture from the glitter and locks everything in place.
Pro Tip: If you find glitters lumpy with a regular top coat, try a gel top coat (if you use gel polish) or a thicker, quick-drying top coat designed to smooth out glitter.
2. Simple Sparkle Stripes
Add a chic, festive touch with just a few straight lines. This design works wonderfully on any base color.
What You’ll Need:
- Base color polish
- Metallic gold or silver polish
- Striping tape or a thin nail art brush
- Top coat
DIY Steps:
- Paint all nails with your chosen base color and let them dry thoroughly.
- With Striping Tape: Carefully place a piece of striping tape across the nail diagonally, vertically, or horizontally. Gently press down the edges to prevent polish from seeping underneath. Apply a coat of your metallic polish over the tape. Immediately after applying the polish, carefully peel off the tape while the polish is still wet. This technique gives you a perfectly crisp line.
- With a Thin Brush: Dip your fine-tipped nail art brush into the metallic polish. Carefully draw straight lines across your nail. You can do one line, a few parallel lines, or a criss-cross pattern.
- Let the stripes dry completely before applying a generous coat of top coat to seal the design.
Nailerguy Tip: For perfectly straight lines, try resting your pinkies on a stable surface to steady your hand. Practice on a piece of paper first!
3. Festive Dot Garland
This design mimics a string of festive lights or delicate holly berries. It’s playful and easy to customize.
What You’ll Need:
- Base color polish (e.g., white, mint green, or a deep red)
- Accent polish colors for the dots (e.g., red, green, gold, silver)
- Dotting tool or a toothpick
- Top coat
Let’s Create the Garland:
- Apply your base color to all nails and let it dry completely.
- Dip your dotting tool or the tip of a toothpick into one of your accent colors.
- Start creating dots along one edge of the nail, perhaps curving up from the cuticle towards the free edge. Think about how a garland or string of lights would drape.
- Use different colors for a playful look, or stick to one or two for a more refined style.
- Continue adding dots until you achieve the desired garland or pattern.
- Let the dots dry for a few minutes, then apply a thin, even coat of top coat over the entire nail to seal your festive dots.
4. The “Snowflake” Simple Accent
Winter wouldn’t be complete without snowflakes! This design uses simple dots and lines to create a snowflake effect.
What You’ll Need:
- Base color polish (icy blue, white, or silver work best)
- White or silver polish for the snowflake
- Dotting tool or toothpick
- Fine-tipped nail art brush (optional)
- Top coat
Making Your Snowflakes:
- Paint your nails with your chosen base color and let them dry.
- On an accent nail, use a dotting tool dipped in white or silver polish to create a small dot in the center of the nail.
- From this central dot, think of it as the center of a star. Using your dotting tool or thin brush, draw four to six straight lines radiating outwards from the center dot, like spokes on a wheel.
- At the end of each line, add a tiny dot of polish. You can also add smaller lines or dots perpendicular to the main lines for a more intricate snowflake look.
- Repeat on other accent nails, or just one, as desired.
- Once dry, carefully apply top coat.
Advanced Tip: For a frosted look, try applying a sheer white or iridescent polish over the finished snowflake design after the top coat has dried. This adds a subtle shimmer!
5. Monochrome Magic with Texture
Sometimes, less is more, especially when it comes to elegance. A monochrome look using different finishes can be incredibly chic for the holidays.
What You’ll Need:
- Two polishes in a similar shade but different finishes (e.g., a matte black and a glossy black, or a satin navy and a glittery navy).
- Optional: Striping tape or dotting tool.
Creating the Look:
- Apply one finish of polish to all nails. Let dry.
- On accent nails, add a design using the second finish. Examples:
- Paint a glossy black base, then add matte black dots or stripes.
- Paint a matte navy base, then add glossy navy tips or small glossy accents.
- Use striping tape to create geometric patterns, filling some sections with a glossy finish and others with a matte finish.
- If these are both regular polishes, you can often get away without a top coat to preserve the matte finish. If you must top coat, use a specific matte top coat or a very thin, quick-drying clear top coat so it doesn’t ruin the effect.
Nail Art Tools Every Beginner Needs
You don’t need a professional salon at home to create amazing nail art. A few simple tools can make a world of difference!
| Tool | What It’s For | Beginner Tip |
|---|---|---|
| Dotting Tools | Creating perfect dots, small flowers, and detailed accents. They come in various tip sizes. | Start with a set that has a few different sizes. Even a toothpick can work in a pinch for smaller dots! For more on nail art tools, check out resources on the Occupational Therapy which sometimes uses nail art for fine motor skill development. |
| Fine-Tipped Nail Art Brush | Drawing thin lines, swirls, French tips, and creating intricate details. | Look for brushes with very fine, firm bristles. You can find these at most beauty supply stores or online. |
| Striping Tape | Creating sharp, clean lines and geometric patterns easily. | This self-adhesive tape is a lifesaver for crisp lines. Make sure to press down the edges firmly. |
| Nail Polish Remover Pot/Strips | Quick and easy clean-up of mistakes or for creating clean lines. | A pot with a sponge inside or pre-soaked pads means no cotton fibers left behind! |
| Top Coat | Seals the design, adds shine, and prevents chipping. Essential for longevity. | A good quality quick-dry top coat is a game-changer for busy hands! |
| Base Coat | Protects your natural nails from staining and helps polish adhere better. | Never skip the base coat, especially with darker or glitter polishes. |
Holiday Themes Beyond the Obvious
While Santa and snowflakes are fun, there are many other ways to bring the holiday spirit to your nails!
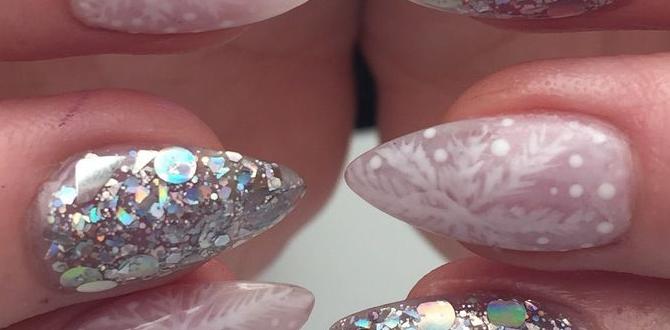
- Winter Wonderland: Think icy whites, pale blues, silver glitter, and subtle snowflake accents. You can even use a sheer holographic polish over a pale blue for a frosty effect.
- Cozy Cabin Vibes: Deep reds, forest greens, warm browns, and creamy beiges. Designs could include simple plaid patterns, tiny reindeer (using dotting tools), or gradient colors resembling a warm scarf.
- Celestial Sparkle: Deep navy or black base with gold or silver glitter accents, constellations drawn with a fine brush, or shimmering metallic tips. Think “starry night” for the holidays!
- Candy Cane Chic: Classic red and white stripes can be done with striping tape or a brush. You can also do a red or white base with alternating candy cane striped accent nails.
- Jewel Tones: Rich emerald green, sapphire blue, ruby red, and amethyst purple. These can be worn alone or as bases for gold foil accents or minimalist gold lines.
Achieving a Professional Finish at Home
Want your DIY holiday nails to look like they came straight from a salon? Here are a few secrets:
- Prep is Key: Start with clean, dry nails. Push back your cuticles gently and file them to your desired shape. A smooth surface makes all the difference.
- Thin Coats are Better: Apply polish in thin, even coats. It’s better to do two or three thin coats than one thick, gloopy one that will take forever to dry and is prone to smudging.
- Clean Up Mistakes Immediately: A small brush dipped in nail polish remover is your best friend for cleaning up any wobbly lines or polish on your skin around the nail. Do this while the polish is still wet for the easiest clean-up.
- Let it Dry: This is the hardest part! Be patient and let your polish dry thoroughly between coats. For quick-drying, consider a quick-dry top coat or a nail drying spray. You can also try the cold water bath method (after polish is mostly dry) to help it set faster. Visit websites like the Nail Care Professionals for more expert advice on nail health and maintenance.
- Top Coat is Non-Negotiable: Always finish with a good quality top coat. It seals your design, adds shine, and makes your manicure last significantly longer.
Holiday Nail Art Tools Comparison
Let’s quickly compare some common tools that can help you create these festive designs.
| Tool Type | Ease of Use (Beginner) | Versatility | Best For | Cost (Estimate) |
|---|---|---|---|---|
| Dotting Tools | Very Easy | High (dots, small details, swirls) | Perfect dots, repeating patterns, tiny accents. | $5 – $15 (for a set) |
| Fine Nail Art Brush | Moderate (requires practice) | High (lines, freehand details, gradients) | Precise lines, intricate designs, drawing small shapes. | $3 – $10 (each) |
| Striping Tape | Very Easy | Moderate (geometric lines, color blocking) | Sharp, clean lines and defined sections. | $2 – $5 (per roll) |
| Makeup Sponge | Easy | Moderate (gradient, textured effects) | Soft glitter gradients, stippled effects. | $1 – $5 (for a pack) |
Frequently Asked Questions About Holiday Nail Art
Q1: How can I make my nail art last longer during the busy holiday season?
A1: The key is proper prep and a good top coat! Always start with a clean, dry nail, apply a base coat, and finish with at least one, ideally two, thin layers of a high-quality top coat. Reapply top coat every 2-3 days to refresh the shine and protection.
Q2: I’m a complete beginner. What’s the easiest holiday nail art design to try first?
A2: The glitter gradient is fantastic for beginners! It’s forgiving, and a touch of glitter instantly makes nails look festive. Simply apply your base color, then dab glitter polish onto the tips or half of your accent nail, blending upwards. A makeup sponge can help create a very soft, blended effect.
Q3: My nail polish smudges easily. What can I do?
A3: Patience is crucial! Let each coat of polish dry completely before applying the next. For nail art, ensure the base color is bone dry before adding designs. Using a quick-dry top coat can also help set everything faster and prevent smudges.
Q4: Can I achieve nail art without buying lots of special tools?

