Elevate your event look with stunning, easy-to-create elegant nail art designs. Discover proven, beginner-friendly ideas that add a touch of sophistication and sparkle to any special occasion, ensuring your fingertips are as memorable as the event itself.
Getting ready for a special event often means planning your outfit, perfecting your makeup, and finally, thinking about your nails. We want our nails to look polished and beautiful, catching the light and complementing our overall style. But sometimes, finding that perfect, “wow” nail art that isn’t overly complicated can feel like a challenge. You might browse through endless complex designs and wonder, “Can I really do that?” Don’t worry! Creating elegant nail art for events is totally achievable, even if you’re just starting. We’ll guide you through simple yet sophisticated ideas that will make your nails shine for any occasion, from weddings to parties and beyond. Get ready to discover designs that are as easy to create as they are to love!
Quick Guide: Elegant Nail Art for Events
This guide offers simple, chic nail art ideas perfect for any event. We’ll cover essential tools, easy techniques like subtle glitter, minimalist lines, and classic French tips with a twist. You’ll learn how to achieve a polished, sophisticated look that’s achievable for beginners and enhances your special occasion style without fuss.
Why Elegant Nail Art Matters for Events
Your nails are like the finishing touches to your entire look for a special event. Think of them as tiny canvases that can express your personal style and add an extra layer of glamour. When your nails are beautifully manicured and adorned with elegant art, it shows you’ve paid attention to the details, which can boost your confidence and make you feel truly polished. For events like weddings, parties, or formal gatherings, a sophisticated nail design can tie your whole ensemble together, making your appearance even more memorable. It’s about feeling put-together and radiant from head to toe!
Essential Tools for Elegant Nail Art
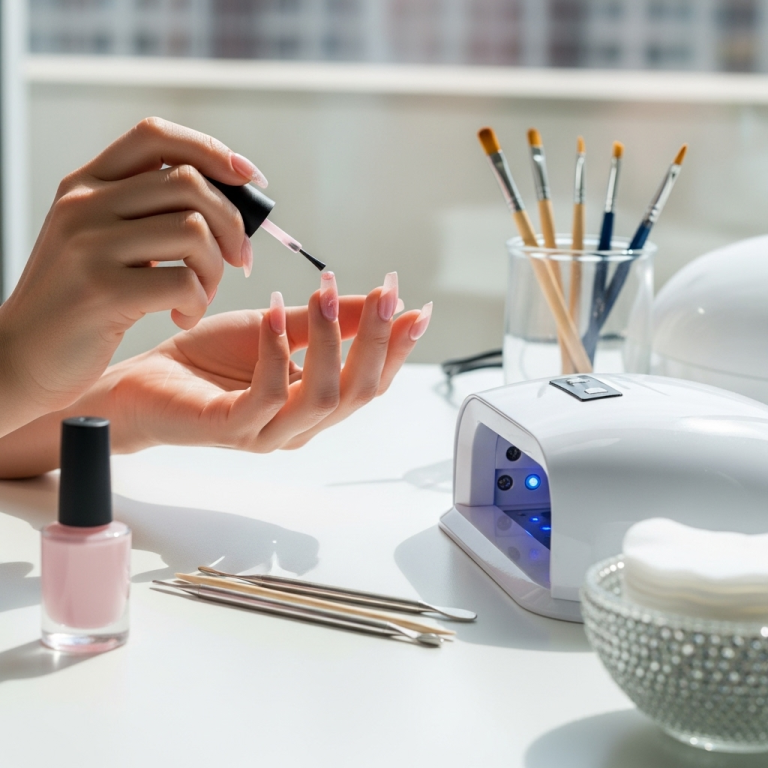
Before we dive into the pretty designs, let’s gather our trusty tools. You don’t need a professional salon’s worth of equipment to create stunning nails. Here are the basics that will help you achieve that elegant finish:
- Nail File: For shaping your nails to your desired length and form.
- Buffer Block: To smooth out ridges and create a perfect base for polish.
- Base Coat: Protects your natural nails and helps polish adhere better.
- Top Coat: Seals your design, adds shine, and prevents chipping.
- Nail Polish Colors: Choose classic shades like nudes, whites, creams, golds, silvers, or deep jewel tones.
- Fine-tip Nail Art Brush or Dotting Tool: For precise lines, dots, and small details. A toothpick can work in a pinch!
- Tweezers: Handy for placing small embellishments like glitter or rhinestones.
- Rubbing Alcohol or Nail Polish Remover: For cleaning brushes and prepping nails.
- Cuticle Oil: To keep your cuticles hydrated and looking neat.
Beginner-Friendly Elegant Nail Art Designs
Ready to get creative? These designs are chosen for their simplicity and immense elegance. They’re perfect for learning new techniques without feeling overwhelmed.
1. The Chic Minimalist Line
This design is all about subtlety and sophistication. A single, clean line can add a modern, artistic touch to any nail color.
What You’ll Need:
- Your favorite base polish color (e.g., nude, soft pink, white, or a sheer finish)
- A contrasting polish color for the line (e.g., black, gold, silver, or even a glitter polish)
- A fine-tip nail art brush or a striping tool
- Base coat and top coat
How to Create It:
- Prep: Start with clean, shaped nails. Apply your base coat, let it dry completely.
- Base Color: Apply two thin coats of your chosen base polish color. Let each coat dry thoroughly – patience is key for a smooth finish!
- The Line: Dip your fine-tip brush into the contrasting polish. Gently wipe off excess polish on the side of the bottle opening.
- Placement: Decide where you want your line. Popular options include:
- Near the cuticle (a “half-moon” effect)
- Along the free edge (like a modern French tip)
- Vertically down the center or side of the nail
- Application: Carefully draw a single, steady line across your nail. For curved lines, you might want to use the side of the brush and a gentle, sweeping motion.
- Refine: If you make a mistake, gently clean it up with a small brush dipped in nail polish remover or use a clean-up pen.
- Seal: Once the line is completely dry, apply a generous layer of top coat to protect your design and add extra shine.
2. Subtle Glitter Accent Nail
Adding a touch of sparkle is a classic way to make nails event-ready. Focusing glitter on just one or two nails keeps it elegant and not overwhelming.
What You’ll Need:
- Your chosen nail polish color for most nails
- A fine or scattered glitter polish for the accent nail
- Base coat and top coat
- Optional: A small brush or sponge for glitter application
How to Create It:
- Prep: File and buff your nails. Apply base coat, letting it dry.
- Base Color: Apply two coats of your main polish color to all nails except your accent nail (usually the ring finger). Allow to dry completely.
- Accent Nail Base: On your accent nail, apply one or two thin coats of your main polish color, or a clear polish if you want the glitter to be the star.
- Glitter Application:
- Option A (Polish Bottle): Apply the glitter polish to your accent nail. For a more concentrated look, you might dab it on with the brush to build up layers.
- Option B (Dabbing with Brush/Sponge): Apply a layer of clear polish or a nail glue specifically for gems to your accent nail. Then, use a small brush or a slightly damp makeup sponge to gently pick up glitter from your palette and press it onto the nail. This gives you more control over placement and density.
- Layering: If you want more glitter, apply another thin layer of clear polish and more glitter. Work in thin layers to avoid a bulky finish.
- Gradual Glitter (Ombre): For a softer look, apply glitter polish starting from the tip of the nail and gradually fading it down towards the cuticle.
- Seal: Once the glitter is dry, carefully apply a thick top coat over the glitter nail. You might need two thin coats of top coat to completely cover the glitter and make it smooth. Polish the rest of your nails with top coat.
3. Modern French Tips
The classic French manicure gets a contemporary update. Instead of opaque white, try colored tips, metallic shades, or even a glitter gradient.
What You’ll Need:
- Base coat and top coat
- Sheer nude or pink polish for the base
- Your chosen color for the tips (e.g., metallic gold, silver, navy, burgundy, or a glitter polish)
- Fine-tip nail art brush or French tip guide stickers
How to Create It:
- Prep: Ensure nails are clean, filed, and buffed. Apply base coat and let it dry.
- Base Color: Apply one or two thin coats of your sheer nude or pink polish. Let it dry completely.
- Option A (Freehand with Brush):
- Dip your fine-tip brush into the tip color. Remove excess polish.
- Carefully paint a clean line across the tip of your nail. You can make it a classic smile line, a straight line, or even a V-shape.
- Repeat for all nails, ensuring consistency.
- Option B (Using Guide Stickers):
- Apply the French tip guide stickers just below where you want your colored tip to start. Press down firmly around the edges to prevent polish from bleeding underneath.
- Paint your chosen tip color over the exposed nail tip.
- While the polish is still wet, carefully peel off the stickers. This creates a super clean line.
- Glitter Tip Variation: If using glitter, apply a thin layer of clear polish to the tip and then dab glitter polish over it as described in Option 2.
- Seal: Once the tip color is dry, apply a generous top coat to seal everything in.
4. The Sophisticated Rhinestone or Pearl Accent
A single tiny gem or pearl can add an instant touch of luxury. This is perfect for anniversaries, galas, or any event where you want to feel extra special.
What You’ll Need:
- Your favorite event-appropriate nail polish color
- A small rhinestone, bead, or pearl embellishment
- Nail glue or a strong top coat
- Tweezers
- Base coat and top coat
How to Create It:
- Prep: Clean, file, and buff your nails. Apply base coat.
- Base Color: Apply two thin coats of your polish. Let it dry completely.
- Placement: Decide where you want your embellishment. Popular spots include:
- At the base of the nail, near the cuticle
- On the free edge, near the corner
- Centered on one nail
- Adhesive:
- Option A (Nail Glue): Apply a tiny dot of nail glue where you plan to place the gem.
- Option B (Top Coat): Apply a small dot of thick top coat where the gem will go.
- Applying the Gem: Using tweezers, carefully pick up your rhinestone or pearl and gently press it into the adhesive. Hold for a few seconds to secure.
- Secure Further: If you used nail glue, let it dry completely before proceeding. If you used top coat, you can carefully paint a thin layer of top coat around the gem, avoiding covering it directly, to add extra security. Alternatively, you can use a specialized gem gel/top coat.
- Final Top Coat: Apply top coat to the rest of your nails. Be careful not to get too much direct top coat on the embellishment itself, as it can dull its shine. Some top coats are designed to go over gems.
5. Delicate Water Marbling for Beginners
Water marbling can look incredibly intricate, but with practice, you can achieve beautiful, unique patterns that are surprisingly simple to master for an elegant effect.
What You’ll Need:
- A cup or bowl of warm water
- Nail polish colors (2-3 complementary colors work best)
- A fast-drying top coat
- Base coat
- Toothpicks or a marbling tool
- Petroleum jelly or tape to protect the skin around your nails
- Paper towels or old cloths to clean up spills
How to Create It:
- Prep Your Workspace: Fill your cup with warm water. Place petroleum jelly or strips of tape around the cuticles of your nails to protect your skin.
- Base Color: Apply one or two coats of a light-colored base polish (white or a pale shade is ideal) to your nails and let them dry completely. This helps the marbled colors pop.
- The Marbling:
- Open your chosen nail polishes.
- Drip one polish into the water, then another, letting each drop spread. Alternate colors.
- Use a toothpick or marbling tool to gently swirl the colors together into a pattern. Don’t over-swirl!
- The Dip:
- Dip your finger into the water at an angle, directly through the swirled polish design.
- As you pull your finger out, use the toothpick to gather any excess polish around your nail.
- Clean Up: Carefully remove the tape or petroleum jelly from your skin. Use a small brush dipped in nail polish remover to clean up any stray polish on your skin.
- Seal: Once the marbled design is dry to the touch, apply a generous layer of fast-drying top coat.
- Repeat: Clean your cup and repeat the process for each nail.
6. Negative Space Designs
Negative space is a trendy technique where parts of your natural nail are left bare, creating a modern and chic look. It’s forgiving and incredibly versatile.
What You’ll Need:
- Base coat
- Your chosen polish color(s)
- Fine-tip nail art brush or striping tape
- Top coat
How to Create It:
- Prep: Clean, file, and buff your nails. Apply a clear base coat.
- Option A (With Tape):
- Once the base coat is dry, apply striping tape onto your nail in a desired pattern (e.g., geometric shapes, diagonal lines). Press down firmly.
- Paint your chosen polish color(s) over the taped sections.
- While the polish is still wet, carefully peel off the tape. This reveals the “negative space” where the tape was.
- Use a small brush with polish remover to clean up any edges.
- Option B (Freehand Shapes):
- Apply your base coat and let dry.
- Using a fine-tip brush, carefully paint simple shapes (like half-moons, geometric lines, or dots) onto your nail. Leave ample space between the design and the edges, or leave sections of the nail bare.
- Allow the polish to dry completely.
- Seal: Apply a thin layer of top coat over the entire nail, being careful not to disturb the dry polish or the negative space.
Choosing the Right Design for Your Event
The best elegant nail art is one that makes you feel confident and suits the occasion. Consider these factors:
| Event Type | Recommended Nail Art Style | Color Palette Suggestions | Complexity Level |
|---|---|---|---|
| Wedding Guest | Subtle glitter accent, minimalist line, modern French tip (with soft colors) | Pastels, nudes, blush pinks, soft metallics (rose gold, champagne) | Beginner to Intermediate |
| Black Tie Gala/Formal Dinner | Rhinestone or pearl accent, deep jewel tones with a thin metallic line, negative space with metallic accents | Deep reds, emeralds, sapphires, black, gold, silver | Intermediate |
| Birthday Party/Celebration | Glitter accent, modern French tip (with bolder colors or glitter), delicate water marble | Bolder shades, metallics, classic nudes with a pop of color | Beginner to Intermediate |
| Bridal Shower/Bachelorette Party | All of the above, with a focus on fun accents like small gems or playful glitter | Whites, ivories, pastels, rose gold, silver | Beginner to Intermediate |
| Everyday Elegance (Events) | Consistent minimalist line, single accent nail with a subtle design (e.g., a dot, a thin stripe) | Nudes, creams, soft grays, muted tones | Beginner |
<h2 id="pro-tips

