Master your manicure with our genius nail prep routine! We’ll guide you through simple, effective steps to get flawless, long-lasting nail art by taking care of your nails before you even pick up a polish. Say goodbye to chipped manis and hello to salon-perfect nails at home.
Dreaming of Instagram-worthy nails but finding your manicures don’t last? Or maybe you just want healthier, stronger nails in general? You’re not alone! Many of us jump straight into painting without giving our nails the proper attention they deserve first. This can lead to polish peeling, rough edges, and nails that just don’t look their best. But don’t worry, creating a beautiful, long-lasting manicure starts long before the color goes on. It all begins with the perfect prep! Get ready to transform your nail game with a simple, step-by-step routine that will make your at-home manicures look professionally done.
Nail Prep 101: Why It’s Your Manicure’s MVP
Think of nail prep as the foundation of a beautiful house. If the foundation is shaky, the whole structure is at risk. For your nails, this means a clean, smooth, and healthy surface is essential for polish to adhere properly and last. Rushing this step is like trying to paint a dusty wall – it just won’t stick or look good for long!
A good prep routine doesn’t just make your polish last longer; it also helps keep your natural nails healthy. By regularly caring for your cuticles and nails, you can prevent issues like dryness, brittleness, and painful hangnails. We’ll show you how to achieve this with simple steps anyone can follow, transforming your nail care from a chore into a delightful self-care ritual.
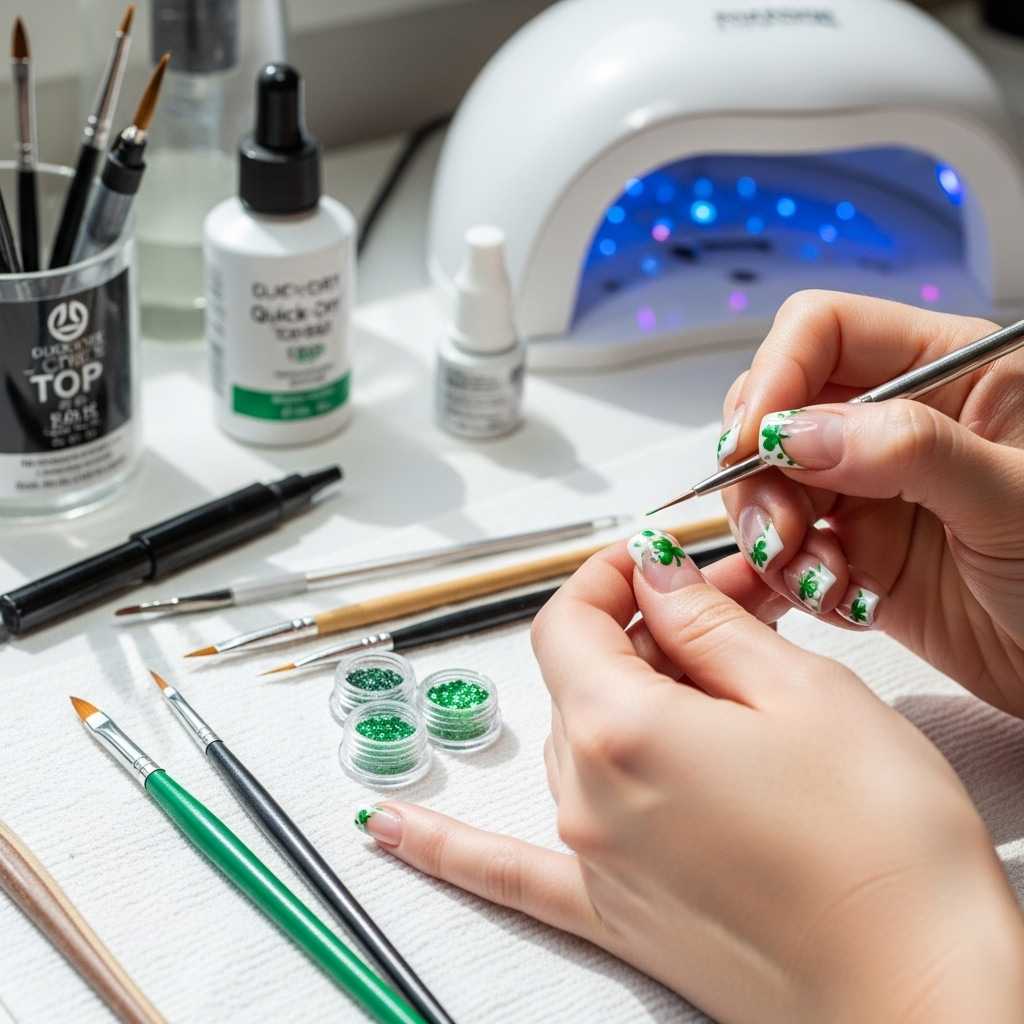
Your Genius Nail Prep Checklist: What You’ll Need
Before we dive into the steps, let’s gather our tools! Having the right supplies makes the entire process smoother and more enjoyable. Don’t worry if you don’t have everything right away; you can build your collection over time. Many of these are staples you might already have around the house or can easily pick up at a drugstore.
- Nail Polish Remover: An acetone-free remover is gentler on nails and cuticles.
- Cotton Pads or Lint-Free Wipes: For applying remover and cleaning.
- Cuticle Pusher & nippers: A cuticle pusher gently moves back skin, while nippers trim any excess. A wooden orange stick can be a good alternative for pushing.
- Nail File (Buffer Block Recommended): Finer grit files are best for shaping natural nails without damage. A buffer block has multiple surfaces for smoothing and shining.
- Nail Clippers: For trimming longer nails.
- Hand Soap & Warm Water: For cleaning hands and nails.
- Nail Brush: To gently clean under and around your nails.
- Cuticle Oil: To rehydrate and nourish cuticles.
- Base Coat: Preps the nail surface for polish and protects from staining.
- Top Coat: Seals your polish for shine and longevity.
The Step-by-Step Genius Nail Prep Routine
Ready to get your nails in tip-top shape? Follow these easy steps for a flawless canvas. This routine is perfect before any nail art, gel polish, or even just a fresh coat of regular lacquer. It’s designed to be gentle, effective, and most importantly, straightforward!
Step 1: Polish Removal & Clean Slate
First things first, make sure any old polish is completely gone. Even a tiny bit of color left behind can create an uneven surface and affect how your new polish adheres. Use your acetone-free nail polish remover and cotton pads. Gently wipe each nail until it’s completely clean. For stubborn glitter polish, try soaking a cotton ball, placing it on your nail, wrapping it in foil, and letting it sit for a few minutes before wiping.
While you’re at it, take a moment to assess your nails. Are they looking dry? Brittle? This initial check helps you understand what your nails might need long-term.
Step 2: Gentle Nail Shaping
Now, let’s shape those nails! If your nails are too long, use nail clippers to trim them down to your desired length first. Then, grab your nail file. Always file in one direction, from the side of the nail to the tip, in a smooth, sweeping motion. Avoid sawing back and forth, as this can weaken and split your nails. If you find filing tricky, consider trying press-on nails for a perfect shape every time, or watch some YouTube tutorials on filing techniques!
Pro Tip: Aim for a shape that complements your fingers. Oval and squoval shapes tend to make fingers look longer and more elegant. For more shape inspiration, check out guides from nail experts like Nailpro Magazine.
Step 3: Cuticle Care is Key
Healthy cuticles are the unsung heroes of a great manicure. They protect your nail matrix (where the nail grows from) from bacteria. We want to care for them, not cut them aggressively!
Start by applying a cuticle remover product or a few drops of cuticle oil to each cuticle. Let it soak in for a minute or two to soften the skin. Then, gently use your cuticle pusher (or an orange stick) to push back the softened cuticle. If there are any little bits of dead skin or hangnails that easily lift away, you can carefully trim them with cuticle nippers, but be very gentle. The goal is to tidy up, not to remove all the cuticle.
What Not to Do: Avoid cutting your entire cuticle, as this can lead to infection and uneven nail growth. Women’s Health has some great insights on why this is important for overall nail health.
Step 4: Cleanse & Dehydrate
This step is crucial for polish longevity! After filing and cuticle work, your nails might have dust and oils on them. Wash your hands thoroughly with mild soap and warm water, using a soft nail brush to gently clean under the nail and around the cuticle area. Rinse well.
After washing and drying your hands, it’s important to remove any remaining natural oils and moisture from the nail surface. You can do this by wiping each nail with a lint-free wipe or cotton pad dipped in nail polish remover or rubbing alcohol. This creates a clean, dry surface for your base coat to grip onto. This is a key step for ensuring your polish adheres properly and doesn’t lift prematurely.
Step 5: Buffing for Smoothness (Optional but Recommended)
If your nails have ridges or uneven texture, a gentle buffing step can make a world of difference. Use the finest grit side of your buffer block. Lightly buff the surface of your nail in a back-and-forth motion. The goal is to create a smooth canvas, not to thin out your nails. Over-buffing can weaken your nails, so a few light passes are all you need.
Some buffer blocks have a shiny side that can actually add a natural sheen to your nails, which is lovely if you’re going for a no-polish look!
Step 6: Apply Your Base Coat
This is where the magic really begins! Your base coat is like the primer for a painting. It creates a smooth surface for your colored polish, helps it adhere better, and most importantly, it acts as a barrier to prevent your natural nails from staining, especially if you use dark or vibrant polish colors.
Apply one thin, even layer of your chosen base coat. Make sure to cap the free edge of your nail by running the brush lightly across the tip. This helps prevent chipping and prolongs the life of your manicure. Let it dry completely. This usually takes about 60 seconds.
Quick Nail Prep for Lasting Manicures: A Comparison
To quickly see the difference a proper prep makes, let’s look at a comparison:
| Prep Step | Why It Matters | Impact on Manicure |
|---|---|---|
| Skipping Polish Removal | Old polish creates a bumpy, uneven surface. | Poor adhesion; polish can lift or peel faster. |
| Aggressive Filing | Weakens the nail and can cause splits. | Nails break easily; polish may chip at edges. |
| Ignoring Cuticles | Dry, torn cuticles look untidy and can lead to hangnails. | Manicure looks unfinished; polish can “crawl” up the nail bed. |
| Not Cleaning/Dehydrating | Oils and dust prevent polish from sticking. | Polish lifts, bubbles, or peels within days. |
| Proper Prep Routine | Creates a smooth, clean, healthy nail surface. | Polish adheres well, looks smooth, and lasts much longer. |
Beyond the Prep: What Comes Next
Once your nails are prepped and your base coat is dry, you’re ready for the fun part: applying your color! Apply thin, even coats of your nail polish, letting each layer dry slightly before applying the next. Remember to cap the free edge with each coat. Finally, finish with a good quality top coat, again capping the edge, for that beautiful shine and extra protection. For even longer wear, some people like to reapply a thin layer of top coat every 2-3 days.
Taking the time for proper nail prep will not only make your manicures look stunning and professional but will also contribute to the overall health and strength of your natural nails. Your nails will thank you for it!
Nail Prep FAQs: Your Questions Answered
Q1: How often should I do a full nail prep routine?
You should do this full nail prep routine every time you give yourself a manicure, usually every 1-2 weeks, depending on how quickly your polish wears off. For daily maintenance, focus on applying cuticle oil and hand cream.
Q2: Can I skip the base coat if I’m in a hurry?
While it might seem like a time-saver, skipping the base coat is not recommended. It’s essential for helping your polish adhere properly and preventing nail discoloration, especially with darker shades. The extra minute it takes is well worth the longevity and health of your nails.
Q3: My nails feel dry after using nail polish remover. What should I do?
This is common! Always follow up your nail polish removal with a good cuticle oil and hand cream. Massage them well into your nails and cuticles. This will help rehydrate the skin and prevent flakiness.
Q4: Is it okay to use metal cuticle nippers?
Metal nippers can be effective, but they require a very steady hand and extreme caution. Overuse or improper use can lead to damage, bleeding, and infection. For beginners, it’s often safer to stick with gentle pushing and only nipping away tiny, loose hangnails. If you’re unsure, a professional manicure is the safest option for cuticle trimming.
Q5: What if I have very weak or brittle nails?
If your nails are weak or brittle, focus on gentle prep. Avoid harsh files and aggressive cuticle cutting. Use a strengthening or growth-promoting base coat. Incorporate regular cuticle oil treatments and consider nail hardeners. For more severe issues, consulting a dermatologist or a nail technician might be beneficial. The U.S. Department of Health and Human Services has general information on nail health that might be helpful: CDC Handwashing & Hygiene.
Q6: How do I prevent my cuticles from getting dry and cracking?
The best way is consistent hydration! Apply cuticle oil or a rich hand cream multiple times a day, especially after washing your hands. Push back your cuticles gently after a shower when they are softest. Avoid exposing your hands to harsh chemicals without gloves.
Conclusion: Your Best Manicure Starts Here!
See? Achieving salon-worthy nails at home is totally within reach! By dedicating just a few extra minutes to these genius prep steps, you’re setting yourself up for a manicure that looks flawless, lasts longer, and keeps your natural nails healthy and strong. This is more than just getting ready for nail art; it’s about embracing a self-care routine that makes you feel polished and confident from your fingertips up.
Remember, perfection isn’t the goal; progress is! Experiment with these steps, find what works best for your nails, and enjoy the process. Each time you prep your nails with care, you’re investing in their beauty and health. So go ahead, give your nails the foundation they deserve, and let your creativity shine with every polish or design you choose. Happy polishing!