Nail Polish Only Designs: Stunning & Effortless Looks You Can Do at Home
Creating gorgeous nail art doesn’t require fancy tools or professional skills! With just a few bottles of nail polish, you can unlock a world of stunning, effortless designs. This guide will show you how to elevate your manicure with simple techniques, transforming your nails into miniature works of art. Get ready to express your creativity and rock beautiful nails, all with the magic of polish!
Welcome to Nailerguy! As a fellow nail enthusiast, I know the joy of a fresh manicure. Sometimes, though, we just want to create something beautiful without a trip to the salon or a complicated setup. That’s where “nail polish only” designs come in! You might think intricate nail art demands special brushes or gels, but the truth is, your favorite nail polishes are incredibly versatile. With a little know-how and a few easy tricks, you can achieve salon-worthy looks right at your own vanity. Forget intimidation; we’re going to make nail art accessible and fun for everyone, even if you’re just starting out. Ready to transform your nails with just polish? Let’s dive in!
Why Nail Polish Only Designs Are Your New Best Friend
In the fast-paced world of beauty trends, it’s easy to feel overwhelmed by the endless array of tools and techniques. But here’s a secret: you don’t need a dedicated nail art kit to achieve eye-catching manicures. Nail polish only designs are the ultimate solution for busy bees and budget-conscious beauty lovers. They prove that creativity and style are well within reach, using the essential tools you likely already have.
Simplicity Meets Style
The beauty of these designs lies in their inherent simplicity. By relying solely on nail polish, you bypass the need for specialized brushes, dotting tools, or stamping plates. This makes the process more intuitive and less daunting for beginners. Plus, it means you can create stunning looks with minimal investment. All you need are a few shades of polish and a steady hand, and you’re ready to go!
Accessibility for All Skill Levels
Whether you’re a complete novice or looking for quick, stylish updates, nail polish only designs cater to everyone. The techniques we’ll explore are designed to be easy to learn and execute. You’ll be surprised at the sophisticated results you can achieve with just a few core colors and simple application methods. It’s all about working with what you have and letting your imagination shine.
Budget-Friendly & Time-Efficient
Let’s face it, salon manicures can add up! Nail polish only designs offer a fantastic way to keep your nails looking chic without breaking the bank. You can experiment with different looks and color combinations regularly without a significant financial commitment. Furthermore, these designs are often quicker to achieve than complex, multi-tool art, making them perfect for those moments when you need a quick style boost.
Essential Nail Polish Colors and Tools (You Probably Already Own!)
Before we jump into designing, let’s ensure you have the right polish colors and a couple of handy items to make your life easier. The beauty of nail polish only designs is that you don’t need a huge collection. A few key players can unlock countless possibilities! Think of these as your foundational pieces.
The Core Polish Palette
When working with just polish, having a versatile color range is key. You want colors that can act as bases, accents, and even tools for creative application. Here’s a starting point:
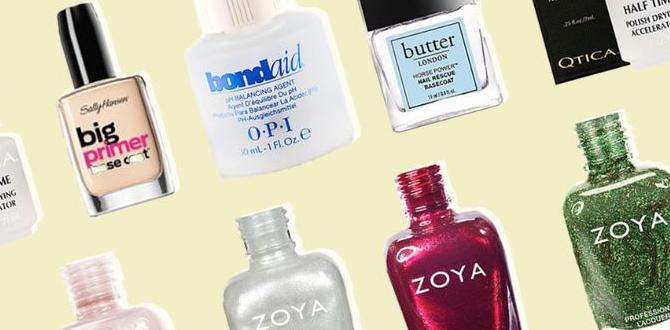
- A Classic Base Coat: Essential for nail health and making your polish last. It creates a smooth surface and protects your natural nails from staining.
- A Top Coat: Crucial for sealing your design, adding shine, and preventing chips. A good quick-dry top coat is a lifesaver!
- Neutral Base Colors: Think nudes, whites, soft grays, or pastels. These are perfect for a clean canvas and make accent colors pop.
- Bold Accent Colors: A vibrant red, a deep navy, a fun glitter polish, or a metallic shade can instantly add interest.
- A Black or White Polish: These are incredibly versatile for creating lines, dots, or even for using the edge of the bottle to draw shapes.
Simple “Tools” You Can Use
You don’t need a professional kit! We’ll leverage everyday items and even the polish bottles themselves.
- Toothpicks: Perfect for creating small dots or fine lines.
- A Thin Brush (Optional): If you have an old, clean, fine-tipped brush (like an old makeup brush or a craft brush), it can be handy for detail work. Wash it thoroughly!
- Scotch Tape or Paper Tape: Great for creating clean lines and geometric patterns.
- An Orange Stick or Cuticle Pusher: Can be used to clean up edges and for some dotting techniques.
Effortless Nail Polish Only Designs: Step-by-Step
Let’s get creative! These designs are straightforward and perfect for beginners. We’ll walk through each one, showing you how to achieve stunning results with just your polishes.
1. The Chic Half-Moon Manicure
This classic design is elegant and surprisingly easy. It creates a beautiful contrast and defines the nail shape.
What You’ll Need:
- Base Coat
- Two complementary nail polish colors (e.g., nude and gold, or navy and silver)
- Top Coat
- A small piece of tape or a stencil (optional, but helpful)
Steps:
- Prep: Apply a base coat and let it dry completely.
- First Color: Apply your first polish color (this will be your “moon” color) to the base of each nail. For a crisp edge, you can use a piece of tape or a round sticker as a guide. Place it just where you want the curve of your moon to start. Paint the small area of the nail below the tape. Remove the tape while the polish is still slightly wet for the cleanest line. Alternatively, you can freehand the half-moon curve. Be patient and allow it to dry.
- Second Color: Once the first color is completely dry, apply your second polish color to the rest of the nail, painting right up to the edge of your half-moon. If you freehanded the half-moon, you’ll simply paint the upper portion of your nail, creating a split effect.
- Clean Up: Use an orange stick or a small brush dipped in nail polish remover to neaten any smudges around your cuticle or nail edges.
- Seal It: Apply a generous layer of top coat over the entire nail to protect your design and add shine.
2. The Playful Polka Dot Effect
Dots are fun, easy to adapt, and can be as simple or intricate as you like!
What You’ll Need:
- Base Coat
- Your favorite base polish color
- A contrasting polish color for the dots
- A toothpick (or the tip of your main polish brush if it’s clean and precise)
- Top Coat
Steps:
- Base: Apply your base coat. Then, apply two thin coats of your chosen base polish color. Let it dry thoroughly – this is crucial for clean dots.
- The Dotting: Dip the tip of a toothpick into your contrasting polish color. Don’t overload it! Gently dab the tip onto your nail to create a dot. Clean the toothpick tip with a tissue (or grab a fresh one) with each dot to keep your polish clean and your dots consistent.
- Placement: You can create a random scattering of dots, or arrange them in neat rows. Experiment with different sizes by using different parts of the toothpick tip or even the edge of a polish bottle for larger dots.
- Finishing Touches: Once all your dots are dry, carefully apply a good, solid layer of top coat to seal everything in. This will also smooth out the surface of the nail, making the dots look professionally applied.
3. The Sophisticated Stripe Design
Clean lines add instant polish and can be surprisingly simple to achieve, especially with tape!
What You’ll Need:
- Base Coat
- Two or three nail polish colors
- Scotch tape or painter’s tape
- A sharp pair of scissors or a craft knife
- Top Coat
Steps:
- Base Layer: Apply your base coat, followed by one or two thin coats of your primary polish color. Let it dry completely. This is essential for the tape to adhere without lifting fresh polish.
- Tape Application: Cut strips of tape using scissors or a craft knife. The width of the tape will determine the width of your stripes. Apply the tape firmly onto the dried polish, pressing down the edges to ensure no polish seeps underneath. You can apply tape horizontally, diagonally, or to create geometric sections.
- Color Blocking: Carefully paint over the taped sections with your second polish color. Apply thin, even coats. If you’re using three colors, let the second color dry completely before applying tape again for the third color.
- The Reveal: This is the most satisfying part! While the last coat of polish is still slightly wet (but not pooling), carefully and slowly peel off the tape. Peeling when it’s too dry can cause the polish to crack or lift.
- Clean Up & Seal: Use a small brush dipped in nail polish remover to clean up any lines that aren’t perfectly sharp. Finish with a protective top coat over the entire nail.
4. The Glamorous Glitter Gradient (Ombre)
This look is all about shimmer and is incredibly forgiving. It’s a fantastic way to use up glitter polishes!
What You’ll Need:
- Base Coat
- A solid color polish for the base
- A glitter polish
- A makeup sponge or the polish brush
- Top Coat
Steps:
- Foundation: Apply your base coat and then one or two coats of your solid color polish. Let it dry completely.
- Glitter Application (Sponge Method): Take a clean makeup sponge (a regular cosmetic sponge works great). Apply a line of your glitter polish near the tip of the sponge. Then, apply a thicker line of the same glitter polish just below it. Gently dab the sponge onto the tip of your nail, starting from the free edge and working your way up towards the cuticle. You’re aiming to build up the glitter density at the tip and let it fade naturally as it moves down the nail. Reapply glitter to the sponge and repeat for more intensity.
- Glitter Application (Brush Method): Alternatively, you can use the polish brush. Load your brush with glitter polish and apply it liberally to the tip of the nail. Then, “flick” the brush upwards and onto the nail, blending the glitter upwards. You can even use a clean, dry brush to help feather the glitter if needed.
- Soften the Edge: If the transition looks too harsh, you can apply another thin coat of your solid base color over the glitter, leaving only the very tip glittery. Or, for a softer blend, apply a bit more glitter polish, focusing on the area where you want the shimmer to be most opaque.
- Smoothen and Shine: Once the glitter is dry, apply a generous top coat. Glitter polishes can be chunky, so a thick top coat is essential to create a smooth, polished finish. You might need two coats of top coat for a truly smooth feel.
5. The Simple & Chic Two-Tone
This is possibly the easiest design but looks incredibly chic and intentional.
What You’ll Need:
- Base Coat
- Two contrasting or complementary nail polish colors
- Optional: Washi tape or thin striping tape for a cleaner line
- Top Coat
Steps:
- First Color: Apply your base coat. Paint the bottom half or one-third of your nail with your first color. Let it dry completely.
- Second Color: Apply your second color to the remaining portion of the nail. For a super clean line, place a piece of tape where you want the division to be before painting. Alternatively, you can freehand the line, aiming for a straight or gently curved edge.
- Refine: Clean up any messy edges with a small brush and nail polish remover.
- Seal: Apply a top coat to protect your work and add shine.
Tips for Flawless Nail Polish Only Designs
Achieving salon-quality results at home with just polish is totally doable! A few pro tips can elevate your game and make the process smoother and more enjoyable.
Preparation is Key
A good manicure starts before you even pick up a polish bottle. Ensure your nails are clean, dry, and free of any old polish. Gently push back your cuticles using an orange stick, as this will give you a larger canvas to work with and a cleaner look.
Thin Coats are Your Friends
Resist the urge to apply thick, gloopy layers of polish. Multiple thin coats dry faster, look smoother, and are less likely to bubble or chip. This is especially important for base colors and for ensuring your designs lie flat.
Patience with Drying Times
This is probably the #1 tip for preventing smudges and creating crisp lines. Allow each layer of polish to dry sufficiently before applying the next or moving on to design elements. If you’re using tape, ensure the base color is bone dry. A good quick-dry top coat can help speed up the final drying process.
Use Your Polish Bottle and Brush Wisely
The edge of a nail polish bottle can be used for larger dots. A clean, precise brush that comes with your polish can create surprisingly fine lines. Don’t shy away from using the brush itself for techniques like freehand stripes or abstract strokes.
Clean Up Smudges Immediately
Keep a small brush (an old, clean makeup brush works wonders) and a bottle of nail polish remover handy. Dip the brush ever so slightly into the remover and use it to clean up any polish that’s landed on your skin around the nail. This makes a huge difference in the final polished look.
The Top Coat is Your Finisher
Never skip the top coat! It seals your design, adds a beautiful shine, and extends the life of your manicure. A good quality top coat is essential for making your nail art last.
Nail Polish Only Designs: Pros and Cons
Like any beauty technique, relying solely on nail polish for designs has its advantages and disadvantages. Understanding these can help you decide when and how to use this approach for the best results.
| Pros | Cons |
|---|---|
| Accessibility: Requires minimal specialized tools, making it easy for beginners. | Durability: Standard nail polish may chip more easily than gel or acrylics, requiring more frequent touch-ups. |
| Cost-Effective: Uses existing nail polish, saving money on salon visits or expensive art kits. | Drying Time: Can take longer to dry completely compared to UV-cured gel polish. |
| Versatility: A wide range of colors and finishes can be mixed and matched for endless design possibilities. | Precision Limitations: Achieving extremely fine details can be challenging without specialized tools like fine-tipped brushes or dotting tools. |
| Ease of Removal: Simple to remove with standard nail polish remover, unlike gels or acrylics. | Skill Curve: While designs are simple, mastering techniques like clean lines or smooth gradients may take practice. |
| No Special Equipment: Doesn’t require UV/LED lamps or bulky machines. | Longevity: May not last as long as professionally applied gel or dip powder manicures. |
| Creativity Friendly: Encourages experimentation and learning basic nail art principles. | Potential for Smudging: Layers need adequate drying time, increasing the risk of smudging if rushed. |
Are Nail Polish Only Designs Suitable for Beginners?
Absolutely! Nail polish only designs are arguably the most suitable for beginners. They strip away the complexity of specialized tools and let you focus on fundamental application techniques. You learn about color layering, creating clean lines (with or without tape), and the importance of prep and finish. It’s the perfect starting point to build your confidence and skills in nail art.
Think of it this way: before you tackle intricate 3D elements, mastering the art of a smooth, chip-free manicure with a touch of creative flair using just polish is a fantastic foundation. The designs we’ve covered — like polka dots, gradients, and simple stripes — are all

