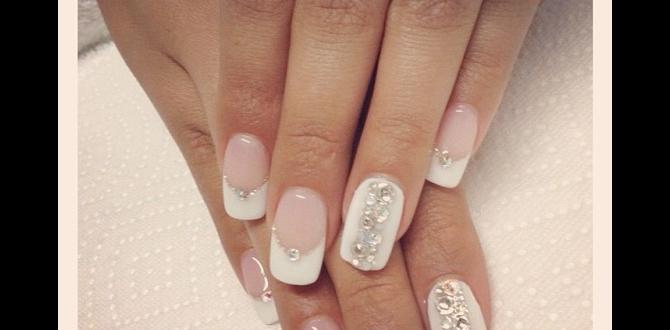
Looking for beautiful, easy French nail designs? These six stunning French nail ideas require minimal effort and are perfect for beginners. Learn simple techniques to create elegant, classic, or modern French manicures that will make your nails pop!
Dreaming of perfectly polished nails without spending hours at the salon? You’re not alone! Many of us love the chic, sophisticated look of French manicures, but sometimes they can feel a little… intimidating. Whether you’ve struggled with getting that crisp white tip just right or wondered how to add a modern twist, we’ve got you covered. This guide is here to show you how incredibly simple and fun creating gorgeous French nails can be. Get ready to discover 6 stunning French nail designs that are totally achievable, even if you’re just starting out!
We’ll walk you through each design with easy-to-follow steps, perfect for a DIY at-home manicure. Let’s get those nails looking fabulous!
Mastering the French Manicure: Your Beginner’s Guide
The classic French manicure, with its clean white tips and natural base, has been a beauty staple for decades. It’s timeless, elegant, and incredibly versatile. But mastering that perfect smile line can sometimes feel like a daunting art form. Fret not! With a few simple tools and techniques, anyone can achieve stunning French nails at home. We’re going to break down the basics and then dive into some creative twists to elevate your nail game.
Why French Nails Are Always a Good Idea
- Timeless Elegance: They look sophisticated and polished for any occasion.
- Versatility: They pair well with almost any outfit and personal style.
- Nail Lengthening Illusion: A well-done French tip can make your fingers appear more slender and your nails longer.
- Easy to Customize: While the classic is beautiful, there are countless ways to put your own spin on it.
Essential Tools for Effortless French Nails
Before we jump into the designs, let’s gather our toolkit. Having the right supplies makes all the difference between a messy mishap and a salon-worthy finish. Don’t worry, you probably have most of these already!
Here’s what you’ll need:
- Base Coat: To protect your natural nails and help polish adhere better. A good quality base coat, like this one from LA Girl, is a great starting point.
- Nail Polish Colors: Typically, a sheer pink, nude, or milky white for the base, and a crisp white for the tips. You can also get creative with colors!
- Top Coat: For shine, protection, and to seal your design.
- Nail Clips or Polish Guard Stencils: These are a game-changer for beginners, helping you create a clean line.
- Fine-tipped Nail Art Brush: For cleaner lines and touch-ups.
- Nail Polish Remover & Cotton Swabs: Essential for any clean-up mistakes.
- Nail File: To shape your nails to perfection.
Prep Work: The Foundation for Flawless Nails
Like any great project, success starts with proper preparation. Taking a few extra minutes to prep your nails will ensure your manicure lasts longer and looks cleaner.
- Clean Your Nails: Remove any old polish. Wash your hands thoroughly.
- Shape Your Nails: File your nails into your desired shape. Almond, square, and squoval are popular and work beautifully with French tips.
- Push Back Cuticles: Gently push back your cuticles using an orange stick or cuticle pusher. Avoid cutting them unless absolutely necessary, as cuticles protect your nail bed. For more on cuticle care, check out this comprehensive guide on nail care.
- Buff Gently: A light buffing can smooth out ridges, but don’t overdo it, as this can weaken your nails.
- Apply Base Coat: Let it dry completely.
6 Stunning French Nail Designs: Effortless & Chic
Now for the fun part! Let’s dive into six beautiful French nail designs that are surprisingly easy to create at home. Each one offers a slightly different vibe, so you can choose the perfect look for any mood or occasion.
1. The Classic French Manicure: Timeless Elegance
This is the OG of French nails, and for good reason! It’s sophisticated, clean, and never goes out of style. For beginners, the key is a steady hand or a little help from stencils.
How to Achieve It:
- Apply Base Coat: Ensure it’s fully dry.
- Apply Your Base Color: Paint one or two thin coats of your sheer pink, nude, or milky white polish. Let each coat dry completely.
- Create the Tip:
- With Stencils: Stick a French tip nail guide sticker onto your nail, just below where the white tip should start. Paint the tip with white polish. Carefully peel off the sticker while the polish is still wet.
- Freehand: Use a steady hand to paint a curved white line across the tips of your nails. Aim for a natural smile line that follows the shape of your nail bed.
- With a Brush: Dip a fine-tipped brush into your white polish (or remover, for touch-ups) and carefully paint the smile line.
- Clean Up: Dip a cotton swab in nail polish remover to clean up any mess around the cuticles or sidewalls.
- Apply Top Coat: Seal the deal with a generous layer of top coat.
2. The Reverse French Manicure: A Modern Twist
Instead of focusing on the tip, the reverse French highlights the cuticle area. It’s a subtle yet striking way to update the classic look.
How to Achieve It:
- Prep and Base: Follow the same prep steps as the classic French. Apply your base color (sheer pink/nude).
- Apply the “Moon” Polish: Using a fine-tipped brush or a small dotting tool, carefully paint a crescent shape along the base of your nail, where the cuticle is. This can be in white, a contrasting color, or even a glitter polish.
- Connect the “Moon” (Optional): You can either stop at the moon shape or connect it carefully with a thin line that follows your natural nail shape up to the free edge.
- Clean Up: As always, tidy up edges with a remover-dipped cotton swab.
- Top Coat: Apply a final layer of top coat.
3. The Colored French Tip: Pop of Personality
Who says French tips have to be white? This design injects fun and personality by swapping out the classic white for any color you desire! Think pastels, neons, deep jewel tones, or even metallics.
How to Achieve It:
- Prep and Base: Complete your nail prep and apply a sheer nude or milky base.
- Apply Colored Tip: Use the same technique as the classic French manicure (stencils, freehand, or brush) but use your chosen colored polish for the tip.
- Experiment with Colors: Try a different color on each nail, or opt for a gradient of colors.
- Clean Up: Neaten any stray polish.
- Top Coat: Seal with a clear top coat.
4. The Double French Tip: Sophisticated Dimension
This design adds a subtle layer of complexity by layering two thin lines of color or by creating two distinct smile lines. It’s chic and eye-catching without being over-the-top.
How to Achieve It:
- Prep and Base: Prepare your nails and apply your base polish color.
- First Tip: Create your first French tip line using your chosen color (e.g., white). Let it dry completely.
- Second Tip: Use a very fine nail art brush and a contrasting color (or the same color for a tonal effect) to draw a second, thinner line just below or above the first tip line. You can also create a second, thinner smile line slightly above the first one, creating a “double smile” effect.
- Alternatively, for a “double French”: Apply a colored tip, let it dry, then apply a second, thinner tip of a different color just above the first one.
- Clean Up: Refine any imperfections.
- Top Coat: Finish with a protective top coat.
5. The Glitter French Tip: Dazzling Delicacy
Add a touch of sparkle to your French nails! This is perfect for parties, holidays, or just when you want your nails to shine a little brighter. Glitter French tips can be achieved in a few simple ways.
How to Achieve It:
- Prep and Base: Get your nails prepped and apply your base color (sheer pink/nude).
- Glitter Application Methods:
- Glitter Polish Tip: Apply a glitter polish directly to the tips of your nails, using the same technique as a classic French tip. Fine glitter polishes work best for a subtle effect, while chunkier glitters make more of a statement.
- Loose Glitter & Top Coat: Paint the tip area with clear polish or top coat. While the polish is still wet, dip your nail into loose glitter. Gently tap off the excess. Clean up and seal with another layer of top coat. Make sure to use a good amount of top coat to trap all the glitter!
- Clean Up: Carefully clean any glitter fallout.
- Top Coat: Apply one or two generous layers of top coat to ensure a smooth, encapsulated glitter finish.
6. The Asymmetrical French Tip: Edgy & Artistic
For those who love to push boundaries, an asymmetrical French tip is a fantastic choice. Instead of a smooth curve, the line can be diagonal, zig-zag, or have a more abstract shape. This design is all about artistic expression and is surprisingly forgiving!
How to Achieve It:
- Prep and Base: Prepare your nails and apply your base color.
- Create the Asymmetrical Line: Using a fine nail art brush, paint a line that isn’t a typical curve.
- Diagonal: Draw a line from one side of the nail tip towards the opposite side.
- Abstract: Create a more freeform shape across the tip.
- Zig-Zag: Paint a zig-zag line instead of a smooth curve.
This can be done with white polish, a colored polish, or even a metallic shade.
- Clean Up: Tidy up any smudges or unevenness.
- Top Coat: Apply your top coat.
Table: French Nail Design Comparison for Starters
Choosing the right French nail design can seem overwhelming. This table breaks down the key features of each design to help you pick the perfect one for your skill level and style.
| Design Type | Difficulty Level (Beginner-Friendly) | Key Feature | Best For | Customization Potential |
|---|---|---|---|---|
| 1. Classic French | Easy to Medium (with stencils, easy) | Clean white tip, natural base | Everyday wear, professional settings, classic style | Moderate (color of tips/base) |
| 2. Reverse French | Medium | Color/emphasis at the cuticle “moon” | Unique look, subtle statement, modern style | High (moons can be any color/finish) |
| 3. Colored French Tip | Easy to Medium (with stencils, easy) | Colorful tip instead of white | Expressing personality, fun events, casual wear | Very High (infinite color options) |
| 4. Double French Tip | Medium to Hard | Two thin lines or two smile lines | Adding dimension, sophisticated and trendy look | High (color combinations) |
| 5. Glitter French Tip | Medium | Sparkling glitter on the tip area | Parties, holidays, adding glam | High (glitter type/color, base color) |
| 6. Asymmetrical French Tip | Medium to Hard (requires artistic flair) | Non-traditional, angled, or abstract tip line | Edgy style, artistic expression, trendsetters | Very High (shape, color, finish) |
Tips and Tricks for Perfect French Nails Every Time
Even with the easiest designs, a few pro tips can elevate your manicure from good to absolutely stunning. These little nuggets of wisdom come from years of DIY nail adventures!
- Don’t Rush the Dry Time: This is crucial! Make sure each layer of polish is completely dry before moving to the next, especially when using stencils or freehanding lines.
- Thin Coats Are Key: Multiple thin coats of polish are almost always better than one thick, goopy coat. They dry faster and look smoother.
- Invest in Good Polish: High-quality polishes have better formulas that apply more smoothly and last longer.
- Practice Makes Perfect: If you’re struggling with freehanding, don’t get discouraged! The more you practice, the steadier your hand will become. Try practicing on paper first.
- Clean Up is Your Friend: A tiny bit of nail polish remover on a fine-tipped brush or cotton swab can fix almost any slip-up. Think of it as your digital eraser for nails!
- Seal It In: A good top coat not only adds shine but also locks in your design, preventing chips and extending the life of your manicure. Consider a quick-dry top coat if you’re short on time.
- Hygiene Matters: Always start with clean hands and tools. You can disinfect your brushes with rubbing alcohol. Proper nail hygiene can prevent infections and lead to healthier nails, which are the best canvas for any design. For more on nail health, the Mayo Clinic offers excellent general nail care advice.
Common Beginner Mistakes to Avoid
We’ve all been there! Learning to do your nails at home involves a few learning curves. Here are some common mistakes beginners make and how to sidestep them:
Mistake 1: Applying Polish Too Thickly
- Why it’s a problem: Thick polish takes ages to dry, can lead to smudging, and often looks bumpy.
- Solution: Opt for thin, even coats. You can always add a second or third coat once the previous one is dry.
Mistake 2: Forgetting the Base and Top Coats
- Why it’s a problem: Base coats protect your natural nails from staining and help polish adhere. Top coats add shine, prevent chips, and seal your design.
- Solution: Make base and top coats non-negotiable steps in your manicure routine.
Mistake 3: Rushing the Drying Process
- Why it’s a problem: You end up with smudges, dents, and a less-than-perfect finish.
- Solution: Be patient! Set aside enough time for your polish to dry. Use cool air from a fan or a quick-dry spray if needed.
Mistake 4: Messy Cleanup
- Why it’s a problem: Polish on your cuticles or skin can make even the best design look amateur.
- Solution: Keep a pot of nail polish remover and a pack of cotton swabs handy. A fine-tipped brush dipped in remover is excellent for precise cleanups.
Mistake 5: Forcing Proper Nail Shape
- Why it’s a problem: Trying to force your nails into a shape they naturally resist can lead to breakage or unevenness.
- Solution: Work with your natural nail shape. File consistently in one direction to avoid splitting.
Frequently Asked Questions About French Nails
Q1: What is the easiest way for a beginner to do French tips?

