Want a touch of luxe for your nails? Discover 6 stunning gold foil nail designs that are surprisingly easy to achieve, adding instant glamour and sophistication to any look. Perfect for beginners and nail art lovers alike, these designs elevate your manicure with minimal fuss.
Are you looking to add a little sparkle to your fingertips? Maybe you’ve seen those gorgeous, shimmering gold foil nails and thought, “That looks way too complicated for me!” I totally get it! Sometimes nail art can seem intimidating, with all the tiny brushes and intricate details. But what if I told you that achieving a chic, high-fashion gold foil manicure is actually super simple, even if you’re just starting out? Get ready to transform your nails with a touch of dazzling gold. We’re going to break down some of the most beautiful gold foil nail designs that are perfect for any occasion. Let’s dive in and make your nails shine!
Why Gold Foil Nails Are a Glamorous Choice
Gold foil on nails isn’t just a trend; it’s a statement. It’s that perfect pop of metallic shine that can instantly elevate a simple manicure into something special. Think of it as edible glitter for your nails (but please, don’t eat it!). Gold foil is incredibly versatile, working beautifully with a wide range of base colors, from classic nudes and deep blacks to vibrant reds and cool blues. It adds a touch of luxury without being over the top, making it suitable for everything from a casual day out to a glamorous evening event.
The beauty of gold foil lies in its ability to catch the light, creating a dynamic and eye-catching effect. It can look soft and ethereal or bold and dramatic, depending on how it’s applied. Plus, the process itself can be quite satisfying! You don’t need to be a professional nail artist to achieve stunning results. With a few basic tools and a little patience, you can recreate these looks at home. Get ready to impress yourself and everyone around you with your gorgeous new set of nails.
What You’ll Need: Your Gold Foil Nail Toolkit
Before we jump into the designs, let’s gather your essentials. Don’t worry, most of these are things you might already have or can easily find at your local drugstore or online beauty supplier. Having the right tools makes all the difference and ensures your gold foil application is smooth and beautiful.
- Nail Polish: Your chosen base color(s). A good quality polish that dries smoothly is key.
- Gold Foil Flakes or Transfer Foil: This is your star ingredient! You can find these in small flakes or in rolls of transfer foil. Flakes are super easy for beginners, while transfer foil offers a more controlled, full-coverage look.
- Nail Glue or Foil Adhesive: You’ll need a specialized adhesive to make the foil stick. Some polishes double as adhesive when they are tacky.
- Top Coat: A good, durable top coat will seal your design and add extra shine.
- Tweezers: For precisely picking up and placing gold foil flakes.
- Small Brush or Orange Stick: To gently press down the foil and smooth out any edges.
- Rubbing Alcohol or Nail Polish Remover: For cleaning up any mistakes.
- Optional: Base Coat: To protect your natural nails and help polish adhere better.
Introducing 6 Stunning Gold Foil Nail Designs
Now for the fun part! Let’s explore some easy yet incredibly chic gold foil nail designs that will have your friends asking where you got your nails done.
1. The Dazzling Accent Nail
This is perhaps the easiest and most popular way to incorporate gold foil into your manicure. It’s perfect for beginners and always looks sophisticated.
How to Do It:
- Start with your chosen base nail polish color. Apply one or two coats and let it dry completely.
- On the nail you want to be your accent nail (usually the ring finger), apply a thin layer of nail glue or foil adhesive. Make sure the layer is even.
- Wait for the adhesive to become tacky. This is crucial – if it’s too wet, the foil will smudge; if it’s too dry, it won’t stick. Check the manufacturer’s instructions for your specific adhesive.
- Carefully place a piece of gold foil, shiny side up, onto the tacky adhesive. You can use tweezers to handle small pieces.
- Gently press down on the foil with your fingertip or a small brush to ensure it adheres smoothly.
- Peel away the backing paper or foil layer. You might have some patches that didn’t transfer, which is fine – it adds to the unique look!
- If you want more coverage or a different effect, you can add more foil pieces to bare spots.
- Once you’re happy with the look, carefully cap the edges with your top coat. This seals the foil and prevents chipping. Apply top coat to all your nails to ensure an even finish.
Lisa’s Tip: For an even more organic look, tear the foil into uneven pieces before applying. This creates beautiful, non-uniform metallic splashes.
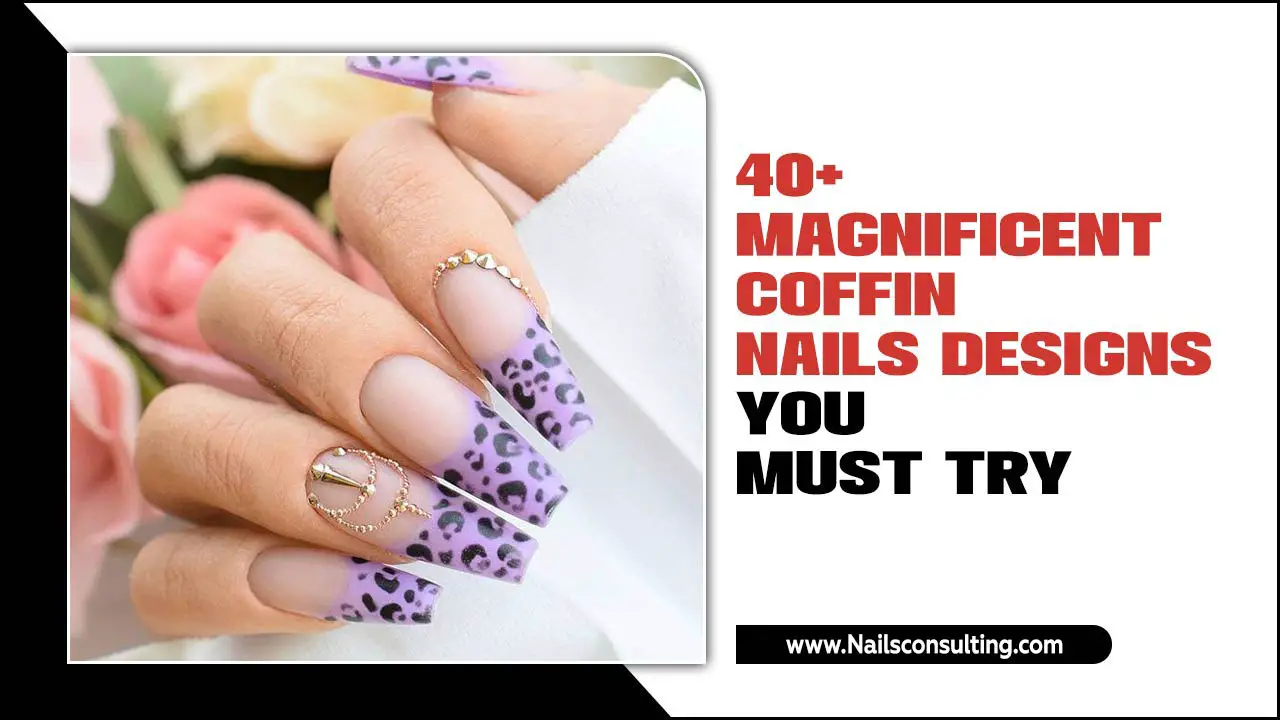
2. The Gold Foil French Tip
Give the classic French manicure a glamorous update with a touch of gold. This design is surprisingly simple and adds an elegant shimmer to your fingertips.
How to Do It:
- Paint all your nails with your desired base color. A sheer pink, nude, or even a soft white works beautifully. Let this dry completely.
- On the tips of your nails, apply a thin layer of your foil adhesive. You can use a fine-tipped brush or a nail art pen for precision.
- Allow the adhesive to become tacky, as described in the accent nail design.
- Carefully apply your gold foil transfer tape over the tacky tips, ensuring good contact.
- Gently press the foil down.
- Peel away the backing. You should have gorgeous gold tips!
- Use a small brush dipped in nail polish remover to clean up any stray foil bits around the cuticle or sides of the nail.
- Finish with a generous layer of top coat over the entire nail, making sure to cap the free edge to seal everything in.
Variations: Instead of full tips, try just a thin gold line along the tip, or a reverse French where the gold lines the cuticle area.
3. The Scattered Gold Flakes Effect
This design is all about effortless chic. It looks like you’ve sprinkled little pieces of pure gold dust all over your nails, creating a subtle yet striking shimmer.
How to Do It:
- Apply your base coat and let it dry thoroughly.
- Apply your main polish color. You can use anything here – a muted tone, a bold color, or even a clear polish for a natural look.
- While the last coat of polish is still wet (or, if using adhesive, while it’s tacky), use tweezers to pick up small gold foil flakes.
- Gently place the flakes onto the wet polish, scattering them randomly across the nail. Don’t aim for perfection; the charm is in the scattered nature.
- You can concentrate the flakes more on one side, the tip, or just have them sparsely dotted all over.
- Wait for the polish to dry completely.
- Apply a careful top coat. You might need two coats to fully smooth out the texture of the flakes. Ensure you seal the edges well.
Lisa’s Tip: For a more defined look, apply a clear polish or top coat to the nail, let it get slightly tacky, then apply the flakes. This gives you more control over placement.
4. The Gold Foil Ombre
Combine the popular ombre trend with the elegance of gold foil for a sophisticated and modern manicure. This design transitions beautifully from a solid color to a scattering of gold.
How to Do It:
- Start with your base color. Paint one or two coats and let it dry.
- On the tips of your nails, apply your foil adhesive.
- While the adhesive is tacky, press a larger piece of gold foil onto the tip of the nail.
- Gently peel off the backing. You’ll have a solid gold tip.
- Now, the blending part: using a fine brush or even a blunt toothpick, gently pick at the edges of the gold foil, lifting and scattering it upwards into the base color.
- You can also use small, loose gold flakes to fill in any gaps or to blend the edges more smoothly.
- Carefully apply a top coat. You might need a couple of coats to smooth out the texture and create a seamless finish. Focusing on the edges where the foil meets the polish is key.
Pro Tip: Try using a slightly different metallic shade, like rose gold or silver, for the foil part for a more complex ombre effect.
5. The Geometric Gold Foil Design
For those who love clean lines and modern aesthetics, geometric patterns with gold foil are a fantastic choice. This can be done using tape or by freehanding.
How to Do It (Using Tape):
- Paint your nails with your desired base color and let them dry completely.
- Once dry, use nail art tape to create geometric shapes or lines on your nails. Press the tape down firmly to prevent polish from seeping underneath.
- Apply your foil adhesive to the areas where you want the gold foil to appear, carefully painting within the taped-off sections.
- Let the adhesive get tacky.
- Apply your gold transfer foil over the tacky adhesive, pressing gently.
- Carefully peel away the foil. The gold should be perfectly in the shapes you created.
- Gently remove the nail art tape. Be careful not to smudge the fresh foil.
- Seal the entire nail with a good top coat.
How to Do It (Freehand):
- Apply base color and let dry.
- Using a fine brush and foil adhesive, paint geometric lines or shapes directly onto the nail.
- Let the adhesive become tacky.
- Apply small pieces of gold transfer foil or flakes strategically to your painted designs.
- Gently press and peel.
- Clean up any stray adhesive or foil.
- Apply top coat.
Lisa’s Tip: A matte top coat can give geometric gold designs a very modern and sophisticated look, contrasting beautifully with the shine of the foil.
6. The Full Coverage Gold Foil Statement Nail
Want to go all out? A full nail covered in shimmering gold foil is the ultimate statement look. It’s bold, luxurious, and surprisingly achievable.
How to Do It:
- Paint your nails with your base color and let it dry completely.
- Apply a generous, even layer of foil adhesive over the entire nail.
- Wait patiently for the adhesive to become optimally tacky. This is key for full coverage. It should feel sticky but not wet.
- Take a larger piece of gold transfer foil and carefully lay it over the entire nail, shiny side up.
- Using a soft cloth, your finger, or a silicone tool, firmly smooth the foil over the entire nail surface. Work from the center outwards.
- Once you’re confident the foil has adhered well, slowly and carefully peel off the backing. You should be left with a beautifully smooth, metallic gold nail.
- If there are any small gaps or missed spots, you can try applying a bit more adhesive to those areas and reapplying foil.
- To ensure durability, cap the entire nail, including the edges and tip, with a generous amount of top coat. You might need two coats to smooth out any potential texture.
Pro Tip: For a slightly more textured, layered look, use multiple pieces of foil and slightly overlap them when applying.
Tips for Perfect Gold Foil Application
Achieving flawless gold foil nails is all about a few key techniques. Here are some extra tips to help you get salon-worthy results every time:
- Patience is Key: The most common mistake is rushing the drying time of the adhesive. Make sure it’s perfectly tacky – not too wet, not too dry.
- Test Your Foil: Different types of foil and adhesives work best with each other. It might take a little experimentation to find your favorite combination.
- Shiny Side Up: Always place the foil with the shiny, metallic side facing up onto the adhesive. The backing paper will be on the bottom.
- Seal the Deal: A good top coat is non-negotiable. It protects your design, adds shine, and smooths out any texture from the foil. Cap your free edge to prevent peeling!
- Clean Up Mistakes Immediately: Keep nail polish remover and a small brush or cotton swab handy for any smudges or stray foil bits.
- Light Pressure: When pressing the foil down, use firm but gentle pressure. Too much force can cause the foil to tear or stretch unevenly.
Gold Foil Nail Designs: A Quick Comparison
Here’s a handy table to help you choose your next gold foil adventure:
| Design Type | Beginner Friendliness | Glamour Level | Time Commitment | Versatility |
|---|---|---|---|---|
| Accent Nail | Very High | Moderate | Low | High |
| French Tip | High | Moderate | Moderate | High |
| Scattered Flakes | Very High | Low to Moderate | Low | Very High |
| Ombre | Moderate | High | Moderate | High |
| Geometric | Moderate (can be advanced freehand) | High | Moderate to High | Moderate |
| Full Coverage | Moderate (requires good adhesive control) | Very High | Moderate | Moderate |
Maintaining Your Gold Foil Nails
Once your beautiful gold foil nails are complete, you’ll want them to last! While DIY manicures are fantastic, they might not always have the longevity of professional gel or acrylics. However, with proper care, you can extend their life considerably.
- Be Gentle: Avoid using your nails as tools. Don’t try to scrape things, open cans, or peel off labels with your fingertips.
- Wear Gloves: When doing household chores like washing dishes or cleaning, wear rubber gloves. Water and harsh cleaning chemicals can break down polish and adhesives. Check out resources on chemical safety from OSHA to understand what you’re protecting your nails from.
- Moisturize: Keep your hands and cuticles hydrated with a good cuticle oil and hand cream. Healthy cuticles and skin make your whole manicure look better and can prevent lifting.
- Avoid Harsh Soaps: Opt for milder hand soaps that are less likely to strip the polish.
- Touch-Ups are Okay: If a small piece of foil lifts or chips, you can sometimes carefully reapply a tiny bit of adhesive and foil to fix it, or simply add another layer of shiny top coat to the affected area.
Frequently Asked Questions About Gold Foil Nails
Here are some common questions beginners have about working with gold foil on nails:
Q1: Can I use regular nail polish as adhesive for gold foil?
A1: Some polishes work better than others. A slightly thicker, stickier polish that’s just beginning to dry can sometimes grab foil. However, for best results and longevity, it’s recommended to use a specialized foil adhesive or nail glue designed for nail art.
Q2: What’s the difference between gold foil flakes and transfer foil?
A2: Gold foil flakes are loose, irregular pieces of foil that you scatter onto adhesive. They create a more organic, textured look. Transfer foil comes in a roll and is applied by pressing it onto adhesive, then peeling off the backing. This gives a smoother, more solid metallic finish.
Q3: My gold foil looks crinkled. How can I make it smooth?
A3: Ensure you’re applying firm, even pressure when pressing the foil onto the adhesive. Work from the center outwards. Using a silicone tool or even a piece of plastic wrap can help smooth out the foil before the adhesive fully cures.
Q4: How do I remove gold foil nails?
A4: Remove gold foil nails just like you would regular polish. Soak a cotton ball in nail polish remover (preferably acetone

