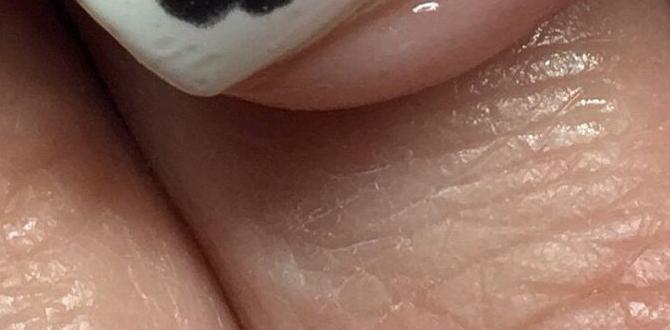
Grab your cap and gown – or just your nail file! Graduation white nails are the chic, celebratory accent every grad needs. Get ready to master 6 essential tips and tricks for a perfect, dazzling mani that screams accomplishment and style. Let’s make your graduation day sparkle!
So, graduation is just around the corner! You’ve aced your exams, survived the late nights, and now it’s time to celebrate. What’s the one detail you might be overlooking? Your nails, of course! A stunning manicure can really complete your look for graduation photos and your big day. But finding that perfect, sophisticated white nail design can feel like a challenge. Don’t worry, I’m here to help! We’ll cover all the essentials to get you those picture-perfect white nails without any stress. Get ready to feel amazing, from your graduation cap right down to your fingertips.
Essential 1: The Perfect White Polish Foundation
Before we get to any fancy designs, let’s talk about the star of the show: your white nail polish. A good quality white polish is key to that clean, crisp look that says “I’ve arrived!”
Choosing Your White
There are different shades of white, and picking the right one makes a big difference:
Pure White: This is your crisp, bright white. It’s bold and makes a strong statement. It’s great for a classic look but can sometimes be a bit stark.
Off-White/Creamy White: These have a subtle warmth or hint of yellow/beige. They are softer and often more flattering on a wider range of skin tones. They feel a little more modern and less intimidating than pure white.
Milky White: This is a sheerer, more translucent white. It gives a softer, “my nails but better” vibe. It’s perfect for a subtle, clean look.
Why it’s Crucial for Graduation
A great white polish ensures:
Vibrant Color: No splotchy, streaky messes!
Smooth Application: Easier to get a flawless finish.
Longevity: A good formula will last longer, looking great throughout your celebrations.
Pro Tip for Application
Always start with a good base coat. This protects your natural nail and helps the polish adhere better. For white polish, especially, a good base coat prevents staining. When applying white polish, a thinner, even coat is better than one thick, gloopy layer. You might need two or three thin coats to get full opacity.
Essential 2: Nail Shape Harmony for Your Style
Your nail shape can totally transform the look of your white manicure. For a graduation, you want something elegant and chic that complements your hand.
Popular Shapes for White Nails
Here are some shapes that work beautifully with white polish:
Squoval/Soft Square: This is a square shape with slightly rounded corners. It’s modern, practical, and looks great on almost everyone. It offers a clean canvas for designs.
Round: A classic, natural-looking shape. It’s super low-maintenance and always looks polished. Excellent for shorter nails.
Almond: This shape is slender and tapers to a soft point. It’s incredibly elegant and elongates the fingers, making it a fantastic choice for special occasions like graduation. Pure white or milky white looks stunning on almond nails.
Stiletto/Coffin (Ballerina): If you love a longer, more dramatic look, these are for you. White polish on a stiletto or coffin shape is very high-fashion. However, they require more care and might not be the most practical for a busy graduation day.
How to Choose
Consider your lifestyle and personal style:
For practicality: Stick with squoval or round. These are less likely to snag.
For elegance: Almond is a beautiful choice that lengthens the appearance of your fingers.
For a statement: Stiletto or coffin can be show-stopping if you can manage them.
Nail Shape Cheat Sheet
| Shape | Description | Best For | Graduation Vibe |
| :———– | :————————————————— | :—————————————————- | :——————————————– |
| Squoval | Square with softly rounded corners | Almost everyone, versatile, balanced | Modern classic, polished, approachable |
| Round | Soft curve following the fingertip | Shorter nails, low-maintenance, natural look | Effortlessly chic, understated elegance |
| Almond | Tapers to a soft point, wider at the base | Elongating fingers, elegant, feminine | Sophisticated, graceful, subtly glamorous |
| Stiletto | Long, pointed tip | Dramatic effect, long nails, statement-making | Bold, high-fashion, attention-grabbing |
| Coffin | Tapered from the cuticle to a flat, squared-off tip | Trendy, glamorous, often longer nails | Modern glam, chic, runway-ready |
Essential 3: The Subtle Sparkle – Glitter & Shimmer Accents
Pure white can be chic, but a touch of sparkle takes your graduation nails to the next level of celebration! Glitter and shimmer are your best friends here.
Ideas for Adding Sparkle
Glitter Fade: Start with a dense glitter at the cuticle and fade it out towards the tip, or vice versa. This is a super popular and elegant look.
Glitter Accent Nail: Choose one nail (like your ring finger) and cover it entirely in fine silver or iridescent glitter.
Subtle Shimmer Top Coat: Apply a top coat infused with fine holographic or iridescent shimmer over your white polish for a delicate twinkle.
Tiny Rhinestones/Pearls: Add a few small rhinestones or tiny pearls along the cuticle line or at the base of one nail. Think of them as mini tiaras for your fingertips!
Why it Works for Graduation
Celebratory Feel: Sparkle just feels like a celebration.
Photogenic: Light catches glitter beautifully, making your hands pop in photos.
Sophistication: Opt for fine glitters or subtle shimmers to keep it elegant, not overwhelming. Silver, holographic iridescent, and rose gold are great choices.
Application Tips
For Glitter Polish: These often apply best with a dabbing motion to build up the glitter density.
For Loose Glitter: Apply your last coat of white (or clear top coat) and while it’s still wet, carefully sprinkle or press loose glitter onto the desired area. Seal it with a good top coat.
For Rhinestones/Pearls: Use a dotting tool with a tiny bit of nail glue or your wet top coat to pick them up and place them precisely. Then, carefully apply a top coat around them without flooding the stones.
Essential 4: The Art of the French Manicure – Redefined
The classic French manicure gets a modern, graduation-ready update with white tips! It’s timeless, elegant, and perfect for the occasion.
Classic White French
This is where the tip of your nail is painted in a crisp white, over a nude or sheer pink base. It’s clean, polished, and sophisticated.
Modern Twists on the White French
Reverse French: Instead of the tip, the white polish is applied to the lunula (the half-moon at the base of your nail).
Double French: Two thin lines of white along the tip, or a white tip with a thin white line at the cuticle.
Glitter French Tip: Replace the white tip with a fine glitter. This looks amazing!
Baby Boomer/Ombre French: A soft, diffused blend of white into your nude base. This is incredibly gentle and elegant.
Achieving a Flawless French Tip
Steady Hand: If doing it freehand, use a fine-tipped brush and take your time.
French Tip Guides: These adhesive stickers are a lifesaver for beginners! Place the sticker along your desired smile line, paint the tip, and carefully peel off while the polish is still slightly wet.
Top Coat is Key: A good top coat will smooth out the lines and add shine, making your French tip look professionally done.
Essential 5: Minimalist Designs for Maximum Impact
Sometimes, less really is more. Minimalist white nail designs are stylish, understated, and perfect for a graduate who wants a touch of personal flair without being too flashy.
Design Ideas
White Dot Accent: A single white dot on each nail, or a few strategically placed dots on an accent nail.
Thin White Lines: A single thin white line running vertically down the center of the nail, or horizontally across the tip.
Abstract Swirls: A small, delicate white swirl on a nude or sheer base.
Geometric Shapes: A tiny white triangle or square at the base of the nail.
Why Minimalist is Great for Graduation
Versatile: These designs go with everything, from your graduation gown to casual celebratory outings.
Sophisticated: They add a subtle artistic touch that conveys confidence and style.
Easy to Achieve: Many minimalist designs can be done with basic tools, even a toothpick!
Tools for Minimalist Art
Fine-Tipped Polish Brush: For drawing thin lines and small details.
Dotting Tool: Comes with different sized balls for creating perfect dots. Toothpicks can work in a pinch!
Nail Art Pen: These pens have a fine tip and gel polish inside, making drawing simple.
Essential 6: The Longevity Kit – Prep, Seal, and Maintain
Your graduation white nails won’t look their best if they chip or fade after a day. A great manicure requires a little prep and ongoing care.
Pre-Manicure Prep
Cleanliness: Ensure your nails and hands are clean and dry. Remove any old polish.
Cuticle Care: Gently push back or trim cuticles. Dry cuticles can make polish look uneven. You can find guidance on safe cuticle care from organizations like the NHS.
File & Shape: File your nails to your desired shape. Always file in one direction to prevent splitting.
Buffing: Lightly buff the nail surface to create a smooth canvas for polish. Don’t over-buff, as this can weaken your nails.
The Power of Top Coat
This cannot be stressed enough! A high-quality top coat is your shield.
Seals the Deal: It locks in your polish color and any design elements.
Adds Shine: Gives that beautiful glossy finish.
Prevents Chipping: A good top coat is crucial for durability.
Gel Top Coats: For extra long wear and a super-hard finish, consider a gel top coat (requires a UV/LED lamp).
Maintaining Your Mani
Gloves for Chores: Wear gloves when washing dishes or using cleaning products.
Cuticle Oil: Apply cuticle oil daily to keep your nails and surrounding skin hydrated and prevent hangnails.
* Touch-Ups: Carry your white polish and top coat for quick touch-ups if needed.
Your Graduation White Nail Style Guide: FAQ
Here are answers to some common questions you might have about rocking white nails for your graduation:
Is white nail polish difficult to apply?
White nail polish can be a bit tricky because it tends to be more opaque and can show streaks easily. The key is to use thin coats, allow each coat to dry slightly, and apply a good base and top coat. Many people find using a slightly thicker, quality formula helps. Don’t be afraid to use two or three thin coats instead of one thick one for a smoother finish.
What skin tones do white nails look good on?
White nails can look fantastic on a wide range of skin tones! For fairer skin, a creamy or off-white can be softer. For medium to darker skin tones, bold, crisp white can be stunning and make a beautiful contrast. If you’re hesitant, start with a milky white or a white with sheer undertones for a subtler effect.
How long does a white nail polish manicure usually last?
With proper prep, application of a good base coat, thin color coats, and a strong top coat, a regular white nail polish manicure can last anywhere from 3 to 7 days. Factors like your daily activities, how carefully you treat your hands, and the quality of the polish and top coat will influence longevity. Using gloves for household chores and applying cuticle oil can help extend its life.
Can I do a white French tip myself at home?
Absolutely! Doing a white French tip at home is very achievable. You can use French tip guide stickers, which help you create a clean smile line. Another method is to use a fine-tipped brush to carefully paint the tip. Patience and practice are key. A good, slightly thicker white polish can also make creating the tip easier.
Should graduation white nails be matte or glossy?
Both matte and glossy finishes can be gorgeous for graduation white nails! A glossy finish is classic, shiny, and always looks polished. A matte finish offers a more modern, sophisticated, and velvety look. You could even do a glossy white with matte tips, or vice versa, for a unique design. For a celebratory feel, glossy is often preferred as it catches the light beautifully.
What are the best tools for adding simple white nail art?
For simple white nail art, you don’t need much! A good quality fine-tipped brush is excellent for drawing thin lines or small details. A dotting tool is perfect for creating dots of various sizes. Even a toothpick can be used carefully to create dots or small swirls if you don’t have specialized tools. For easy lines and dots, nail art pens are also a fantastic beginner-friendly option.
How do I prevent my white graduation nails from chipping?
Preventing chips is all about your top coat and aftercare. Always use a high-quality, durable top coat and reapply it every 2-3 days to refresh the shine and reinforce the seal. Keep your nails moisturized with cuticle oil, as dry nails are more prone to breaking and chipping. Also, be mindful of your hands – avoid using your nails as tools and wear gloves for harsh activities. For ultimate chip resistance, consider a gel manicure with a white polish, which is known for its incredible durability.
Conclusion: Your Dazzling Graduation Manicure Awaits!
Congratulations, graduate! You’ve reached a major milestone, and your nails should reflect that achievement. From selecting the perfect shade of white to adding those essential touches of sparkle or minimalist art, mastering these six essentials will ensure your graduation white nails are nothing short of stunning.
Remember, the key is preparation, quality products, and a little bit of fun. Whether you opt for a classic French tip, a chic almond shape with a glitter fade, or a simple dot accent, your white nails will be the perfect finishing touch to your celebratory look. Take these tips with you, practice a little, and most importantly, enjoy your special day with confidence and beautifully manicured hands. You’ve earned it!

