Ready to rock elegant Greek key nails? This guide breaks down 6 stunning, beginner-friendly Greek key nail designs. Learn essential techniques and easy styles to create sophisticated, classic manicures at home. Perfect for any occasion, these designs add a timeless touch to your look!
Ever looked at a nail design and thought, “Wow, that’s so chic, but there’s no way I can do that”? We’ve all been there! Greek key patterns, also known as the meander or tectonic, are beautiful symbols of infinity and unity. They have a sophisticated, classic vibe that can elevate any manicure. But translating that geometric beauty onto tiny nails can seem intimidating, especially if you’re new to nail art. You might worry about messy lines, uneven shapes, or just not knowing where to start. Don’t worry, though! With a few simple tools and easy-to-follow steps, you can absolutely achieve stunning Greek key nails. Get ready to unlock your inner nail artist and create designs that are both elegant and surprisingly easy to replicate.
In this guide, we’ll explore six essential Greek key nail designs, perfect for beginners. We’ll break down each style with simple instructions, helping you master the art of this timeless pattern. From minimalist accents to bolder statements, you’ll discover how to bring this ancient motif to life on your fingertips. Let’s dive in!
Why the Greek Key is a Nail Art Staple
The Greek key motif is more than just a pretty pattern; it’s a symbol steeped in history and meaning. Originating in ancient Greece, it represents eternity, the four directions, and the flow of life. This deep symbolism adds a layer of sophistication to any design. On nails, it translates into clean, geometric lines that are both visually striking and incredibly versatile. It’s a pattern that never goes out of style, making it a brilliant choice for both everyday wear and special occasions.
Its inherent structure also makes it surprisingly adaptable for nail art. The repeating pattern can be scaled down for delicate details or enlarged for a bolder statement. Plus, the geometric nature means you don’t need a steady hand for complex freehand drawing. With the right tools and a little patience, even intricate-looking Greek key designs become achievable. It’s a design that speaks of understated elegance and a nod to classic artistry, making your nails look polished and thoughtfully designed.
Essential Tools for Greek Key Nail Designs
Before we jump into the designs, let’s gather our supplies. You don’t need a professional setup; most of these items are readily available and affordable. Having the right tools makes creating crisp lines and neat patterns a breeze!
- Nail Polish: Your base color and your Greek key accent color.
- Base Coat & Top Coat: Essential for polish longevity and shine.
- Thin Striping Brush or Dotting Tool: For drawing the lines of the Greek key. A fine-tipped brush is ideal for precision.
- Nail Art Pen: Can be easier for beginners than a brush for drawing lines.
- Stencils or Tape: For creating clean, straight lines and perfectly formed keys, especially for beginners.
- Tweezers: To precisely place stickers or guides.
- Rubbing Alcohol or Non-Acetone Nail Polish Remover: For cleaning up mistakes and cleaning brushes.
- Cuticle Pusher/Orange Stick: To clean up any stray polish around the cuticles.
Investing in a good quality top coat is especially important. It seals your design, prevents chipping, and gives your nails that sought-after glossy finish. A set of striping brushes can be surprisingly inexpensive and offers great versatility for various nail art projects.
Understanding the Basic Greek Key Pattern
The classic Greek key pattern is a continuous, interlocking, angular meander. Imagine a single line that turns at right angles, forming a series of L-shapes connected by straight lines. The simplest form involves four connected “L” shapes that create a square or rectangular frame with an inner void. It looks like this:

The beauty of this pattern for nail art is its modularity. You can create a single corner, a full square, or repeat the pattern across the nail. It’s all about those right angles and connecting lines. The key to a good Greek key design on nails is precision. Even slight wobbles can make it look less polished, but with practice and the right tools, you’ll get the hang of it quickly.
6 Stunning Greek Key Nail Designs You Can Do!
Now for the fun part! Let’s explore six different ways to incorporate the Greek key into your nail game. We’ll start with the simplest and move towards slightly more intricate variations.
1. The Minimalist Accent Nail
This is the perfect entry point for beginners. You focus the Greek key design on just one or two nails, usually the ring finger. This keeps the overall look understated and allows you to practice the technique without overwhelming yourself.
What you’ll need:
- Base color polish
- Accent color polish
- Thin striping brush or nail art pen
- Top coat
How to achieve it:
- Apply your base coat and let it dry completely.
- Paint your nails with your chosen base color. Let it dry thoroughly.
- On your accent nail (e.g., ring finger), use your striping brush or nail art pen and accent color polish to carefully draw a small Greek key pattern in a corner or along the cuticle line. Start with a simple “L” shape, then add another to connect it, and so on.
- For a super clean look, you can use a fine-tip brush dipped in your base color to clean up any uneven lines.
- Once the design is dry, apply a generous layer of top coat over all nails to seal and add shine.
Pro Tip: If freehanding feels too daunting, try using a nail stencil or carefully placed striping tape to guide your lines. This gives you perfect geometric edges every time!
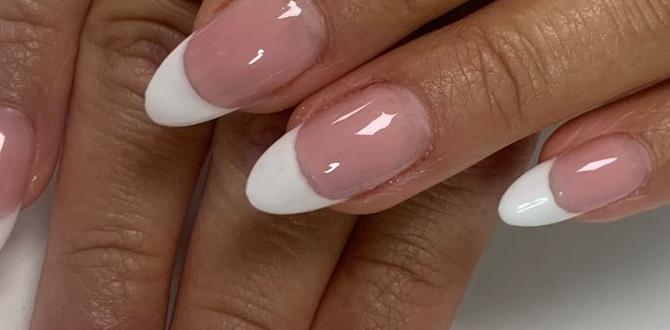
2. The French Tip Greek Key
Give your classic French manicure a modern twist! Instead of a plain white tip, we’re adding a subtle Greek key design along the smile line.
What you’ll need:
- Sheer nude or pink polish (for the nail bed)
- White or contrasting polish (for the tip and key)
- Thin striping brush or nail art pen
- French tip guide stickers (optional, but helpful!)
- Top coat
How to achieve it:
- Apply your sheer polish to the nail bed and let it dry.
- If using French tip guides, place them along the natural smile line. Paint the tips with your white or contrasting color. Let it dry completely, then carefully remove the guides. If freehanding, paint clean tips.
- Once the tip color is dry, use your striping brush or pen and the same tip color (or a different accent color) to draw a small, U-shaped Greek key pattern along the edge of the French tip, or just along the smile line itself. Think of it as a little flourish at the tip!
- Clean up any stray lines with a fine brush and polish remover.
- Finish with a protective top coat.
Variation: You can also do a full French tip in one color and then add a Greek key design in an accent color on top.
3. The Full Nail Pattern
Ready to commit to the Greek key? This design covers the entire nail with the iconic pattern. It’s bolder and makes a strong statement.
What you’ll need:
- Base color polish
- Accent color polish
- Thin striping brush or nail art pen
- Top coat
- Optional: Small nail stickers with Greek key patterns for an easier application.
How to achieve it:
- Apply your base coat and let it dry.
- Paint all your nails with your base color. Ensure they are completely dry before proceeding.
- On each nail, use your striping brush or pen and accent color to draw the Greek key pattern. You can repeat the pattern multiple times across the nail, or create a border. For a classic look, try framing the nail.
- Tip for beginners: Draw one full square Greek key, then repeat it next to it, filling the nail. Or, use a stencil with a repeating pattern. For an even simpler approach, consider using pre-made nail stickers featuring the Greek key design. Apply them over your dry base coat and seal with a top coat.
- Carefully clean up any smudges or uneven lines.
- Apply a thick layer of top coat to seal the design and add a glossy finish.
This design looks particularly striking with contrasting colors, like black and gold, navy and white, or even a deep emerald green and metallic silver.
4. The Negative Space Greek Key
Negative space nail art is chic and modern. Instead of filling the entire nail with color, you leave parts of the natural or bare nail showing through. This creates a sophisticated, airy look.
What you’ll need:
- Clear or sheer nude polish (optional, as a base)
- Contrasting color polish for the Greek key
- Thin striping brush or nail art pen
- Tape or stencils (highly recommended for clean edges)
- Top coat
How to achieve it:
- Apply a thin layer of clear or sheer nude polish if desired, or leave your nails bare. Let it dry completely.
- Precisely place striping tape onto your nail to create the sections you want to fill with color. For example, you could section off a corner or a stripe.
- Carefully paint within the taped-off areas using your contrasting color.
- While the polish is still wet, carefully remove the tape using tweezers. This reveals the negative space. Think of the tape as a guide for where the Greek key lines won’t be.
- Alternatively, use a very fine brush and your contrasting color to draw the Greek key pattern directly onto the bare nail, leaving sections unpainted. This requires a steadier hand.
- Allow the design to dry completely.
- Apply a thin layer of top coat. Be careful not to smudge the design.
Why it works: The contrast between the painted lines and the unpainted nail bed is what makes this design pop. It feels intricate without being heavy.
5. The Gradient Greek Key
Add depth and dimension by combining the Greek key with a gradient, or ombré, effect. This looks complex but can be achieved with patience.
What you’ll need:
- At least two complementary polish colors for the gradient
- Base color polish
- Accent color polish for the Greek key
- Cosmetic sponge or makeup sponge
- Thin striping brush or nail art pen
- Top coat
How to achieve it:
- Start with your base coat and then apply your lightest shade of polish to all nails. Let it dry.
- For the gradient: Apply your gradient colors side-by-side onto the cosmetic sponge.
- Gently dab the sponge onto the nail, starting from the cuticle and moving upwards, to create a smooth transition of colors. Repeat this process, layering gently until you achieve your desired effect. Work quickly before the polish dries on the sponge.
- Clean up any polish that got onto your skin using a brush dipped in nail polish remover. Let the gradient dry completely.
- Use your striping brush or pen and your accent color to carefully draw the Greek key pattern over the dried gradient. You could place it centrally, in a corner, or frame the nail.
- Clean up edges and apply top coat.
Tip: A common mistake is making the gradient too harsh. You want a seamless blend. Building up the color in thin layers on the sponge and gently dabbing is key.
6. The Geometric Block Greek Key
This design plays with shapes. Instead of just lines, you’re creating solid blocks or outlines that form the Greek key pattern. It has a more modern, graphic feel.
What you’ll need:
- Base color polish
- Accent color polish
- Thin striping brush or nail art pen
- Small squares of striping tape or stencils for creating blocks
- Top coat
How to achieve it:
- Apply base coat and paint your nails with your base color. Let them dry completely.
- Use your striping tape or stencils to create geometric sections on your nail. For instance, you might tape off a square in the center, leaving a border, or create overlapping rectangles.
- Paint inside the taped-off sections with your accent color.
- While the paint is still wet, carefully remove the tape or stencils.
- Once dry, use your striping brush or pen to draw the connecting Greek key lines within or around these colored blocks. You might outline the blocks with the key pattern, or have the key pattern emerge from the lines between blocks.
- Clean up edges.
- Apply a protective top coat.
Consider This: This style is fantastic for creating a bold, almost architectural look. Think of it as building the key piece by piece with geometric shapes.
Table: Greek Key Design Pros & Cons for Beginners
Here’s a quick comparison to help you choose your first Greek key nail design:
| Design Style | Ease for Beginners | Visual Impact | Pros | Cons |
|---|---|---|---|---|
| Minimalist Accent | Very Easy | Subtle | Quick to do, forgiving, requires minimal practice. | Less “wow” factor for those seeking bold designs. |
| French Tip Greek Key | Easy-Medium | Moderate | Combines two popular styles, adds detail to a classic. | French tip application requires some practice; pattern placement needs care. |
| Full Nail Pattern | Medium | Bold | Makes a strong statement, shows off nail art skills. | Requires more time, precision, and practice for clean lines. |
| Negative Space | Medium-Hard | Chic/Modern | Unique look, feels sophisticated, uses less polish. | Requires very precise application and clean lines; tape removal can be tricky. |
| Gradient Greek Key | Hard | Complex/Artistic | Adds depth and visual interest, looks very professional. | Gradient itself takes practice; drawing on top of it needs a steady hand. |
| Geometric Block | Medium | Graphic/Modern | Defined shapes, versatile color combinations, can be simplified with tape. | Requires careful taping and outlining for clean results. |
Tips for Perfect Greek Key Lines
Achieving those crisp, clean lines is the secret to a professional-looking Greek key design. Here are some tips:
- Thin Polish: If your polish is too thick, it will create blobs rather than fine lines. Thin it with a nail polish thinner if needed.
- Brush Control: Don’t overload your brush. Wipe off excess polish on the edge of the bottle. Use the tip of the brush, not the whole thing, for delicate lines.
- Steady Hand: Rest your wrists on a stable surface. You can even rest your forearms together for extra stability.
- Clean Up: Keep a small brush (like a liner brush) dipped in nail polish remover handy. Use it to gently clean up any stray marks or smudges immediately after painting. It’s much harder to fix mistakes once the polish is dry.
- Practice Strokes: Before drawing on your nail, practice drawing straight lines and right-angle turns on a piece of paper or a nail wheel.
- Nail Art Pens: For absolute beginners, nail art pens with fine tips can offer more control than a brush.
- Patience is Key: Don’t rush! Give each layer of polish plenty of time to dry before the next step. Rushing is the main cause of smudged designs.

