Discover 6 stunning hygge nail designs for cozy, effortless beauty. These simple yet chic looks embrace comfort and natural elegance, perfect for beginners wanting elegant, low-maintenance manicures.
Feeling a bit frazzled or just craving a warm hug for your fingertips? You’re not alone! In our busy lives, sometimes we just want our nails to feel as comfy and delightful as our favorite cozy sweater. That’s where hygge comes in – the Danish art of coziness and contentment. It’s not just for your home; it’s a vibe that’s perfect for your nails, too. But how do you translate that feeling into beautiful nail art that’s also super easy to do?
Don’t worry, I’ve got you covered! We’re going to dive into six gorgeous hygge nail designs that are not only stunning but wonderfully simple to create. Get ready to embrace effortless beauty and give your nails a touch of everyday luxury. Let’s get cozy!
What Exactly is Hygge Nail Design?
Hygge (pronounced hoo-gah) is a Danish word that captures a feeling of warmth, comfort, and contentment. Think of those moments: a crackling fireplace, a steaming mug of tea, soft blankets, and good company. When we bring this feeling to our nails, we’re talking about manicures that are:
- Cozy Color Palettes: Think warm neutrals, muted earth tones, creamy whites, soft grays, and gentle pastels. Black might be too stark, and neons are definitely out!
- Comforting Textures & Finishes: Matte finishes, subtle shimmers, and smooth, clean looks often evoke a sense of warmth and softness.
- Simple & Effortless: Hygge is about ease, not fuss. Designs are typically minimalist, focusing on elegance and understated beauty rather than intricate, time-consuming art.
- Natural & Organic: Designs often mimic elements found in nature, like soft gradients, milky finishes, or simple line art.
It’s all about creating a feeling of calm and well-being reflected on your hands. It’s your nails saying, “Take a deep breath and relax.”
Easy Hygge Nail Essentials for Beginners
To create these cozy looks, you don’t need a professional salon setup! Here are a few basics that will make your hygge nail journey a breeze:
- Good Quality Nail Files: For shaping your nails perfectly. A fine-grit file is great for smoothing edges.
- Base Coat: Essential for protecting your nails and helping polish adhere better.
- Top Coat: Seals your design, adds shine (or a matte finish), and prevents chipping.
- Nail Polish Remover & Cotton Pads: For clean-up and corrections.
- Your Chosen Nail Polish Colors: Focus on the hygge palette we discussed!
- Optional: Dotting Tool or Toothpick: For very simple accent details.
- Optional: Matte Top Coat: If you want to achieve that super cozy, velvety finish.
Investing in a few good quality tools will make all the difference, ensuring your manicures look polished and last longer. For a deeper dive into essential nail care tools, check out resources from the American Academy of Dermatology on nail health. They offer great tips on maintaining healthy nails, which is the foundation for any beautiful manicure.
6 Stunning Hygge Nail Designs You Can Do at Home
Let’s get to the fun part! These designs are perfect for beginners and capture that warm, inviting hygge spirit.
1. The Cozy Neutral Gradient
A gradient, or ombre, effect can look super chic and complex, but it’s surprisingly easy to achieve, especially with neutral tones. This design feels like a soft, warm sunset.
What You’ll Need:
- Base coat
- 2-3 neutral polishes (e.g., creamy beige, soft taupe, muted blush)
- Makeup sponge or a nail art sponge
- Top coat
- Clean-up brush or cotton swab with polish remover
How to Create It:
- Prep Your Nails: Apply a base coat and let it dry completely.
- Apply Base Color: Paint one thin coat of your lightest neutral color on each nail. Let dry.
- Create the Gradient: On a piece of plastic or a foil surface, paint stripes of your chosen neutral polishes next to each other. For example, lightest to darkest.
- Sponge It On: Gently dab a makeup sponge into the polish stripes, blending the colors slightly. Then, carefully dab the sponge onto your nail, building up the gradient effect. You might need to re-apply polish to your blending surface and sponge a few times to get the opacity you desire.
- Clean Up Edges: Use a small brush dipped in nail polish remover to clean up any polish that got onto your skin.
- Seal the Deal: Once completely dry, apply a layer of top coat to smooth out the texture and add shine.
Pro Tip: For an even softer look, use a matte top coat instead of a shiny one. This truly enhances the cozy, velvety feel of the gradient.
2. The Subtle “Milky” Manicure
This is the epitome of effortless hygge. It’s a sheer, milky white or very subtle off-white polish that looks clean, sophisticated, and oh-so-cozy. It gives the impression of healthy, naturally beautiful nails with a touch of polished perfection.
What You’ll Need:
- Base coat
- Sheer milky white or off-white polish
- Top coat
How to Create It:
- Start with a Clean Canvas: Apply your base coat and let it dry.
- Apply the Milky Polish: Apply 1-3 thin coats of your milky polish. The beauty of this look is its transparency. One coat gives a subtle hint of color, while two or three build up to a creamier, more opaque finish. Let each coat dry completely before applying the next.
- Finish Off: Once you’ve achieved your desired level of opacity, apply your top coat for protection and shine.
Why Hygge? This look is incredibly calming and understated. It’s the nail equivalent of a warm, comforting blanket – simple, beautiful, and deeply satisfying. It pairs perfectly with the calming benefits of mindfulness, further enhancing the hygge experience.
3. The Soft-Focus Flannel Accent Nail
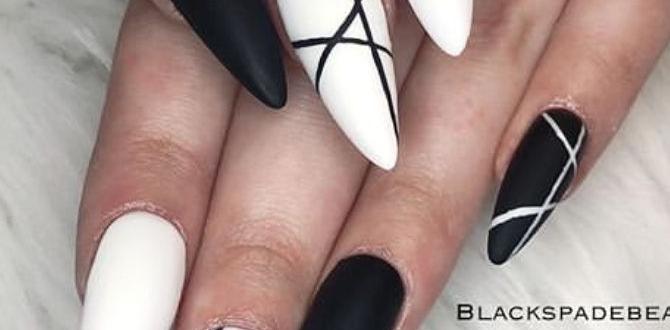
Flannel might seem bold, but we can bring it into the hygge realm with soft colors and a simplified approach. Focus on an accent nail (like your ring finger) for a touch of warmth without being overwhelming.
What You’ll Need:
- Base coat
- A soft, muted neutral polish for the base color (e.g., creamy beige, light gray)
- A slightly darker neutral polish for the lines (e.g., soft brown, muted navy), and white or cream for thinner lines.
- A thin striping brush or a toothpick
- Top coat
How to Create It:
- Base Layer: Apply your base coat, then paint all nails with your chosen soft neutral base color.
- Design Your Accent Nail: On your accent nail, once the base color is dry, use your striping brush or toothpick to paint thin, horizontal and vertical lines. Think of a very simplified flannel pattern – just a few intersecting lines. Keep the lines a bit wavy or imperfect to enhance the cozy, hand-drawn feel.
- Add Dimension (Optional): You can add a few thinner, lighter lines (white or cream) intersecting the darker ones for more depth, again keeping it very minimal.
- Clean Up: Carefully clean up any stray lines with your cleanup brush.
- Seal and Finish: Apply a top coat to all nails, including the accent nail.
Variation: For an even simpler take, skip the lines and just do a matte top coat on your accent nail for a textural contrast.
4. The Warm Earth-Tone Mix-and-Match
Embrace the beauty of nature with a sophisticated palette of warm earth tones. This design is all about effortless coordination and comforting colors.
What You’ll Need:
- Base coat
- 3-4 nail polishes in warm earth tones (think terracotta, caramel, warm olive green, deep rust, creamy beige)
- Top coat
How to Create It:
- Color Selection: Choose shades that complement each other beautifully. The key is to stick within the warm, muted earth-tone family.
- Apply Each Color: Paint each nail a different color. This is where the “mix-and-match” comes in! Ensure all colors are cohesive and feel harmonious together.
- Keep It Simple: No need for extra art here. The beauty is in the thoughtful color combination.
- Seal It: Once dry, apply a top coat to all your nails.
Why it Works: This design feels grounded and organic, bringing a sense of calm and connection to nature. It’s incredibly chic and easy to wear, making it a perfect everyday hygge look.
5. The Creamy White with a Hint of Gold Fleck
A clean, creamy white is a hygge staple, but adding a subtle touch of gold flecks elevates it from simple to sophisticated without losing its cozy essence. It’s like a hint of candlelight on a winter’s night.
What You’ll Need:
- Base coat
- A creamy, opaque white or off-white polish
- A clear polish with fine gold or champagne shimmer/fleck
- Top coat
How to Create It:
- Prep: Apply your base coat.
- White Base: Apply one or two coats of your creamy white polish, letting each dry. Clean up any smudges around the cuticle.
- Add the Sparkle: On one or two accent nails (or all nails for a bit more shine), apply a thin coat of the clear polish with gold flecks. You can layer it over the white, or apply it sparingly for a subtle shimmer.
- Seal the Look: Once the gold fleck polish is dry, finish with a layer of glossy top coat.
Hygge Factor: The creamy white provides the cozy, soft base, while the subtle gold flecks add a touch of understated luxury and warmth, reminiscent of soft, dancing flames.
6. The Gentle Blush and Nude Abstract Swirl
This design is perfect for those who love a touch of artistry but want to keep it soft and simple. Abstract swirls in gentle blush and nude tones feel modern and cozy.
What You’ll Need:
- Base coat
- A soft nude or light pink polish
- A creamy blush or peachy tone polish
- A fine-tip brush or a toothpick
- Top coat
How to Create It:
- Foundation: Apply your base coat, then paint all nails with your soft nude or light pink polish.
- Create the Swirls: Once the base is dry, use your brush or toothpick dipped in the blush/peachy polish to paint gentle, abstract swirls. Think fluid, organic lines. You don’t need perfect circles; just flowing, soft shapes.
- Less is More: Don’t overcomplicate it. A few well-placed swirls are more effective than too many.
- Clean Up Crisply: Use a fine brush and polish remover to neaten the edges of your swirls and clean up your cuticles.
- Lock it In: Apply a layer of top coat to seal your design and add a beautiful finish.
Why it’s Hygge: The soft, blended colors and the free-flowing lines evoke a sense of calm and gentle movement, much like watching clouds drift by or smoke curl from a chimney.
Maintaining Your Hygge Manicure
Keeping your hygge nails looking their best is all about gentle care. Here are a few tips:
- Reapply Top Coat: A fresh layer of top coat every 2-3 days can significantly extend the life of your manicure.
- Moisturize: Keep your cuticles and hands hydrated with a good hand cream and cuticle oil. Dry skin can make even the prettiest manicure look less polished. Consider using the Institute for Hand Health’s tips for effective hand moisturizing.
- Be Gentle: Avoid using your nails as tools (like to scrape or pry things). This is the quickest way to chip or break them.
- Touch-Ups: For minor chips on solid color nails, a tiny bit of polish and a mini brush can work wonders for a quick fix.
Hygge Nail Design FAQs
What are the best nail polish colors for a hygge look?
Opt for warm, muted, and natural tones. Think creamy beiges, soft grays, warm taupes, muted blush pinks, gentle creams, and earthy browns. Avoid neons, overly bright colors, and harsh black.
Do I need special tools for hygge nail designs?
Not at all! Basic nail care tools like files, a good base and top coat, and your chosen polishes are usually enough. For simple designs like gradients or swirls, a makeup sponge or a toothpick can be very helpful.
How long do these hygge nail designs usually last?
With proper application and care (including reapplying top coat every few days), most of these simple designs can last anywhere from 5 to 10 days without chipping. The matte finishes might wear slightly differently than glossy ones.
Can I make the “milky” manicure more opaque if I want?
Absolutely! The beauty of the milky manicure is its versatility. You can apply one thin coat for a sheer, subtle look, or build it up with two to three coats for a creamier, more opaque finish. Experiment to find your perfect level of coverage.
Are these designs suitable for short nails?
Yes, definitely! Hygge nail designs, with their emphasis on simple colors and understated elegance, are fantastic for short nails. The neutral palettes and minimalist approaches look chic and sophisticated on any nail length.
How can I achieve a matte finish for my hygge nails?
The easiest way is to use a matte top coat! Apply it just like a regular top coat over your dried nail polish. It instantly transforms a glossy finish into a soft, velvety matte one, perfectly enhancing the cozy hygge aesthetic.
What kind of cleanup is needed for these designs?
For most simple hygge designs, cleanup is minimal. You’ll primarily want to use a small brush (like a fine-tip liner brush or an old makeup brush) dipped in nail polish remover to carefully remove any polish that has gotten onto your skin around the nail bed. This makes your manicure look neat and professional.
Conclusion: Embrace Your Inner Cozy with Hygge Nails
There you have it! Six stunning and wonderfully achievable hygge nail designs that bring comfort, warmth, and effortless beauty right to your fingertips. Whether you choose the soothing simplicity of the milky manicure,

