Ready to rock K-pop-inspired nails? This guide offers 6 stunning, beginner-friendly K-pop nail designs, from subtle gradients to dazzling abstract art. Get ready to express your inner idol with easy-to-follow steps and quick tips!
Are you looking to spice up your manicure with some K-pop flair? Sometimes, the nail trends you see on your favorite idols can seem a bit intimidating to recreate at home. You might wonder, “Can I really do that?” Well, I’m here to tell you, yes, you absolutely can! K-pop nail art is all about fun, creativity, and expressing yourself. It doesn’t have to be complicated.
This guide is designed for you, whether you’re just starting your nail art journey or you’re a seasoned pro looking for fresh inspiration. We’ll break down six gorgeous K-pop nail designs into simple, achievable steps. No fancy tools required for most of these! Get ready to transform your fingertips into tiny works of art that would make any idol proud. Let’s dive in and discover your next favorite mani!
Why K-Pop Nails Are Having A Moment
K-pop isn’t just about music; it’s a whole visual experience! From dazzling stage outfits to vibrant music videos, the artistry extends to every detail, including the idols’ nails. K-pop nail designs are often bold, experimental, and incredibly trendsetting. They can feature anything from playful characters and intricate patterns to mesmerizing color gradients and dazzling embellishments.
What makes them so appealing? They offer a fantastic way to:
Express your personality: K-pop nails let you showcase your mood, your favorite group, or your personal style.
Boost your confidence: A stunning manicure can make you feel polished and ready to take on anything.
Be creative: Nail art is a low-stakes, high-reward way to experiment with colors and designs.
Stay on-trend: Many nail trends are amplified and popularized by the K-pop scene.
But don’t worry if you think nail art is too difficult. Many of these looks are surprisingly easy to do at home with a few basic supplies. Let’s get started with some gorgeous, achievable designs!
Essential Tools for Your K-Pop Nail Art Toolkit
Before we jump into the designs, let’s make sure you have some basic supplies. You might already have most of these, but it’s always good to check!
Nail Polish: A variety of colors, including your base coat, top coat, and the shades you’ll use for your designs.
Base Coat: Protects your natural nails and helps polish adhere better.
Top Coat: Seals your design and adds a glossy shine.
Nail Polish Remover: For cleaning up mistakes.
Cotton Swabs or Pads: For precise cleanup.
Thin Nail Art Brush (Optional but helpful): For details. You can often use an orangewood stick or a toothpick for simpler designs.
Dotting Tool (Optional): Great for creating dots and small circular designs.
Clear Tape or Washi Tape (Optional): Can be used for creating sharp lines and geometric patterns.
Nail File & Buffer: To shape your nails and smooth the surface.
For the more advanced designs, you might also consider:
Gems/Rhinestones: For a bit of sparkle.
Glitter Polish: For extra shimmer.
Stickers/Decals: Super easy way to add intricate designs.
Remember, you don’t need everything on day one! Start with the basics and add tools as you get more comfortable and adventurous.
6 Stunning K-Pop Nail Designs You Can Recreate
Let’s get to the fun part! Here are six K-pop-inspired nail designs that are perfect for beginners and seasoned artists alike.
Design 1: The Pastel Gradient Dream
This design is a classic for a reason! It’s soft, elegant, and has that dreamy K-pop aesthetic. It looks complicated, but it’s surprisingly easy.
What you’ll need:
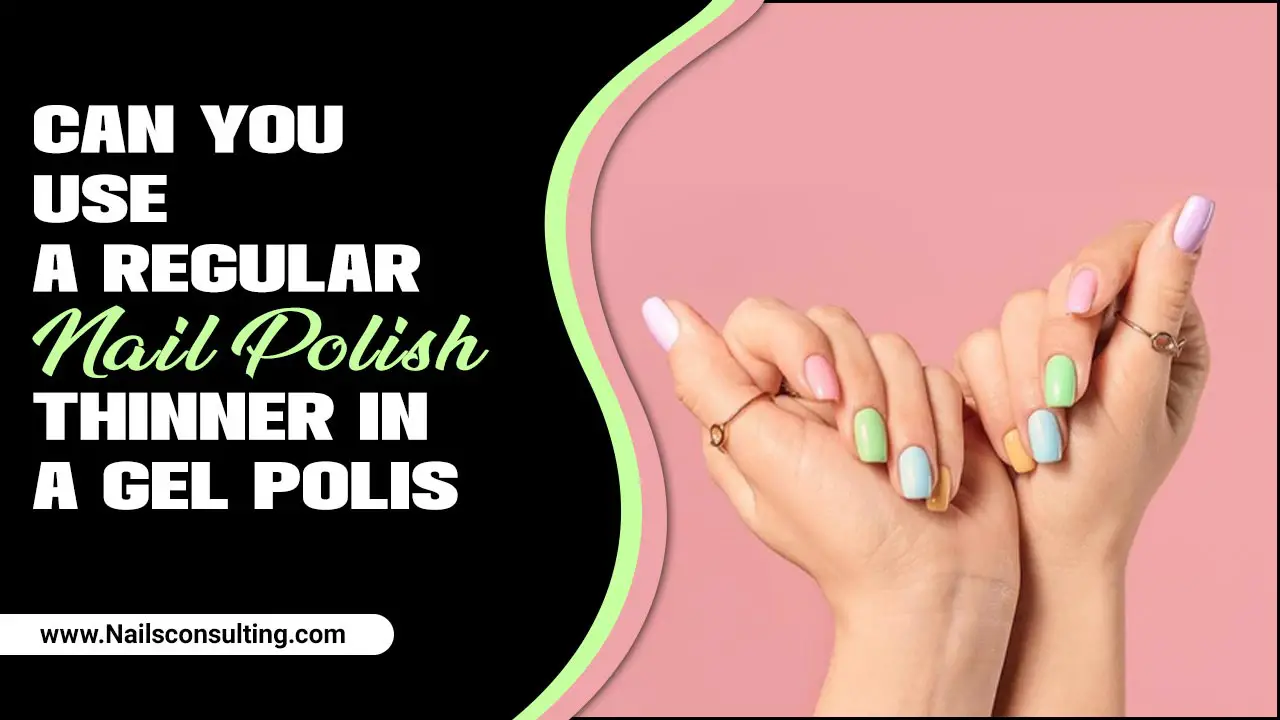
Nail polish in 2-3 pastel shades (e.g., baby pink, lavender, mint green, sky blue)
White nail polish (optional, for brighter effect)
Makeup sponge or a clean cosmetic sponge
Base coat and top coat
Nail polish remover
Tweezers (to hold the sponge can be helpful!)
Step-by-Step Guide:
1. Prep Your Nails: Start with clean, shaped nails. Apply a layer of base coat and let it dry completely.
2. Apply a Base Color (Optional but recommended): For a brighter, more blended effect, paint your nails with a thin layer of white polish. Let it dry.
3. Create the Gradient: On a piece of paper or a plastic bag, paint stripes of your chosen pastel colors next to each other. Don’t worry about neatness!
4. Sponge It On: Lightly dab the makeup sponge onto the polish stripes, picking up the colors. Then, gently dab the sponge onto your nail. You want to press and lift repeatedly, building up the color transition.
5. Repeat for Intensity: Reapply polish to your sponge and dab onto your nail again until you achieve the desired color intensity and blend.
6. Clean Up: Use a cotton swab dipped in nail polish remover to carefully clean up any polish that got on your skin.
7. Seal It In: Once the polish is dry to the touch, apply a generous layer of top coat. This will also help to smooth out any sponging texture.
This gradient technique works beautifully with any color combination. Try matching your idol’s comeback concept colors for an extra special touch!
Design 2: The Chic Glitter Accent Nail
Sometimes, all you need is a touch of sparkle to elevate your look. This design focuses the dazzling glitter on one or two nails, keeping the rest clean and elegant.
What you’ll need:
Your favorite nude, pink, or pastel nail polish
A stunning glitter polish (chunky or fine, your choice!)
Base coat and top coat
Optional: Small nail art brush for details
Step-by-Step Guide:
1. Prep and Base: Apply base coat to all nails and let dry.
2. Color Polish: Paint all nails except your accent nail(s) with your chosen solid color. Let dry.
3. Apply Glitter: On your accent nail(s), apply the glitter polish. You can do a full glitter nail or use a thin brush to create patterns like a glitter French tip or a glitter stripe.
4. Two-Tones (Optional): For a more sophisticated look, apply the solid color polish first, let it dry, then apply the glitter polish strategically. For instance, apply glitter just to the tips for a glitter French manicure, or create a diagonal line of glitter across the nail.
5. Seal: Once the glitter is completely dry, apply a thick layer of top coat to smooth out the glitter texture and seal it in. Multiple top coats might be needed for very chunky glitters.
This is a fantastic way to add some bling without overwhelming your nails. It’s sophisticated and lets your chosen glitter shine!
Design 3: The Cute Character Decals
K-pop idols often have adorable mascots or signature characters. Recreating these using stickers or decals is one of the easiest ways to get intricate designs.
What you’ll need:
Base color polish (your choice!)
Nail art stickers or water decals featuring your favorite K-pop characters, symbols, or motifs
Tweezers
Top coat
Small dish of water (if using water decals)
Step-by-Step Guide:
1. Prep and Polish: Apply base coat and let it dry. Paint all nails with your chosen base color and let them dry completely. A smooth, even surface is key for decals to adhere well.
2. Apply Decals:
Stickers: Peel the sticker carefully with tweezers and place it onto your nail, pressing down gently to ensure it sticks. Smooth out any edges.
Water Decals: Cut out the desired decal. Dip it into a small dish of water for 10-20 seconds until the design loosens from the backing paper. Gently slide the design off the paper and onto your nail. Carefully position it.
3. Smooth and Position: Use tweezers or a damp cotton swab to gently maneuver the decal into the perfect spot. Smooth out any bubbles or wrinkles as best you can.
4. Seal It All: Once your decals are perfectly placed and the polish is dry, apply a generous layer of top coat. Make sure to cover the edges of the decal to prevent peeling. You might need a couple of coats for water decals.
This method is super beginner-friendly and allows for incredibly detailed designs that would be impossible to paint freehand. Search online for “K-pop nail stickers” or “character nail decals” to find tons of options!
Design 4: The Abstract Swirls & Dots
This design is all about playful, artistic flair. Think of it as your nails becoming a mini canvas for spontaneous art. It allows for so much creativity!
What you’ll need:
Base coat and top coat
2-3 contrasting or complementary nail polish colors
Thin nail art brush or toothpick/orangewood stick
Dotting tool (optional)
Step-by-Step Guide:
1. Prep and Base Color: Apply base coat and let it dry. Paint all nails with a solid base color. Let it dry completely. A lighter color often works best as a background.
2. Create Swirls: Dip your thin nail art brush or toothpick into one of your design colors. On a piece of paper, practice making swirls and lines until you feel comfortable. Then, carefully draw abstract swirls and lines onto your nails. Don’t aim for perfection; embrace the free-flowing look!
3. Add Dots: Use a dotting tool or the tip of your toothpick/orangewood stick to add dots in various sizes around your swirls or as a standalone design. You can create patterns with the dots, or just sprinkle them randomly.
4. Layer Colors: You can go back and add more swirls or dots with your other colors, layering them on top of the first ones. Let each color dry a bit before adding the next to avoid muddying.
5. Clean Up and Seal: Carefully clean up any stray polish around your nails. Once everything is completely dry, apply a layer of top coat to seal your artwork.
This look is fantastic because every nail can be unique! It’s inspired by the bold, artistic elements you often see in K-pop graphics and styling. For inspiration, look at K-pop album art or fan art for color and pattern ideas.
Design 5: The Geometric Block Design
Sharp lines and clean shapes are a hallmark of modern design, and K-pop nails aren’t exempt! This design uses tape to create crisp geometric patterns.
What you’ll need:
Base coat and top coat
2-3 contrasting nail polishes
Fine-tip nail art brush (optional)
Clear tape or specialized nail tape (masking tape can work in a pinch, but is thicker)
Small scissors or a craft knife
Step-by-Step Guide:
1. Prep and Base Color: Apply a base coat and let it dry. Apply your first color and let it dry completely. This will be the base color showing through your geometric shapes.
2. Apply Tape: Once the base color is fully dry, carefully apply strips of tape onto your nails. You can create sharp lines, triangles, squares, or stripes. Press the edges down firmly to prevent polish from bleeding underneath.
3. Paint Over Tape: Apply your second polish color over the taped sections. Make sure to cover the tape with an even coat. If you’re using multiple colors, you might need to apply tape again over the newly painted sections before applying the next color. For example, you could paint a whole nail blue, then tape off angled stripes and paint them white.
4. Remove Tape: While the second (or subsequent) color is still slightly wet but not goopy, very carefully peel off the tape. Peeling when completely dry can sometimes lift the polish underneath. Peel at an angle.
5. Touch Up: If there’s any bleeding, use a fine-tip brush dipped in nail polish remover to carefully clean up the lines.
6. Seal: Once everything is dry, apply a generous top coat to protect your design.
This design requires a steady hand but using tape makes it so much more achievable! It gives a modern, sophisticated, and seriously cool vibe.
Design 6: The Subtle French Twist – Color Tips
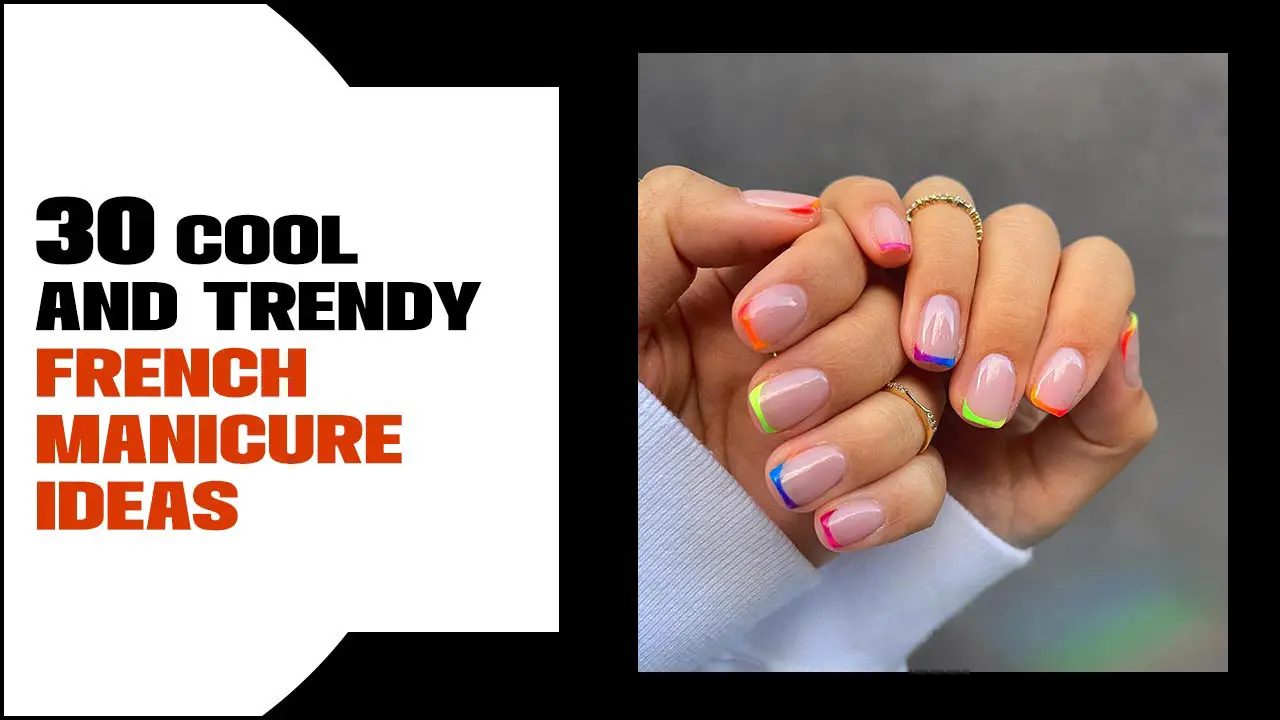
The classic French manicure gets a K-pop makeover with vibrant color tips! This is a fun and fashionable take on a traditional style.
What you’ll need:
Base coat and top coat
Nude or sheer pink polish for the nail bed
Bright, fun nail polish colors for the tips (e.g., neon pink, electric blue, lime green, sunny yellow)
Thin nail art brush or a small stencil/guide sticker (optional)
Nail polish remover and cotton swabs
Step-by-Step Guide:
1. Prep and Base: Apply base coat to all nails and let it dry.
2. Color the Nail Bed: Apply one or two thin coats of your chosen nude or sheer pink polish to the entire nail. Let it dry completely.
3. Create the Color Tip:
Freehand: Using a thin nail art brush, carefully paint a colored line across the tip of your nail. You can make it a sharp smile line or a softer curve. Practice on paper first!
With Aid: You can use small guide stickers or even carefully cut out a curved shape from clear tape to help you create a neat line.
4. Color Choices:
Matching Set: Use the same bright color on all the tips.
Rainbow Effect: Use a different bright color on each nail.
Ombre Tips: Blend two bright colors on the tip for a subtle ombre effect.
5. Clean Up: Use a cotton swab dipped in nail polish remover to sharpen the line between the nude base and the color tip, or clean up any smudges.
6. Seal: Once the color tips are completely dry, apply a generous layer of top coat to seal everything in and add shine.
This is a great way to incorporate bold colors without going for a full nail of bright polish. It’s chic, playful, and totally K-pop!
Tips for Long-Lasting K-Pop Nails
You’ve created a masterpiece – now let’s make it last!
Always Use a Base Coat: This protects your nails from staining and creates a smooth surface for polish. The American Academy of Dermatology recommends using a base coat for this very reason.
Apply Thin Coats: Several thin coats of polish are better than one thick, gloppy coat. This helps with drying time and reduces the chance of smudging.
Don’t Forget the Top Coat: A good top coat is crucial for sealing in your design, adding shine, and preventing chips. Reapply every couple of days if you want to extend your manicure’s life. Brands like Seche Vite are popular for their quick-drying and durable finish.
Cap Your Free Edge: When applying your top coat (and even your color polish), swipe the brush along the very tip (the free edge) of your nail. This seals the edge and helps prevent chips from the tip.
Keep Cuticles Hydrated: Dry, flaky cuticles not only look less polished but can also snag on your nails, potentially damaging your manicure. Apply cuticle oil regularly.
Wear Gloves for Chores: Protecting your nails from harsh chemicals and excessive water is one of the best ways to keep your manicure intact.
Frequently Asked Questions About K-Pop Nail Designs
Q1: Do I need special K-pop nail polish colors?
A: Not at all! While K-pop often features brights, pastels, neons, and metallics, you can use any colors you love. The key is the design and how you apply them. It’s all about expressing your style!
Q2: How do I prevent nail polish from chipping so quickly?
A: Ensure your nails are clean and oil-free before applying polish. Use a good base coat and top coat, and always cap the free edge. Applying thin coats and letting each layer dry properly also helps a lot.
Q3: Can I do these designs if I have short nails?
A: Absolutely! Many K-pop designs, like the pastel gradient or glitter accent, look amazing on short nails. For designs with intricate patterns or decals, shorter nails can even be easier to manage.
Q4: What if I make a mistake while painting?
A: Don’t worry! Keep nail polish remover and cotton swabs handy. Dip the swab in remover to precisely clean up any mistakes around your cuticles or on your skin. For smudges on the nail itself, you might need to carefully touch up with your polish color or top coat once dry.
Q5: Are there K-pop designs that are super simple for absolute beginners?
A: Yes! The Glitter Accent Nail (Design 2) and Character Decals (Design 3) are fantastic for beginners. The Pastel Gradient (Design 1) is also surprisingly easy with practice. These allow you to achieve a big impact

