Kylie Jenner nails are all about bold shapes, eye-catching colors, and daring designs. Discover 6 stunning looks that are surprisingly achievable for beginners, from chic minimalist to dazzling maximalist styles, proving you don’t need to be a pro to rock a celeb-worthy manicure.
Ever scroll through social media and feel a little bit… nail-envy when you see Kylie Jenner’s perfectly manicured hands? You’re not alone! Her nails are practically a celebrity in their own right, always on-trend and undeniably fabulous. But here’s a little secret: achieving that stunning Kylie Jenner vibe isn’t as complicated as it might seem. We’re going to break down some of her most iconic looks into simple steps that any beginner can follow. Get ready to transform your nails and express your own unique style, one polish coat at a time!
Understanding Kylie Jenner’s Nail Style
Kylie Jenner’s nail aesthetic is a masterclass in bold self-expression. It’s not about subtle hints of color; it’s about making a statement. Think vibrant hues, unique shapes, and often, a touch of glam. She’s known for embracing current trends while also setting them. Whether it’s a minimalist matte finish or an explosion of chrome and intricate art, her nails are always a focal point. The beauty of her style lies in its versatility – there’s a Kylie-inspired look for every mood and occasion.
Key Elements of Kylie Jenner’s Nail Designs:
- Bold Shapes: Almond, stiletto, and coffin shapes are frequent favorites, elongating the fingers and adding instant drama.
- Vibrant Colors: From neon brights to deep jewel tones, color is never shy in her designs.
- Matte Finishes: A chic matte topcoat can elevate even the simplest color to high-fashion status.
- Chrome & Metallic Accents: These add a futuristic, high-shine element that’s undeniably modern.
- Minimalist Accents: Sometimes, simplicity is key, with a single line, dot, or subtle French tip.
- 3D Embellishments: Gems, charms, and sculpted details can add a touch of maximalist luxury.
Kylie Jenner Nails: 6 Stunning Designs for Beginners
Ready to get inspired? We’ve chosen 6 popular Kylie Jenner nail designs and simplified them so you can recreate them at home. We’ll cover everything from the base colors to the application techniques. Don’t worry if you’re new to nail art; these steps are designed to be super easy to follow. Let’s dive in!
1. The Chic Monochrome Matte
This look is all about sophisticated simplicity. Kylie often rocks a solid, bold color with a smooth, non-shiny finish. It’s elegant, modern, and surprisingly easy to achieve. Think of it as the little black dress of nail art – always in style.
How to Get the Monochrome Matte Look:
- Prep Your Nails: Start with clean, filed nails. Push back your cuticles gently.
- Apply Base Coat: A good base coat protects your nails and helps polish adhere better. Let it dry completely.
- Choose Your Bold Color: Select a deep, rich shade like black, navy, deep red, or even a sophisticated emerald green. Apply two thin coats for full, even coverage. Allow each coat to dry for a few minutes.
- Apply Matte Top Coat: This is the game-changer! Once your color coats are completely dry, apply a matte topcoat over the entire nail. This instantly transforms the finish from glossy to velvety.
- Cure (if using gel): If you’re using gel polish, cure each layer under a UV/LED lamp according to the product instructions.
2. The Subtle Metallic French Tip
A modern twist on a classic! Instead of white tips, Kylie has been seen with elegant metallic French tips. This adds a hint of shimmer and sophistication without being over the top, making it perfect for everyday wear or special occasions. The beauty of this look is how it elevates a simple mani.
How to Achieve the Metallic French Tip:
- Prep and Base Coat: As always, start with clean, prepped nails and a base coat.
- Apply Base Color: Paint your nails with a sheer nude, milky white, or a soft pastel polish. Apply one or two coats for desired opacity. Let it dry completely.
- Create the Tips: This is where the magic happens! You have a few options:
- Freehand: If you’re feeling confident, use a fine-tipped brush dipped in a metallic polish (gold, silver, or rose gold work beautifully) to carefully draw a curved line across the tip of each nail.
- Stencils: Use French tip guides or nail vinyls. Apply the stencil over your dried base color, paint the metallic polish over the tip area, and carefully peel off the stencil while the polish is still slightly wet.
- Striping Tape: Place a strip of nail tape where you want your tip to end, paint the metallic polish over the tip, and remove the tape once dry.
- Seal with Top Coat: Once the tips are completely dry, apply a clear topcoat to seal everything in and add shine.
3. The Bold Almond Shape with Minimalist Detail
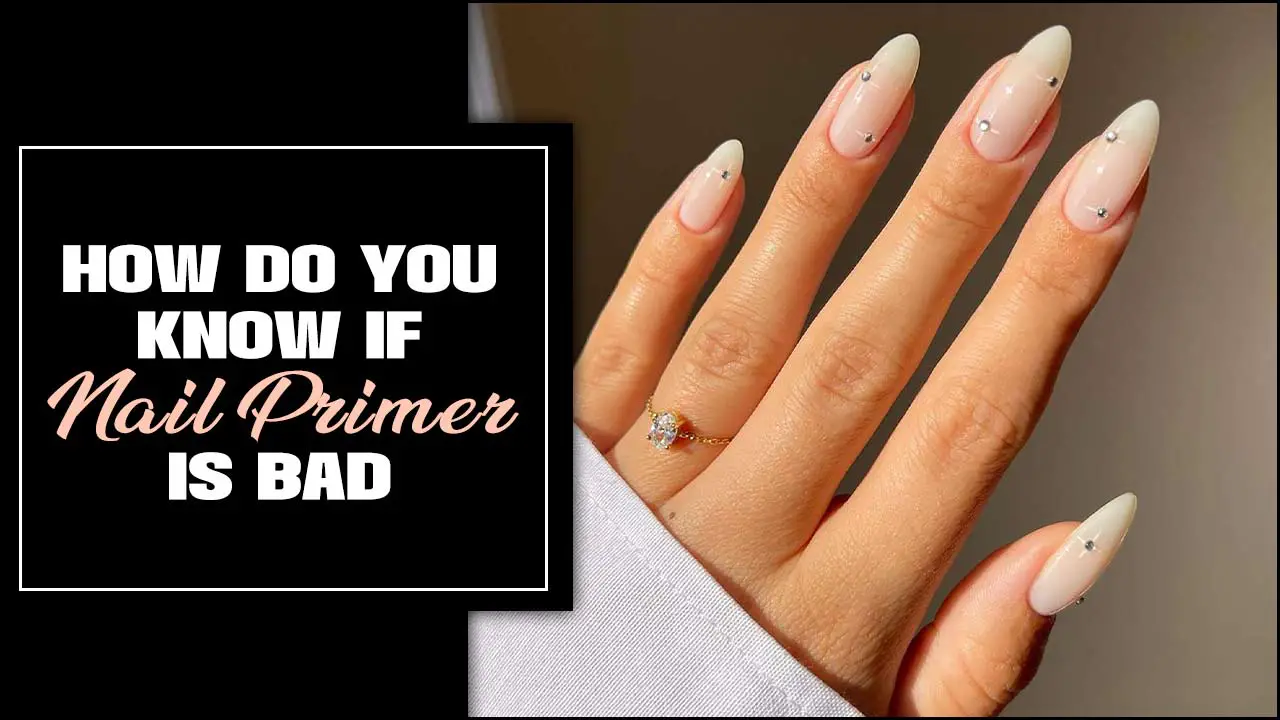
The almond shape is a Kylie staple. It’s elegant and elongates the fingers beautifully. To keep it beginner-friendly, we’ll pair it with a simple, chic detail. Think a single fine line or a tiny dot near the cuticle.
Creating the Almond Shape and Minimalist Design:
- Shape Your Nails: If you have artificial nails or natural nails long enough, file them into an almond shape. This means gently tapering the sides towards a rounded point. If your natural nails aren’t long enough, you can achieve this shape with press-on nails or extensions. For a guide, check out resources on proper nail filing techniques.
- Apply Base and Color: Paint your nails with your chosen base color. Neutrals, soft pastels, or even a deep solid color work well. Ensure smooth, even coats.
- Add the Detail: Once the color is dry, grab a fine-tipped nail art brush or a dotting tool.
- For a Line: Dip your brush in a contrasting color (like black, white, gold, or silver) and draw a single, thin vertical line down the center of the nail, starting from the cuticle and extending towards the tip.
- For a Dot: Use a dotting tool to place a small dot precisely at the base of your nail, right in the center where the cuticle meets the nail.
- Top Coat: Apply a clear topcoat to protect your design and add shine.
4. The Glossy Chrome Finish
Chrome nails have been huge, and Kylie has definitely embraced this trend. They give a futuristic, super-shiny, mirror-like effect that’s incredibly eye-catching. While it might seem complex, with the right products, it’s surprisingly achievable!
DIY Chrome Nails:
- Prep and Base: Clean, file, and apply a base coat to your nails.
- Apply Black Base Color: For most chrome powders, a black base color provides the best depth and vibrancy. Apply two thin coats of black polish and let them dry completely (or cure if using gel).
- Rub in the Chrome Powder: Here’s the key step!
- For Regular Nail Polish: Wait about 10-15 minutes after the second coat of black polish has been applied, so it’s tacky but not fully dry. Then, use a silicone applicator tool or your fingertip to gently rub the chrome powder onto the nail until it achieves a mirrored effect.
- For Gel Polish: Apply a no-wipe gel topcoat over your black gel polish and cure it. Then, use a silicone applicator tool or your fingertip to rub the chrome powder onto the tacky surface until it’s fully mirrored.
- Wipe Away Excess: Gently brush off any excess powder with a soft brush.
- Seal with Top Coat: Apply a durable topcoat to lock in the chrome. If using regular polish, a good quality clear topcoat will work. For gel, use a gel topcoat (a no-wipe one is often best here too).
Helpful tip: You can find chrome powder and applicators easily online or at beauty supply stores. A little goes a long way!
5. The Two-Tone Color Block
This design is all about clean lines and contrasting colors, creating a modern, graphic look. Kylie often plays with bold blocks of color. This version uses two complementary or contrasting shades for a striking effect.
Creating Your Two-Tone Color Block Mani:
- Prep and Base Coat: Cleanse, shape, and apply your base coat.
- Apply First Color: Paint 2-3 nails on each hand with your first chosen color. Let these dry completely.
- Apply Second Color: Paint the remaining nails with a contrasting or complementary second color. Ensure both colors are fully dry before proceeding.
- Create the Block (Optional but Recommended): For a super clean line:
- Use Nail Tape: On nails you want to divide, apply nail striping tape diagonally or horizontally across the nail. Press the tape down firmly to ensure a clean seal.
- Paint the Second Color: Carefully paint over the tape with your second color, covering the section of the nail you want to be that shade.
- Remove Tape: While the second color is still slightly wet, carefully peel off the nail tape. This will reveal a crisp division line.
If you’re feeling brave, you can freehand the division, but tape gives the cleanest results for beginners.
- Top Coat: Once all polish is completely dry, apply a clear topcoat to seal your design and add shine.
6. The Glazed Donut Finish
Inspired by Hailey Bieber’s iconic nails, this trend has also been embraced by Kylie. It’s a pearlescent, ethereal finish that looks like a delicate glaze. It’s subtle but impactful and surprisingly simple to achieve over any base color.
How to Get the Glazed Donut Effect:
- Prep and Base: Start with clean, prepped nails and a base coat.
- Apply Base Color: Choose your desired base color. White, pink nudes, or pastels work wonderfully for this look, but you can experiment with any shade! Apply one or two coats for full coverage. Let it dry completely (or cure if using gel).
- Apply a Chrome/Pearl Powder Topcoat: This is the essential step for the “glaze.”
- For Regular Polish: Wait for your final color coat to be slightly tacky (not fully dry). Using a soft applicator brush or your fingertip, gently dab and rub a pearlescent or iridescent chrome powder all over the nail until it creates a subtle, shimmery, milky finish.
- For Gel Polish: Apply a no-wipe gel topcoat over your colored gel polish and cure it. Then, gently rub the same pearlescent/iridescent powder onto the cured topcoat until you achieve the glazed effect.
- Seal It In: Apply a final clear topcoat (or gel topcoat if you used gel base polish) to protect the finish and add a beautiful shine. If you used a no-wipe gel topcoat for the glaze, you can use a regular or gel topcoat to seal (ensure it’s compatible with your system).
Tools and Products You Might Need
To recreate these stunning Kylie Jenner-inspired nails, having the right tools makes a world of difference. Don’t worry, you don’t need a professional salon’s worth of equipment! Here’s a list of basics that will help you achieve these looks:
| Tool/Product | Description | Why You Need It |
|---|---|---|
| Nail Files & Buffer | Various grits for shaping and smoothing. | Essential for prepping nails and achieving desired shapes like almond. |
| Cuticle Pusher/Remover | To gently push back or remove excess cuticle. | Creates a clean canvas for polish and makes designs look more professional. |
| Base Coat | Clear protective polish. | Prevents staining and helps polish adhere. Crucial for longevity. You can find more information on nail care from resources like the U.S. Food & Drug Administration (FDA) on cosmetic product safety. |
| Top Coat (Glossy & Matte) | Clear protective polish; one with a shiny finish, one with a non-shiny finish. | Seals your design and adds durability. Matte topcoat is key for specific looks. |
| Nail Polish Remover & Cotton Pads | For cleaning up mistakes and removing old polish. | Essential for any manicure. |
| Fine-Tipped Nail Art Brush / Dotting Tool | For detailed lines, dots, or small accents. | Perfect for the minimalist details or French tips. |
| Nail Polish Colors | Your chosen shades! | The foundation for all your designs. |
| Metallic/Chrome/Pearl Powder | Special effect powders. | Necessary for metallic, chrome, and glazed donut finishes. |
| Applicator Tool (Silicone/Sponge) | For applying powders. | Helps to rub powders evenly onto the nail. |
| Nail Stencils / Striping Tape | Adhesive guides for creating clean lines. | Great for precise French tips or color-blocking. |
| UV/LED Lamp (for Gel Polish) | Cures gel polish. | Required if you choose to use gel polishes for longer wear. |
Frequently Asked Questions (FAQs)
Got more questions about channeling your inner Kylie Jenner with your nails? Here are some common beginner queries answered:
Q1: Do I need professional help to get Kylie Jenner-style nails?
Not at all! While nail techs are amazing, many of Kylie’s popular looks, especially the ones we’ve covered, are totally doable at home for beginners with a few key tools and a little patience. Practice makes perfect!
Q2: How can I make my DIY nails last longer?
Key steps include starting with clean, oil-free nails, using a good quality base coat, applying thin, even coats of polish (allowing drying time between layers!), and sealing everything with a durable topcoat. For gel polish, proper curing is essential. Reapplying topcoat every few days can also extend wear.
Q3: What’s the best way to shape my nails into an almond or stiletto?
For natural nails, use a medium-grit file and shape from the sides towards the center point. Always file in one direction to avoid weakening the nail. If your natural nails aren’t long enough, press-on nails or nail extensions are a great way to achieve these dramatic shapes. For precise guidance, many tutorials demonstrate safe filing techniques.
Q4: My chrome powder isn’t sticking or looking mirrored. What am I doing wrong?
This is usually due to the base. For regular polish, the black color needs to be tacky, not bone dry or fully cured. For gel, a reliable no-wipe topcoat is crucial before rubbing the powder. Ensure you’re rubbing the powder in gently but thoroughly until the mirror effect appears, and then seal IMMEDIATELY with a good topcoat.
Q5: Can I mix regular nail polish with gel polish?
It’s generally not recommended to mix regular polish with gel polish within the same layer, especially for the color coats or base/topcoats, as they cure and dry differently and usually aren’t compatible, leading to chipping or lifting. However, you can often use regular polish for nail art details (like striping tape designs) over a cured gel base or topcoat, just be sure to seal it with a compatible gel topcoat.
Q6: How do I remove glitter or chrome polish without damaging my nails?
For glitter or stubborn chrome, soaking is usually best. Soak a cotton ball in nail polish remover (acetone works best for tough finishes), place it on your nail, and wrap it with a small piece of aluminum foil. Leave it for 5-10 minutes to soften the polish, then gently slide it off. Follow up with cuticle oil to rehydrate your nails and skin.
Conclusion
There you have it! Six stunning nail designs inspired by Kylie Jenner that are totally achievable for beginners. From the sleek simplicity of

