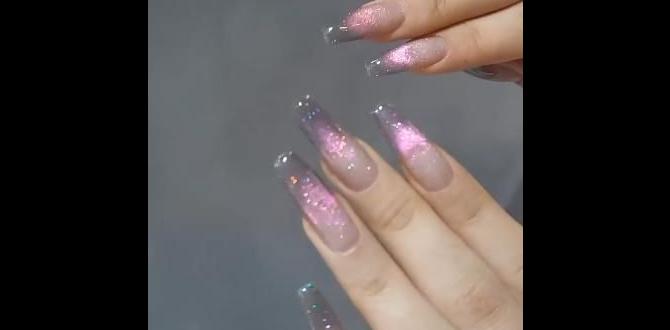
6 Stunning Lace French Nails: Essential Designs for a Chic Manicure
Learn how to create beautiful lace French nails with these 6 essential designs! Perfect for beginners, these tips and ideas will help you achieve elegant and intricate nail art that elevates your look. Get ready to master this classic-meets-modern manicure.
Hey nail lovers! Lisa here from Nailerguy. Are you dreaming of nails that whisper elegance and sophistication? Perhaps you’ve seen those delicate lace patterns on manicures and thought, “That looks amazing, but it’s way too complicated for me!” I totally get it. French manicures are timeless, but adding a touch of lace can feel like a whole new level of artistry. But guess what? It doesn’t have to be hard! With a few simple tricks and some inspiration, you can create stunning lace French nails that will have everyone asking where you got them done. We’re going to break down some easy-to-achieve designs that are perfect for any skill level. Get ready to unleash your inner nail artist – you’ve got this!
Why Lace French Nails Are a Must-Try
Lace French nails are the perfect blend of classic and chic. They take the timeless appeal of a French manicure – that clean, elegant white tip – and add a touch of intricate beauty with delicate lace patterns. Think of it as your favorite little black dress getting a gorgeous lace overlay. It’s subtle yet striking, making it ideal for everything from everyday elegance to special occasions like weddings, parties, or even a sophisticated date night. Plus, the versatility is incredible; you can play with different colors, lace styles, and placement to match your mood and outfit.
Getting Started: Your Lace French Nail Toolkit
Before we dive into the designs, let’s make sure you have the essentials. Don’t worry, you probably have most of these already!
Base Coat: To protect your natural nails and provide a smooth canvas.
Nail Polish Colors: Your chosen base color (think nudes, soft pinks, or even a sheer white) and white (or black, for a striking contrast) for the French tip and lace details.
Top Coat: To seal your design and add a glossy, long-lasting finish protection to your manicure.
Fine-Tipped Nail Art Brush or Dotting Tool: For precise application of lace patterns. A thin striping brush is also fantastic for creating delicate lines.
Optional: Stencils or Lace Stickers: For an even easier lace effect!
Clean-up Brush or Cotton Swabs: With nail polish remover for tidying up any mistakes.
Nail File and Buffer: To shape and prep your nails.
Essential Tools for Precision
| Tool | Description | Best For |
| :———————– | :——————————————————————————————————— | :————————————————- |
| Fine-Tipped Nail Art Brush | A brush with very fine, precise bristles, ideal for drawing intricate details like lace patterns. | Hand-painting delicate lines, dots, and swirls. |
| Dotting Tool | A tool with small metal balls on the end, used for creating dots and small circular designs. | Creating small dots that can form lace patterns. |
| Stripping Tape/Stencils | Adhesive strips or pre-cut lace designs that you apply to the nail to create patterns. | Achieving clean, uniform lace shapes with ease. |
| Thin Cotton Swabs | Smaller than regular cotton swabs, perfect for precise clean-up around the cuticle and nail edges. | Removing excess polish without disturbing art. |
| Magnifying Lamp | A desk lamp with a magnifying lens, helpful for seeing fine details clearly. | For those who need extra visual aid on intricate work. |
6 Stunning Lace French Nail Designs to Try
Now for the fun part! Let’s explore some beautiful and achievable lace French nail designs.
Design 1: Classic White Lace French Tip
This is the quintessential lace French. It keeps the traditional French manicure structure but adds a delicate floral or vine-like lace pattern to the white tip.
How-to:
1. Prep: Start with a clean, shaped nail. Apply your favorite nude or sheer pink base polish and let it dry completely.
2. French Tip: Carefully paint a crisp white French tip. You can use a freehand brush, a nail stamping plate with a French tip design, or even nail guides for a clean line.
3. Lace Detail: Once the white tip is dry (or just tacky, depending on your polish), use your fine-tipped brush and white polish to draw delicate lace patterns over the tip. Think small dots connected by thin lines, tiny swirls, or floral motifs. Keep it light and airy.
4. Seal: Apply a generous coat of clear top coat to seal your design.
Pro Tip: If freehand lace is daunting, use a stencil or sticker! Apply the stencil to the white tip and paint over it with white polish, then carefully peel it away.
Design 2: Black Lace with a Nude Base
For a bolder, more dramatic look, try a black lace design over a soft nude or sheer pink base. This creates a stunning contrast that’s incredibly chic.
How-to:
1. Prep: Apply a nude or sheer pink base and let it dry.
2. French Tip (Optional): You can either opt for a traditional white French tip first and then add black lace, or skip the white tip and go straight for black lace detail on the nude base. If going for lace directly on nude, focus the pattern more towards the tip area.
3. Black Lace: Using black polish and your fine-tipped brush, draw delicate lace patterns. You can mimic the floral patterns from Design 1, or try creating a more geometric, web-like lace. Concentrate the detail on the tips or along the smile line of where a French tip would be.
4. Seal: Add your top coat for a glossy finish.
Perfect For: Evening events or when you want your nails to make a statement.
Design 3: Delicate Dotted Lace
This design uses small dots to create the illusion of lace. It’s a fantastic option for beginners as it’s more forgiving than intricate line work.
How-to:
1. Prep: Apply your base color (nude, pale pink, or even a soft grey).
2. French Tip: Paint your French tip in white or a complementary color.
3. Dotted Lace: Using your dotting tool and white (or contrasting color) polish, place small dots along the edge of your French tip. Connect these dots with very fine lines using your nail art brush, or create clusters of dots that appear like small lace motifs. You can also use the dotting tool to create tiny rosettes or simple patterns by varying the size of the dots.
4. Seal: Finish with a good top coat.
Why it Works: The dots create texture and interest, mimicking the openwork of lace without requiring perfect lines.
Design 4: Lace Accent Nail
Not ready for lace all over? Try this design where only one or two accent nails feature the lace French tip.
How-to:
1. Prep: Apply your base color to all nails.
2. French Tip: Apply French tips to your non-accent nails.
3. Accent Nail: On your chosen accent nail(s), apply the French tip. Then, on this tip, go all out with a more elaborate lace design using your fine brush and contrasting polish. This is your chance to get creative!
4. Seal: Top coat all nails.
Tip: You can also do a full lace pattern on the accent nail, not just the tip. For example, a white base with a detailed black lace pattern covering the whole natural nail.
Design 5: Lace-Inspired French Tips with Color
Who says lace has to be white or black? Experiment with colored lace designs!
How-to:
1. Prep: Apply a neutral base color.
2. French Tip: Apply a classic white or nude French tip.
3. Colored Lace: Use your fine brush and a colored polish (like a soft baby blue, pastel pink, or even a metallic gold) to create lace patterns over the white tip. This adds a unique, modern twist. For example, a white tip with pastel blue lace details or a nude tip with metallic gold swirls.
4. Seal: Apply your top coat.
Consider: Matching the lace color to an outfit or another accent color in your look.
Design 6: Lace Stamping & Full Coverage
For a quick and impressive effect, nail stamping is your best friend. There are many plates with beautiful lace designs.
How-to:
1. Prep: Apply your base color to all nails.
2. Stamping Polish: Apply a good quality stamping polish (often more opaque than regular polish) to your chosen lace design on the stamper plate.
3. Scrape and Stamp: Scrape off excess polish immediately and roll the stamper over the design to pick it up.
4. Transfer: Quickly and gently roll the stamper onto your nail, aiming to cover the tip area or create a lace-like pattern where you desire.
5. French Effect: If you want a French tip look, stamp the lace design right on the tip of your nail. Some plates even have designs specifically shaped for French tips.
6. Seal: Once the stamped design is dry, apply a generous top coat.
External Resource: For more on nail stamping techniques and why specific polishes work best, check out this guide from Nail Stamping Resources . They offer great insights into choosing the right tools and polishes for crisp, clear designs.
Pro Tips for Perfect French Lace Nails
Practice Makes Perfect: Don’t get discouraged if your first attempt isn’t salon-perfect. Keep practicing, and your fine motor skills will improve!
Thin Coats are Key: Apply polish in thin, even layers to avoid bulkiness, especially when layering designs.
Clean Up is Crucial: A clean-up brush dipped in nail polish remover can work wonders for tidying messy edges and creating a polished finish. The American Academy of Dermatology suggests keeping cuticles moisturized, and a clean-up brush helps with precision without drying out the skin. American Academy of Dermatology
Patience with Drying Time: Allow each layer of polish to dry sufficiently before moving to the next step to prevent smudging.
Experiment with Colors: Don’t be afraid to swap out traditional white for black, metallic, pastels, or even jewel tones for your lace patterns.
Maintaining Your Lace French Manicure
To keep your beautiful lace French nails looking stunning for as long as possible:
Wear Gloves: When doing household chores, gardening, or anything that involves prolonged contact with water or harsh chemicals, wear gloves. This protects your polish and your natural nails from damage.
Avoid Using Nails as Tools: Resist the urge to use your nails to open cans, scrape off labels, or any other task that could chip or break them.
Gentle Filing: If you need to shorten your nails, always file in one direction to prevent snags and breakage.
Moisturize: Keep your hands and cuticles hydrated with a good hand cream and cuticle oil. Well-moisturized nails are less prone to breaking.
* Refresh Your Top Coat: Every few days, carefully apply an extra layer of top coat to refresh the shine and add protection.
Frequently Asked Questions About Lace French Nails
Q1: Are lace French nails difficult to do at home?
A1: They can seem intimidating, but with the right tools and techniques, they are very achievable! Designs using dotting tools or lace stickers are particularly beginner-friendly.
Q2: What colors work best for lace French nails?
A2: Classic white lace on a nude or pink base is timeless. Black lace offers a chic contrast. You can also experiment with pastels, jewel tones, or metallics for a unique twist.
Q3: How do I get a clean French tip line?
A3: You can use nail guides or tape for a crisp line. Alternatively, a fine-tipped brush dipped in polish remover can help clean up freehand lines.
Q4: Can I use regular nail polish for lace designs?
A4: Yes, you can! However, polishes specifically designed for nail art or stamping tend to be more pigmented and easier to control for fine details.
Q5: How long does a lace French manicure usually last?
A5: With proper application and care, a well-done lace French manicure can last anywhere from 7 to 14 days without chipping.
Q6: What is the difference between freehand lace and stamped lace?
A6: Freehand lace is painted directly onto the nail using a brush or dotting tool. Stamped lace uses a metal plate with etched designs, a stamper, and a scraping tool to transfer the pattern to the nail for a perfect, repeatable design.
Q7: What kind of polish should I use for the lace detail?
A7: A polish with good pigmentation and a finer consistency is ideal. Nail art polishes or even your regular polish applied with a very fine nail art brush will work well.
Conclusion
And there you have it! Six stunning ways to elevate your French manicure with delicate lace designs. Whether you’re a seasoned nail art pro or just starting your nail journey, these styles offer a beautiful blend of classic elegance and modern flair. Remember, the key is to start simple, practice those essential techniques, and most importantly, have fun with it! Your nails are a canvas for self-expression, so don’t be afraid to experiment with colors, patterns, and placements to create a look that’s uniquely you. So grab your polish, your finest brush, and get ready to create some truly gorgeous lace French nails that will have you feeling confident and chic! Happy polishing!


