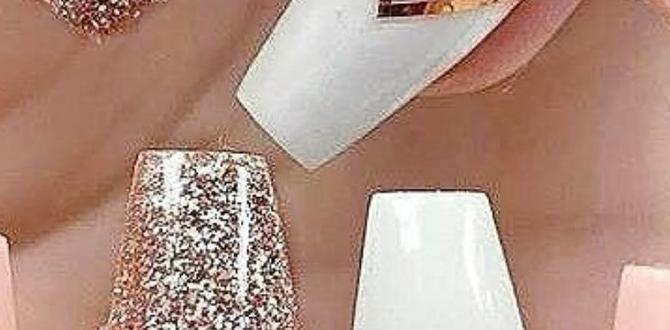
3D nail designs add instant flair and texture to your manicure, transforming your nails into miniature works of art. You can achieve stunning, effortless 3D nail effects at home with the right simple tools and techniques. Let’s explore how to create eye-catching dimensional manicures without needing professional skills.
Hey there, nail lovers! Are you ready to take your nail game from flat to fabulous? Sometimes, a regular polish just doesn’t cut it when you want your nails to truly stand out. We’ve all been there, scrolling through Pinterest or Instagram, mesmerized by those gorgeous, raised designs that seem almost magical. But maybe you’ve thought, “That looks way too tricky for me!” I get it. The world of 3D nail art can seem a little intimidating, but I’m here to show you it’s totally achievable, even for beginners! We’ll break down the essentials and reveal how simple techniques can give you show-stopping results. Get ready to impress yourself and everyone else with your amazing new 3D nail designs!
What Are 3D Nail Designs?
Simply put, 3D nail designs are manicures where elements are raised from the nail surface, creating a dimensional or “three-dimensional” effect. Unlike flat nail art that sits flush with your polish, 3D designs have height, texture, and a tactile quality. Think of delicate flowers, chunky gems, intricate patterns, or even tiny sculptures that pop off your nails. These designs add a unique flair that can range from subtle elegance to bold statements, making your nails truly unforgettable.
Why Try 3D Nail Designs?
There are so many reasons to dive into the world of 3D nail art! For fashion-forward individuals, it’s a fantastic way to express personal style and stay ahead of trends. It’s a creative outlet that allows for incredible customization, letting you match your nails to any outfit or occasion. Plus, the “wow” factor of a well-executed 3D design is undeniable. Gone are the days when intricate nail art was only for salons; with a few key tools and some practice, you can achieve professional-looking results in the comfort of your own home. It’s empowering and fun!
Essential Tools for Effortless 3D Nail Designs
You don’t need a whole professional kit to start creating amazing 3D nail designs. A few key items will set you up for success. Having the right tools makes all the difference in achieving clean, precise, and durable designs. Let’s look at what you’ll need:
- UV/LED Gel Lamp: This is crucial for curing gel products like gel polish, builder gels, and gel paints. It ensures your 3D elements are securely hardened and long-lasting. Think of it as the magic oven for your nail art! You can find compact, affordable options perfect for home use. For more information on light therapy in the context of skin and nail health, you might find resources on safe light practices informative, though commercial lamps are designed for nail curing.
- Gel Polish: The base color for your nails. Having a good selection of colors will open up your design possibilities.
- Builder Gel or Polygel: These thicker gel formulas are perfect for sculpting 3D elements like flowers, leaves, or abstract shapes. They provide structure and can be easily manipulated.
- 3D Gel Paints or Thick Gel Polish: Some brands offer specialized gel paints or very thick gel polishes specifically formulated for creating raised designs. These are often highly pigmented and hold their shape well.
- Rhinestone/Gem Picker Tool: A wax-tipped pencil or a specialized tool that makes picking up tiny rhinestones, pearls, or other embellishments a breeze. No more fumbling with tweezers!
- Detail Brushes: A set of fine-tipped brushes with varying shapes (e.g., round, flat, pointed) is essential for applying gel paints, creating fine lines, and adding details to your 3D elements.
- Dotting Tools: These come with different-sized ball tips and are fantastic for creating small dots, pearls, and also as a base for larger 3D embellishments.
- Nail Art Palette or Mixing Surface: A clean, non-porous surface (like a glass tile, a silicone mat, or a dedicated palette) to mix colors or create small amounts of 3D gel.
- Alcohol Wipes or Lint-Free Wipes: For cleaning brushes and surfaces.
- Top Coat and Base Coat: Standard gel polish essentials for adhesion, protection, and a glossy finish.
- Nail Dehydrator/Primer (Optional but Recommended): Helps ensure gel polish adheres properly to the natural nail, preventing lifting, especially with designs that add extra bulk.
Step-by-Step: Creating Basic 3D Nail Designs
Let’s get our hands dirty and create some beautiful 3D nail art! We’ll start with a simple, yet striking, technique using builder gel or thick gel paint. This method is fantastic for beginners because it’s forgiving and versatile.
Method 1: Sculpting with Builder Gel
This is a wonderful way to create raised elements like petals, leaves, or abstract blobs of color. Builder gel is self-leveling to an extent but holds its shape well enough to build dimension.
- Prep Your Nails: Start with clean, dry nails. Apply your base coat and cure under your UV/LED lamp according to the product instructions. Apply your chosen gel polish color and cure. You might need two coats for full opacity.
- Apply Top Coat (Optional but Recommended for Sculpting): Some artists prefer applying a thin, uncured layer of top coat over the colored gel. This provides a slightly sticky surface for the builder gel to adhere to without completely flattening. Cure this layer.
- Pick Up Builder Gel: Use your brush to pick up a small bead of builder gel. Don’t overload your brush; you can always add more.
- Apply to the Nail: Gently place the bead of builder gel onto the nail surface where you want your 3D element. For a petal, start at the base and gently guide the gel outwards and upwards with your brush.
- Shape Your Design: Use your brush to sculpt the gel into your desired shape. For instance, to create a flower petal, gently push the gel from the center outwards, creating a slight raise. You can create multiple small strokes to build up texture or form. Work efficiently, as builder gel can start to self-level.
- Cure! Once you’re happy with the shape, cure the builder gel under your UV/LED lamp. Ensure you follow the recommended curing time for your specific builder gel.
- Add More Elements (Optional): You can add more sculpted elements to the same nail or move to the next.
- Apply Top Coat: Once all your sculpted 3D elements are cured, apply a generous layer of top coat. Be careful not to flood the uncured gel around your design, but ensure you cap the edges of your 3D elements to seal them in. Cure the top coat.
- Clean Up: Remove any tacky inhibition layer with an alcohol wipe.
Method 2: Using 3D Gel Paints or Thick Gel Polish
These products are designed to create raised designs with less manipulation than builder gel, often resembling thick enamel paint. They are great for detailed patterns, outlines, or smaller embellishments.
- Prep Your Nails: As always, start with a properly prepped nail. Apply base coat and cure. Apply your gel polish color(s) and cure.
- Apply a Thin Base Gel Coat (Optional): Some 3D gel paints adhere best to a slightly tacky surface. Apply a very thin coat of gel top coat (or base coat) and cure, but don’t wipe off the inhibition layer if your product recommends it. Check your specific 3D gel product instructions.
- Apply the 3D Gel Paint: Dip your detail brush into the 3D gel paint. Apply it to the nail in your desired pattern or shape. You can create outlines, dots, swirls, or even small floral motifs. The key is to work with a thicker application to achieve the 3D effect.
- Build Dimension: Don’t be afraid to layer the 3D gel paint slightly to build up height. Work in small sections if needed.
- Cure: Carefully cure the 3D design under your UV/LED lamp. Curing time might be slightly longer for thicker applications, so follow product guidelines.
- Add Details (Optional): You can add smaller 3D elements on top of your cured design or incorporate other nail art materials like tiny gems.
- Apply Top Coat: Carefully apply top coat, ensuring you get into any crevices of your 3D design to secure it fully. You might need a slightly stiffer brush to maneuver the top coat around raised elements without flooding them. Cure the top coat.
- Clean Up: Wipe away the inhibition layer with an alcohol wipe.
Pro Tip: For a balanced look, consider the overall dimension. If you’re creating very high 3D elements, you might want to reserve them for accent nails so they don’t catch on things or feel uncomfortable.
Elevating Your Designs with Embellishments
Once you’ve mastered basic sculpting or painting, it’s time to add extra sparkle! Embellishments are a fantastic way to add instant detail and glamour to your 3D nail designs. They can be used alone or layered on top of sculpted elements.
Types of Embellishments:
- Rhinestones: Available in countless colors, shapes, and sizes. Use a clear gel or builder gel as “glue” to attach them.
- Pearls: Offer a classic, elegant look.
- Cabochons: Flat-backed dome-shaped gems that add a smooth, rounded dimension.
- Charms: Small metal or acrylic pieces that can be attached for a statement look.
- Glitter: Can be embedded into wet gel or mixed with gel medium for a textured effect.
Attaching Embellishments:
The most reliable method for attaching embellishments to gel manicures is by using a clear gel, builder gel, or a strong nail art glue. Apply a small amount of your chosen adhesive to the nail where the embellishment will go, carefully place the embellishment using your picker tool, and then cure it under your UV/LED lamp (if using gel). For nail art glue, follow its specific drying instructions.
External Link: For inspiration on color combinations and design patterns from leading nail artists, you can explore resources from fashion magazines or dedicated nail art communities. Looking at how experienced artists use texture and dimension can spark new ideas.
Common 3D Nail Design Ideas for Beginners
Don’t feel overwhelmed by the possibilities! Start simple and build your confidence. Here are some beginner-friendly design ideas that offer a great introduction to 3D nail art:
1. Raised Dots and Pearls
This is perhaps the easiest 3D design. Using a dotting tool or a fine brush with builder gel or 3D gel paint, simply place dots and cure. You can make them all the same size or vary them for a playful look. Add a single pearl on top of a cured dot for extra elegance.
2. Simple Flower Petals
Using builder gel or a thick gel paint, apply small beads of gel to your nail. Use a brush to gently push and pull the gel into petal shapes, starting from a central point and working outwards. You can arrange them in a circle to form a simple flower. Cure after each petal or after creating a few, depending on the gel’s consistency.
3. Outline Designs
With a fine detail brush and 3D gel paint, trace the outline of a simple shape (like a heart, star, or even just a swirl) on your cured gel polish. Apply a slightly thicker line to achieve a raised effect. Cure and seal with a top coat.
4. Gem Clusters
Apply a few small dots of builder gel or strong nail art glue to your nail. Use your picker tool to place a cluster of rhinestones or pearls onto the gel. Press gently to embed them, then cure if using gel. This is quick, easy, and adds a lot of sparkle.
5. Leaf Motifs
Similar to creating petals, you can sculpt simple leaf shapes using builder gel. A single, well-placed leaf can add a touch of nature-inspired charm.
Materials Comparison: Gel vs. Acrylic for 3D Designs
When you’re creating dimensional nail art, you’ll often encounter two primary sculpting mediums: gel and acrylic. While both can be used for 3D designs, they have distinct characteristics that might make one a better choice for beginners or certain design types.
| Feature | Gel (Builder Gel/3D Gel Paint) | Acrylic (Powder & Liquid) |
|---|---|---|
| Curing | Requires UV/LED lamp to cure and harden. No odor. | Self-cures (hardens on its own) when powder and liquid mix. Has a strong chemical odor. |
| Application | Thicker consistency, self-levels somewhat, can be easier to control for beginners for certain designs. Less forgiving if you make a mistake before curing. | Can be sculpted very quickly into shapes. Requires faster work due to self-curing. Can be more difficult for beginners to control initially. |
| Durability | Very durable and flexible, less prone to chipping. Long-lasting wears well. | Extremely hard and durable. Can be more prone to chipping if not applied correctly. |
| Removal | Requires soaking with acetone or filing off. | Requires soaking with acetone. Filing is also an option. |
| Best For Beginners | Generally considered easier for beginners due to better control and no strong smell. Good for sculpted elements and detailed painting. | Can be more challenging due to quick drying time and odor, but excellent for strong, sharp 3D sculptures when mastered. |
| Cost | Initial lamp cost, but gel products can be cost-effective. | Requires powder and liquid, which are consumable. Can be cost-effective over time. |
For most beginners looking to ease into 3D nail design, working with gels (builder gels and 3D gel paints) is often recommended. You have more time to manipulate the product before it cures under the lamp, and there’s no strong chemical smell.
Maintaining Your 3D Nail Designs
Once you’ve created a stunning 3D masterpiece, you’ll want it to last! Proper care ensures your designs stay intact and beautiful.
- Be Gentle: Avoid picking or prying at your 3D elements. Try not to use your nails to open things or scrape surfaces.
- Top Coat is Your Friend: Ensure your entire nail, including the edges of your 3D designs, is well-sealed with a good quality gel top coat. This helps protect the design and prevents lifting.
- Moisturize: Keep your cuticles and the skin around your nails moisturized with cuticle oil. Dry skin can sometimes interfere with the longevity of gel enhancements.
- Avoid Harsh Chemicals: Prolonged exposure to harsh cleaning chemicals or excessive acetone can weaken the gel and adhesives, potentially causing designs to lift or damage. Wear gloves when doing chores.
- File with Care: If you need to shorten your nails, file gently and avoid filing the actual 3D embellishments if possible.
Troubleshooting Common Issues
Even with the best intentions, you might run into a few snags. Here’s how to handle them:
- Design Falling Off: This usually means the adhesion wasn’t strong enough. Ensure your nail surface was properly prepped (cleaned, dehydrated, and primed if necessary), and you used enough of your gel adhesive/builder gel. Make sure you’re curing for the recommended time.
- Design Not Curing Hard: Over-application of product without adequate curing time is the usual culprit. Thicker applications of gel need more time under the lamp. Ensure your UV/LED lamp is functioning correctly and that the wavelength is appropriate for your gel products. (Learn more about UV/LED lamp best practices from reputable beauty supply manufacturers.)
- Bubbles in the Design: This can happen if you’re working with gel too aggressively or if the product is too thick. Try working more gently or even warming the gel slightly (e.g., by rolling the bottle between your hands) to make it more pliable.
- Design Looks Flat: You might not be using enough product to create true dimension. Don’t be afraid to build up layers or use a slightly larger bead of builder gel.
- Top Coat Flooding the Design: This often happens with very intricate or raised designs. Try using a slightly stiffer brush or a more viscous top coat that won’t run as easily. Apply top coat in smaller sections, carefully painting around the raised elements, and then


