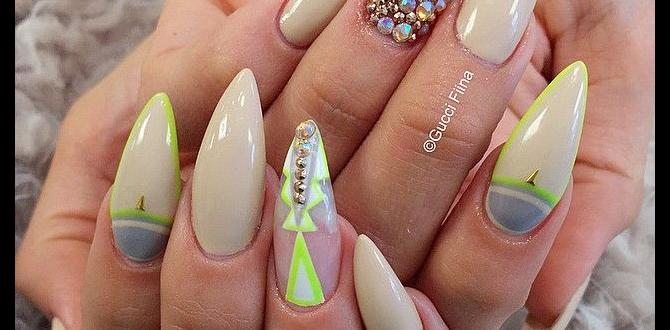
Mastering 3D nail design with builder gel is achievable for beginners! This guide breaks down essential techniques, tools, and tips to help you create stunning, sculpted nail art with confidence. You’ll learn to build dimension and texture, transforming your nails into tiny masterpieces.
Dreaming of nails that pop with beautiful, sculpted designs? 3D nail art using builder gel can seem intimidating, especially when you’re just starting out. You see those gorgeous raised flowers, intricate patterns, and stunning embellishments, and you think, “How do they DO that?” It’s easy to feel a little overwhelmed by the thought of creating dimension on your nails. But guess what? It’s totally within your reach! With the right techniques and a little practice, you can create incredible 3D effects that will make your manicure shine. Get ready to unlock your inner nail artist!
This guide is designed to make learning 3D nail design with builder gel fun and easy. We’ll walk you through everything you need to know, from the basic supplies to the step-by-step process. No more feeling lost – we’re here to help you build your skills and confidence, one sculpted nail at a time. Let’s dive into the exciting world of 3D nail art!
What is Builder Gel and Why Use It for 3D Designs?
Builder gel is a fantastic product for creating 3D nail designs because of its unique properties. Unlike regular gel polish, builder gel is thicker and more viscous. This consistency is key! It allows you to sculpt and build up material on the nail surface, creating dimension and definition that you just can’t achieve with thinner polishes. Think of it like modeling clay for your nails – you can shape it, mold it, and create three-dimensional art!
Builder gels are typically cured under a UV or LED lamp, just like gel polish. Once cured, they provide a strong, durable overlay that can hold intricate designs. This means your amazing 3D creations will last, resisting chipping and wear.
Benefits of Builder Gel for 3D Nail Art:
- Sculptability: Its thick consistency makes it perfect for building up shapes and textures.
- Durability: Creates a strong, long-lasting nail enhancement that protects your design.
- Versatility: Can be used for full nail overlays, extensions, and intricate 3D embellishments.
- Self-Leveling (to an extent): While you sculpt, some builder gels have a natural flow that helps create smooth surfaces.
- Less Odor: Compared to acrylics, builder gels generally have a minimal odor.
Essential Tools and Materials for 3D Builder Gel Designs
Before we get our hands (and nails!) dirty, let’s gather the must-have tools. Having the right equipment makes all the difference when you’re starting out with 3D nail design. Don’t worry if it seems like a lot; you can build your collection over time. For now, focus on the essentials!
The Builder Gel Itself
You’ll need a builder gel specifically formulated for sculpting. These come in various viscosities, colors (clear, pink, nude, or even colored), and finishes. For beginners, a medium-viscosity clear or milky builder gel is often a great starting point. Brands like Aprés Gel-X, Kiara Sky, or Beetles offer quality options. Always choose a reputable brand.
For a deeper dive into nail enhancement materials, checking resources like the NailTech Industry website can provide useful background information on various nail enhancement materials and their properties.
Your Curing Lamp
A UV or LED nail lamp is absolutely crucial. Builder gel needs to be cured under a lamp to harden. Most modern lamps are LED and cure gels in 30-60 seconds. Make sure your lamp is powerful enough for builder gel.
Application Brushes
This is where the magic happens! You’ll need specific brushes to manipulate the builder gel:
- Gel Brush: A flat, synthetic brush is essential for picking up, placing, and smoothing the builder gel onto the nail. Look for one with a medium firmness.
- Detailer/3D Brush: A finer brush with a pointed tip can be helpful for adding finer details, drawing lines, or creating delicate petals.
- Non-Wipe Top Coat Brush: Sometimes, embedding small beads or charms into a non-wipe top coat is easier with a dedicated brush to avoid contaminating your main bottle.
Essential Prep and Application Supplies
These items ensure a clean canvas and proper application:
- Nail File & Buffer: For shaping the natural nail and gently buffing the surface to create adhesion.
- Cuticle Pusher & Nippers: To gently push back and trim excess cuticle for a clean nail bed.
- Alcohol Wipes or Cleanser: To dehydrate the nail plate and remove dust and oils.
- Primer/Bonding Agent: Optional, but highly recommended for builder gel to ensure maximum adhesion and prevent lifting.
- Base Coat: A good quality gel base coat is always the foundation.
- Lint-Free Wipes: For cleaning brushes and wiping the nail.
Tools for Sculpting and Detailing
These help you create those dimensional effects:
- Dotting Tools: Can be used to create dots, petals, or small raised elements.
- Tweezers: For picking up small rhinestones, charms, or adding tiny 3D elements.
- Small Silicone Tools/Orange Wood Sticks: Useful for smoothing, shaping, and lifting gel.
- Alcohol or Gel Slip Solution: Dipping your brush in a small amount of alcohol or a dedicated gel slip solution can help prevent the gel from sticking to your brush and make it easier to move and sculpt.
Preparing Your Nails for 3D Builder Gel Designs
Just like any nail art, a proper foundation is key to a long-lasting and beautiful result. Preparing your nails correctly ensures your builder gel adheres well and your designs stay put. Think of it as prepping a canvas before painting!
Step-by-Step Nail Prep:
- Cleanse and Sanitize: Start by washing your hands thoroughly and then apply a nail cleanser or rubbing alcohol to the nail plate to remove any oils or residue.
- Push Back Cuticles: Gently push back your cuticles using a cuticle pusher. For a cleaner look and better adhesion, you can carefully trim any dead skin around the cuticle line with nippers, but be very gentle.
- Shape the Nails: File your natural nails to your desired shape. If you’re planning on using builder gel to add length or structure, ensure the free edge isn’t too long before applying the product, or you might be working with a template or tips.
- Buff the Surface: Lightly buff the entire surface of the nail plate with a fine-grit buffer (around 180-240 grit). This creates a slightly rough surface that the gel can grip onto. Be gentle; you’re not trying to thin your natural nail, just create a bit of ‘tooth’ for the gel.
- Remove Dust: Use a soft brush to gently brush away all the dust from filing and buffing from your nails and the surrounding skin.
- Dehydrate and Prime: Apply a nail dehydrator to remove any remaining moisture. If your builder gel system recommends it, follow up with a nail primer or bonding agent, especially on the free edge and around the cuticle area.
- Apply Base Coat: Apply a thin, even layer of your gel base coat and CURE it under your lamp according to the manufacturer’s instructions. This creates a protective layer and ensures the builder gel adheres well.
Essential Builder Gel Techniques for 3D Nail Art
Now for the fun part – sculpting! Applying builder gel for 3D effects involves understanding how to control the product and build it up strategically. Here are the core techniques to get you started:
1. The “Bead” Method for Building Shapes
This is the most fundamental technique. You place small “beads” of builder gel onto the nail and then manipulate them into your desired shape.
How to do it:
- Pick Up a Bead: Dip your gel brush into the builder gel pot. Aim to pick up a bead of gel the size you need for the specific part of your design (e.g., a small bead for a petal, a larger one for a base).
- Place the Bead: Carefully place the bead of gel onto the nail where you want your design to start.
- Roll and Pat: Using the side or tip of your brush, gently “roll” or “pat” the bead, encouraging it to spread and take the shape you want. Don’t push too hard, especially with thicker gels.
- Add More Beads as Needed: For larger or more complex elements, you’ll place multiple beads, blending them together as you go. Work in small sections.
- Smooth and Refine: Once you have the basic shape, use your brush with a tiny bit of alcohol or slip solution on it (this helps the gel not stick to the brush) to gently smooth out any rough edges or textures. You can also use a clean brush to refine lines.
- CURE: Once you are happy with the shape, cure the gel completely under your lamp.
2. Creating Textured Surfaces
Builder gel is excellent for creating rich textures that add depth and visual interest.
Techniques:
- Swirls and Curls: Use your brush to gently drag and swirl the gel to create raised patterns. You can create simple swooshes or more intricate curled designs.
- Dotting for Dimension: Apply small dots of gel and then use a tool (like a dotting tool or the tip of your brush) to gently press and spread them, creating raised floral patterns or textured backgrounds.
- Marbling Effects: While builder gel is thick, you can achieve a subtle marbling by placing two different colored builder gels next to each other and gently swirling them with a fine brush.
3. Sculpting Flowers and Petals
This is a popular application of 3D builder gel. The key is to build up layers and shapes.
How to sculpt a simple petal:
- Place a Bead: Start with a bead of builder gel at the base of where you want your petal to be.
- Shape the Base: Gently press and spread the bead slightly to form the initial base of the petal.
- Create the Tip: Pick up a smaller bead and place it at the outer edge of the petal shape. Use the tip of your brush to gently pull and taper it, creating a delicate outer edge.
- Add Veins (Optional): With a finer brush, you can draw delicate lines to mimic vein patterns.
- Layering: For fuller flowers, layer petals, ensuring each one is cured before adding the next, or build them up to overlap slightly.
- CURE: Cure each petal or section thoroughly.
4. Embedding Elements
Builder gel can also be used to securely embed embellishments like rhinestones, pearls, or even small 3D charms.
How to embed:
- Apply a Base: Apply a layer of builder gel where you want to place your embellishment. Don’t cure it yet.
- Place the Embellishment: Using tweezers, carefully place your rhinestone or charm into the uncured gel.
- Cover Carefully: Then, use your gel brush to carefully apply more builder gel around and over the embellishment, ensuring it’s fully encased by the gel. This secures it and prevents it from snagging. Don’t flood the stone with gel, just build up enough to cover its sides and base.
- CURE: Cure the entire nail with the embedded elements.
Common 3D Nail Designs to Try
Once you’ve got the basic techniques down, you can start experimenting with specific designs. Here are a few beginner-friendly ideas that showcase the versatility of builder gel:
1. Simple Raised Flowers
Perfect for practicing petal sculpting. You can create little buds or open blooms. Think about using different colors of builder gel for variety!
Steps:
- Apply base coat and cure.
- Place a small bead for the center of the flower.
- Sculpt 3-5 small petals around the center, curing each as you go or curing after 2-3 petals are placed.
- Add a tiny bead of a contrasting color for the center detail. Cure.
2. Elegant Swirls and Curls
This design adds subtle texture and sophistication. It’s great for creating elegant lines and movement.
Steps:
- Apply base coat and cure.
- Using your gel brush, place a bead of builder gel on the nail.
- Gently drag and swirl the gel to create a flowing pattern. You can use light pressure to create thinner swirls or more pressure for thicker ones.
- Refine the edges with your brush.
- CURE.
3. Textured Abstract Designs
This is where you can really let your creativity flow! Combine different techniques like dots, lines, and swirls to create unique patterns.
Steps:
- Start with a cured base coat and an optional color gel polish.
- Place random beads of builder gel around the nail.
- Use your brush to connect them, create textures, or smooth them out into an abstract shape.
- You can add smaller dots or lines on top of the cured builder gel for added dimension.
- CURE.
4. Rhinestone and Pearl Embellishments
Using builder gel to secure embellishments ensures they won’t fall off easily and gives a professional finish.
Steps:
- Apply base coat and cure.
- Apply a thin layer of builder gel where you want to place your stones or pearls.
- Place your embellishments using tweezers.
- Carefully apply more builder gel around and over the edges of the embellishments to secure them.
- CURE.
Tips for Success with 3D Builder Gel Designs
Working with builder gel for 3D art is a skill that improves with practice. Here are some insider tips to help you achieve amazing results and avoid common pitfalls:
Consistency is Key
Builder gels vary in thickness. Get to know your specific product. Thicker gels are easier to control for sculpting, while thinner ones can be used for finer details or smoothing.
Work in Small Sections
Don’t try to place one giant bead and sculpt your entire design. Work with smaller “beads” of gel. Place, shape, and cure in stages. This gives you more control and prevents the gel from spreading too much before you can work with it.
Master Your Brush
Your gel brush is your best friend. Use the flat side to spread and smooth, the tip to define edges, and the corner to pick up smaller amounts of gel. If the gel starts sticking too much, dip your brush very lightly into alcohol or slip solution. Too much liquid will dilute the gel and weaken it.
Don’t Overwork the Gel
Builder gel can become runny if you manipulate it too much, especially in warmer temperatures. Work efficiently and decisively. If you make a mistake, gently wipe it off with a lint-free wipe soaked in alcohol but avoid over-saturating the nail.
Cure Thoroughly
Always cure each layer of builder gel as per the manufacturer’s instructions. Incomplete curing can lead to lifting, chipping, or the design losing its shape. If you’re building thick designs, you might need to cure for slightly longer or in shorter bursts to prevent heat spikes (the “ouch” factor).
Keep Your Workspace Clean
Wipe your brushes clean with alcohol or slip solution after each use and after cleaning up mistakes. Keep your pots of gel free from dust and debris.
Practice on Nail Tips
Before attempting 3D designs on clients or your own nails, practice on nail tips. This allows you to experiment with different techniques and get a feel for the product without the pressure.
Consider Builder Gel Viscosity
There are different viscosities of builder gel:
| Viscosity | Characteristics | Best For | Beginner Friendliness |
|---|

