Learn how to create stunning 3D nail designs! We’re sharing essential professional secrets, from choosing the right materials to mastering application techniques. Get ready to elevate your nail art game with easy-to-follow tips and inspiring ideas perfect for beginners.
Dreaming of nails that pop with dimension and wow-worthy details? 3D nail designs might seem like they’re just for the pros, but they’re more achievable than you think! Many of us admire those intricate flowers, cute characters, or glamorous gems that seem to leap off the nail. It’s easy to feel a little intimidated by the idea of creating such detailed art. But don’t worry, turning your nails into tiny masterpieces is within reach. This guide breaks down the professional secrets into simple, fun steps. We’ll show you exactly what you need and how to use it, so you can start creating your own fabulous 3D nail looks today. Get ready to unleash your inner artist!
Exploring the World of 3D Nail Design
3D nail design is all about adding elements that have height and depth to your manicure, making them stand out from the flat surface of the nail. Think of it as sculpting miniature art pieces right on your fingertips! This can range from delicate floral patterns and intricate lace details to playful characters and sparkling gems. The magic of 3D nail art lies in its ability to draw attention and express your unique personality in a bold, artistic way. It’s a fantastic way to make a statement and show off your creativity.
The beauty of 3D nail art is its versatility. Whether you love subtle elegance or a more dramatic flair, there’s a 3D design for every occasion and personal style. For beginners, starting with simpler elements can build confidence and skill. As you get more comfortable, you can explore more complex designs. Professional designers often use a combination of techniques and tools to achieve stunning, durable 3D effects. The key is to understand the materials and how they interact with the nail.
In the professional world, 3D nail design is a highly sought-after skill. It allows nail technicians to offer unique, custom services that set them apart. Clients love the opportunity to have truly personalized nail art that reflects their individual taste. From bridal manicures with tiny pearls to edgy designs featuring metal studs, the possibilities are endless. Mastering these techniques can open up exciting new avenues for nail artists, whether as a hobby or a professional pursuit. Today, we’re going to demystify these techniques and share the secrets that make 3D nail designs so special and long-lasting.
Essential Tools of the 3D Nail Art Trade
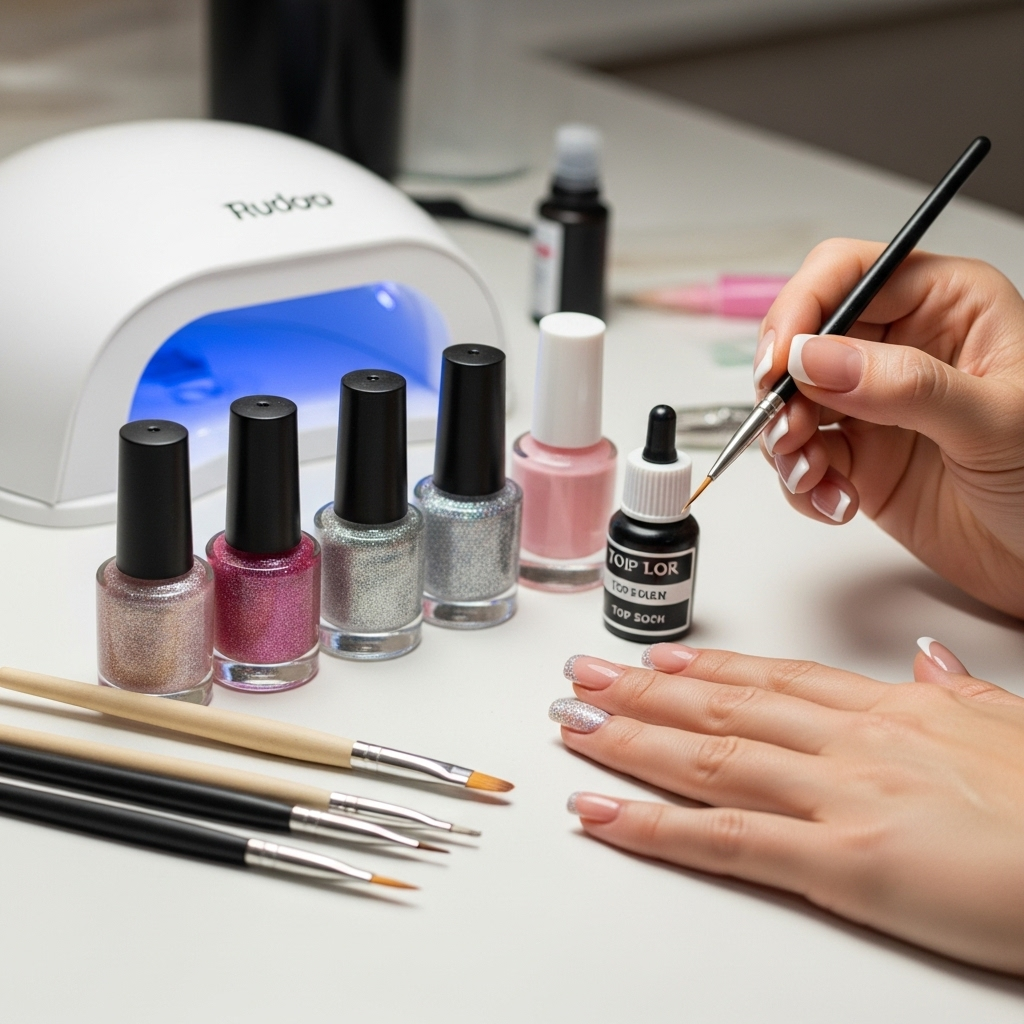
To create amazing 3D nail designs, having the right tools is super important. These aren’t overly complicated, and many are similar to what you might already use for basic nail art. Having them on hand will make the process much smoother and help you achieve those professional-looking results. Let’s dive into what you’ll need:
The Must-Have Kit:
- 3D Acrylic Powder and Monomer Liquid: This is the classic combination for creating sculpted 3D elements. You’ll typically use a small brush to pick up a bead of acrylic and sculpt it directly onto the nail. It dries hard, allowing for durable and defined shapes.
- UV/LED Gel for 3D Sculpting: Similar to acrylics, but cured under a UV or LED lamp. This offers a slightly different feel during application and can provide a super glossy finish. Many gels are specifically designed for creating texture and dimension.
- Nail Art Brushes: You’ll want a variety! A fine-tipped brush is perfect for intricate details and sharp lines. A slightly thicker, pointed brush is great for picking up product (like acrylic beads) and shaping larger elements.
- Gel Polish or Regular Nail Polish: These will be your base and background colors.
- Top Coat & Base Coat: Essential for protecting your nail, ensuring polish longevity, and adding a final glossy finish. A good top coat is crucial for sealing in your 3D designs.
- Nail Files and Buffers: For shaping the natural nail and gently smoothing any edges of your 3D elements to ensure a comfortable fit.
- Tweezers: Incredibly useful for picking up tiny embellishments like rhinestones, pearls, or glitter.
- Glue or Sticky Base: For attaching larger embellishments or if your 3D element needs extra security.
- Adhesive Remover (for gels): If you’re working with gel art, you might need a special remover to clean up mistakes or residual stickiness.
- Orange Wood Sticks or Cuticle Pushers: Handy for manipulating small pieces or cleaning up around the nail edge.
When you’re starting out, you don’t need every single brush or every type of acrylic. Begin with a basic set and the materials you feel drawn to experimenting with first. Many artists swear by the versatility of acrylics for classic 3D sculpting, while others love the flexibility and quick application of gels. The material choice often comes down to personal preference and the specific look you want to achieve.
Professional Secret #1: Choosing the Right Medium
One of the most significant decisions for 3D nail art is the medium you use. Professionals carefully select their medium based on the desired effect, durability, and application time. For beginners, understanding these options will help you choose what’s best to start with.
Acrylic vs. Gel for 3D Designs
The two most popular choices for 3D nail art are acrylic and UV/LED gel. Each has its unique properties:
| Feature | Acrylics (Powder & Liquid) | UV/LED Gels (Sculpting Gels) |
|---|---|---|
| Application Feel | Dries airborne; can be slightly more forgiving for beginners as you can manipulate it until it sets. | Cures under UV/LED lamp; offers a slightly more viscous texture that can be great for building height and shape. |
| Drying/Curing Time | Dries within minutes without a lamp. | Requires curing under a UV/LED lamp (typically 30-120 seconds per layer). |
| Durability | Very durable and hard, excellent for creating strong, raised elements. | Durable and flexible, can be slightly less prone to chipping if applied correctly. |
| Sculpting Ability | Excellent for fine details and precise sculpting. | Great for creating smooth, consistent shapes and building volume. |
| Removability | Removed with acetone. | Typically requires filing off or soaking with a gel remover. |
| Beginner Friendliness | Often considered more beginner-friendly for sculpting due to the working time. | Can have a learning curve with curing times and precise placement. |
Professional Tip: Many artists start with acrylics for learning basic sculpting techniques because you have more control over the setting time. Once you’re comfortable, experimenting with 3D gels can open up new possibilities, especially for achieving a super-glossy, seamless finish that’s built directly into the gel structure.
Other Materials to Consider:
- 3D Gels with Pigment: These come in various colors, allowing you to sculpt in color without needing to paint afterwards.
- Builder Gels: Thicker gels that can be used to build structure and create subtle 3D effects, especially when combined with embellishments.
- Press-On 3D Elements: For the absolute beginner or for quick looks, pre-made 3D charms and embellishments are available and can be glued onto the nail.
Professional Secret #2: The Art of Sculpting
Sculpting is the heart of 3D nail art. It’s where you shape and build your designs using acrylic or gel. This is where practice truly makes perfect, but understanding the technique will get you there faster.
Sculpting with Acrylics:
- Prepare Your Nail: Apply your base coat and desired color polish, and cure if necessary. Ensure the nail surface is smooth.
- Mix Your Bead: Dip your brush in monomer liquid, then touch it to your acrylic powder. You want to create a perfectly formed bead that’s not too wet or too dry. It should be shiny and hold its shape.
- Place and Shape: Pick up the bead with your brush and place it onto the nail where you want your 3D element to start. Use the side and tip of your brush to gently pat, press, and shape the acrylic. Work quickly but deliberately, as the acrylic will start to set.
- Build Your Design: Add more beads as needed, blending them together to create petals, leaves, bows, or any shape you envision. For intricate details, use smaller beads and finer brush strokes.
- Refine and File: Once fully set, you can gently refine the shape with a fine nail file or a buffer, ensuring there are no sharp edges.
Sculpting with 3D Gels:
- Prepare Your Nail: Apply your base coat and color, curing thoroughly. Ensure the surface is non-tacky or use a gel top coat and wipe off the inhibition layer (the sticky residue) if your sculpting gel requires it. Some 3D gels work best on a slightly tacky surface.
- Apply the Gel: Use a detail brush or a specialized tool to pick up a small amount of 3D gel. Apply it to the nail where you want your design.
- Shape and Create: Use your brush or tool to sculpt the gel into your desired shape. You can create smooth, rounded forms or sharp, defined edges before curing.
- Cure: Place the nail under your UV/LED lamp for the recommended time.
- Build Layers: For taller designs, you may need to cure in layers, adding more gel and curing again.
Professional Secret: The key to seamless sculpting is controlling the amount of product on your brush and “reading” the product’s consistency. For acrylics, practice getting the perfect bead. For gels, understanding how much pressure to apply and how it flows is crucial. Don’t be afraid to experiment on practice tips first!
Professional Secret #3: Incorporating Embellishments
While sculpting creates amazing dimension, embellishments add that extra sparkle and detail that makes 3D designs truly pop. Think rhinestones, pearls, glitter, charms, and even tiny dried flowers.
Attaching Embellishments Securely:
- Placement is Key: Before you glue anything down, plan where your embellishments will go. Sometimes, placing pearls along the edge of a sculpted flower or a tiny gem at the center can elevate the design.
- Use the Right Adhesive:
- Gems & Rhinestones: A strong nail glue is often sufficient, but for maximum longevity, especially on 3D sculpted elements, place them while the gel is still wet before curing, or use a rhinestone gel adhesive.
- Pearls & Studs: These can also be secured with nail glue or a specialized adhesive gel.
- Charms: Larger charms might need a generous dab of strong nail glue or even a bit of acrylic or builder gel brushed around the edges for extra hold.
- Don’t Overdo It: While it’s tempting to load up on bling, remember that balance is important. Too many embellishments can make a design look cluttered and can also be uncomfortable to wear.
- Seal with Top Coat (Carefully!): Once your embellishments are securely in place and any adhesive has cured, you can carefully apply a top coat to seal them. For larger 3D elements or gems with deep facets, avoid flooding the entire area with top coat, as it can dull their sparkle or fill in the detail. Instead, use a fine brush to apply top coat around the base of the embellishment. For flat-backed rhinestones, you can often top coat over them, but test a small area first.
Professional Secret: For a seamless look and to ensure your embellishments don’t snag, try placing them into a tiny pool of uncured gel polish or builder gel. Then, cure the entire nail. This encases the base of the embellishment slightly, making it sit more flush and be more durable. For extra security on statement pieces, some artists will even use a small amount of acrylic to blend around the base of a charm after it’s glued down and before topping.
Quick & Easy 3D Nail Design Ideas for Beginners
Ready to dive in? Here are some simple 3D nail design ideas that are perfect for getting started. These focus on achievable techniques and build your confidence.
1. The Mini Pearl Accent
- What you’ll need: Base coat, your favorite nail polish color, cuticle oil, and small nail pearls or caviar beads.
- The secret: Use a fine-tipped brush and a dotting tool.
- How to:
- Apply and cure your base and color polish as usual.
- Apply a small dot of top coat or a special adhesive gel where you want your pearls.
- Use tweezers to carefully place the pearls in your desired pattern (e.g., along the cuticle line, as a border, or a cluster on one nail).
- Apply a bead of top coat around the base of the pearls with a fine brush to secure them without frosting them over. Cure if using an adhesive gel.
This offers a sophisticated 3D effect with minimal effort and is very beginner-friendly! Tiny pearls add a touch of elegance that can elevate any manicure.
2. The Sculpted Flower Petal
- What you’ll need: Acrylic powder and monomer liquid (or a 3D sculpting gel), a fine nail art brush, and your base/color polish.
- The secret: Focus on mastering one simple shape, like a petal, before trying complex flowers.
- How to:
- Prepare your nail with base and color.
- Create a small, slightly flattened bead of acrylic.
- Place the bead on the nail. Use your brush to gently press from the center outwards, creating a curved petal shape.
- Repeat, overlapping petals slightly to form a simple flower.
- Once set, you can add a tiny bead of yellow or gold acrylic in the center for a stamen, or a small gem.
This is a fantastic intro to acrylic sculpting. Start with just one or two petals on a accent nail!
3. The Textured Gem Cluster
- What you’ll need: Base/color polish, builder gel or strong nail glue, and a mix of rhinestones, small gems, and studs.
- The secret: Vary the size and type of gems for visual interest and use a gel that builds a slight base for them.
- How to:
- Apply and cure your base color.
- Apply a small amount of builder gel over the area where you want your cluster. You can even create a slight dome shape with the gel.
- While the gel is still uncured, or using nail glue, carefully place your mixed gems into the gel/glue.
- Cure the nail under your lamp.
- Use a fine brush to carefully apply top coat around the very base of the Gems, avoiding the top facets if possible.
This design gives a rich, dimensional look that’s easier than it looks! The builder gel acts as a secure anchor for your bling.
Maintaining Your 3D Masterpieces
Once you’ve created a stunning 3D nail design, you’ll want it to last! Proper care is essential to keep your art looking pristine and prevent damage.
Everyday Tips for Longevity:
- Be Gentle: Avoid using your nails as tools. Don’t scrape anything with them, and be mindful when opening cans or bags.
- Wear Gloves: When doing chores involving water or harsh chemicals (like washing dishes or cleaning), wear rubber gloves. Water and chemicals can break down adhesives and polishes over time.
- Moisturize: Keep your cuticles and surrounding skin hydrated with cuticle oil. Healthy skin means a healthier nail base, which helps your design last longer.
- Avoid Extreme Heat: Prolonged exposure to high temperatures can sometimes affect the integrity of nail products.
- Regular Check-ups: If a small part of your 3D design starts to lift or come loose, try to address it gently with a touch of glue or top coat to prevent further damage. Don’t try to force it off.
Professional Secret: For designs with embedded gems, applying cuticle oil regularly is crucial. Oils can seep into crevices and help maintain flexibility between the gem and the nail surface, reducing the chance of the gem popping off