Unlock stunning nails with these 3 color-specific design essentials! Learn simple tips and tricks to create eye-catching manicures that perfectly match any outfit or mood, making nail art accessible and fun for beginners. Get ready to express your unique style with confidence!
Ever stare at your nail polish collection, completely overwhelmed by all the beautiful colors? You’re not alone! Sometimes, the most beautiful nail designs come from simply understanding how to work with a specific color. It’s like having a secret weapon for gorgeous, put-together nails. We’ll break down how to make any color shine with simple, genius essentials. No complicated techniques, just pure, colorful fun for your fingertips!
Color-Specific Nail Designs: Genius Essentials
Diving into the world of nail art can seem a little daunting, especially when you’re just starting. But what if I told you that sometimes, the best nail designs are the ones that celebrate a single color? Mastering color-specific nail designs is all about understanding the nuances of different shades and how to make them pop. Think of it as learning to speak the ‘color language’ of your nails!
This guide is your friendly, no-fuss introduction to making color work for you. We’ll explore three essential ways to elevate your manicures using the power of color. Get ready to transform your nails from simple to stunning with straightforward tips that even the newest nail enthusiast can master. Let’s get those creative juices flowing and make your nails the envy of everyone!
Why Color-Specific Designs Matter
Why focus on one color? It’s where the magic truly begins! When you understand how to highlight a specific hue, your manicures instantly look more intentional and chic. It’s about creating harmony and impact. Instead of drowning in a sea of competing shades, you learn to appreciate and enhance the beauty of a single color. This approach is fantastic for beginners because it simplifies the design process and guarantees sophisticated results.
Think about the mood a color evokes. A deep navy can feel sophisticated and mysterious, while a vibrant coral screams summer fun. By focusing on a color, you can craft a look that truly speaks to your personality or the occasion. It’s a powerful yet easy way to elevate your everyday style.
The Psychology of Color on Nails
Colors have a fascinating way of influencing our mood and how others perceive us. Understanding a little about color psychology can help you choose and design with intention.
- Reds: Often associated with passion, energy, and confidence. A classic red is timeless and bold.
- Blues: Can evoke feelings of calmness, stability, and serenity. Different shades can range from tranquil to powerful.
- Greens: Frequently linked to nature, growth, and balance. It can be both refreshing and grounding.
- Yellows: Typically symbolize happiness, optimism, and creativity. A bright yellow is sure to grab attention.
- Pinks: Often represent femininity, sweetness, and romance. From soft pastels to hot fuchsia, the range is wide.
- Neutrals (Nudes, Beiges, Grays): Convey sophistication, elegance, and practicality. They are versatile and chic.
- Purples: Can signify luxury, creativity, and spirituality. Deeper purples are rich, while lighter ones can be whimsical.
- Black & White: Classic, dramatic, and modern. They offer strong contrasts and a timeless appeal.
Knowing this can help you choose a color not just because it’s pretty, but because of the statement you want to make!
Genius Essential 1: Mastering Monochromatic Magic
This is your secret weapon for instant elegance. Monochromatic means using various shades, tints, and tones of a single color. It’s unbelievably chic, incredibly easy, and perfect for beginners. Forget clashing colors; embrace the harmony!
What You’ll Need:
- One base color polish
- 1-2 lighter shades of the same color (tints)
- 1 darker shade of the same color (shade)
- A thin nail art brush or toothpick
- A top coat for shine and longevity
- Optional: Glitter or shimmer polish in the same color family
Step-by-Step: The Monochromatic French Tip
Let’s take a classic French manicure and give it a color-specific twist. This is a great way to start!
- Prep Your Nails: Start with clean, dry nails. Apply a base coat to protect your natural nails and help polish adhere better. Let it dry completely. You can learn more about nail prep from resources like the American Academy of Dermatology’s nail care tips.
- Apply the Base Shade: Paint your nails with your main, medium shade of the chosen color. Apply two thin coats for smooth, opaque coverage. Let each coat dry thoroughly between applications.
- Create the Tip – Option 1 (Freehand): Using a fine-tip nail art brush dipped in a lighter shade (or even white/off-white if your base is vibrant), carefully paint a thin line along the free edge of your nail. Aim for a clean, curved smile line.
- Create the Tip – Option 2 (Using a Stamp or Sticker): For super-straight tips, you can use a nail stamping technique or French tip guide stickers. Apply the lighter color and carefully peel away the sticker once the polish is slightly tacky.
- Add Depth or Dimension (Optional): With your darkest shade and your thin brush, you can add a tiny, subtle line just below the lighter tip, or even a tiny dot at the apex of the smile line for a little extra flair. This creates a subtle gradient effect.
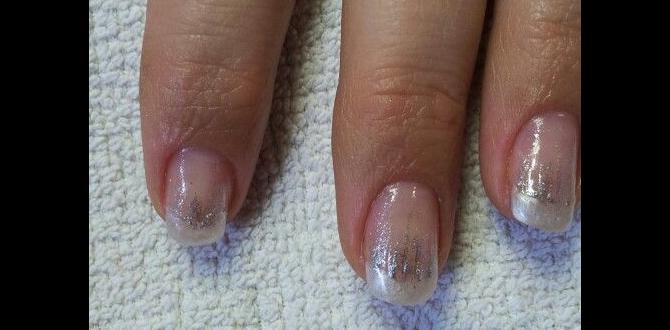
- Add Sparkle (Optional): If you have a glitter or shimmer polish in the same color family, a tiny swipe of it over the tip can add a gorgeous shimmer.
- Seal the Deal: Apply a generous layer of top coat. This will smooth out any texture, enhance the shine, and protect your beautiful design.
Monochromatic Design Ideas:
- Gradient Ombre: Apply your base shade. Once dry, use a makeup sponge to gently dab lighter shades from the cuticle to the tip, blending as you go.
- Color-Blocked Accents: Paint all nails with your main shade. On one accent nail, paint a geometric block or stripe using a lighter or darker variation of the color.
- Shaded Dots: Paint nails with the base color. Using a dotting tool or toothpick, create dots with lighter and darker shades randomly across the nail for a playful, textured look.
Why It Works:
Monochromatic designs are inherently harmonious. By sticking to one color family, you avoid visual clutter. The variations in shade and tone create subtle depth and sophistication without being overwhelming. It’s a foolproof way to achieve a polished, professional look that’s entirely DIY-friendly.
Genius Essential 2: Color Contrast With Neutrals
Neutrals are the ultimate chameleons of the nail world. They pair brilliantly with almost any color, offering a sophisticated canvas or a chic accent. This is where you can play with bold colors without them becoming too loud, or elevate neutrals with a pop of something special.
What You’ll Need:
- A neutral polish (beige, nude, gray, white, black, or cream)
- A bold or vibrant accent color polish
- Thin nail art brush, toothpick, or dotting tool
- Optional: Metallic polish (gold, silver, rose gold)
- Top coat
Step-by-Step: The Neutral Base with a Pop of Color
This design is all about making a statement that’s curated and stylish. Perfect for when you want your nails to be noticed but still look refined.
- Prep Your Nails: As always, start with clean nails. Apply your base coat, allowing it to dry completely.
- Apply the Neutral Base: Paint all your nails with your chosen neutral color. Two thin coats are usually best for even coverage. Let them dry thoroughly.
- Choose Your Accent: Decide on your bold or vibrant color. Think about the occasion or your outfit. A jewel tone like emerald or sapphire looks stunning against a creamy nude, while a bright coral pops against crisp white.
- Create the Accent – Option 1 (Single Stripe): Using your fine nail art brush dipped in the accent color, paint a single vertical or horizontal stripe down your accent nail (ring finger is popular!). Keep it clean and crisp.
- Create the Accent – Option 2 (Geometric Shape): With a dotting tool, create a bold dot or a series of dots in the center or corner of your accent nail with the vibrant color.
- Add Metallic Accents (Optional): A thin line of gold or silver polish along the cuticle or tip of your accent nail can add a touch of luxury and definition to the neutral base.
- Seal & Shine: Apply your top coat over all nails to lock in the design and add a beautiful glossy finish.
Color Contrast Combos to Try:
Here are some fun pairings to get you started:
| Neutral Base | Accent Color | Vibe |
|---|---|---|
| Creamy Beige | Emerald Green | Elegant & Earthy |
| Crisp White | Electric Blue | Bold & Playful |
| Soft Gray | Hot Pink | Chic & Energetic |
| Classic Black | Fiery Red | Dramatic & Timeless |
| Deep Navy | Sunny Yellow | Modern & Eye-Catching |
Why It Works:
Neutrals provide a sophisticated, understated backdrop that allows the accent color to truly shine without competition. This contrast creates a balanced yet impactful look. It’s versatile, making it suitable for both casual days and special events. Plus, it’s incredibly forgiving for beginners!
Genius Essential 3: Mood-Matching With A Single Shade
Some days, you just want a single, stunning color that perfectly captures your mood. This isn’t about complicated art; it’s about using the finish and application of a single color to create impact. Think shimmer, metallic, matte, or even a bold, opaque cream.
What You’ll Need:
- One polish in a finish you love (e.g., metallic, shimmer, cream, matte)
- A good base coat
- A good top coat
- Optional: A matte top coat (if your polish isn’t already matte)
Step-by-Step: The “One Color Wonder” Manicure
This is the ultimate minimalist chic approach. It’s all about the quality of the color and its finish.
- Nail Prep is Key: Ensure your nails are clean, filed to your desired shape, and free of any old polish. Apply a quality base coat and let it dry completely. Healthy cuticles make a huge difference, so consider using cuticle oil regularly.
- Choose Your “Wonder” Polish: Select a polish with a beautiful finish. This could be:
- A Rich Metallic: Think liquid gold, brushed silver, or a deep bronze. These have an inherent shine that makes them look expensive.
- An Iridescent Shimmer: Polishes that shift color in the light offer subtle complexity.
- A Deep, Opaque Cream: A classic, perfectly opaque shade like a vampy berry or a vibrant cobalt.
- A Modern Matte: Matte finishes instantly feel sophisticated and contemporary.
- Apply With Precision: Paint your nails with two thin, even coats of your chosen polish. The key here is smooth, clean strokes. Take your time, especially around the cuticles. The goal is flawless application.
- Consider the Matte Transformation (Optional): If you chose a cream or metallic polish but want a matte look, apply a matte top coat after your color has fully dried. This completely changes the vibe of the polish!
- Seal the Deal: Apply a high-shine top coat (unless you went for matte) to protect your manicure and add that extra gloss. Ensure you cap the free edge of your nail to prevent chipping.
Finishes That Make a Statement:
- High-Gloss Cream: Perfect for solid, bold colors. Think of a stunning red or a deep teal. The high shine makes the color richer. Proper application is crucial here.
- Mirror-Like Metallics: These nail polishes are designed to mimic metal. They are opaque and have an incredible reflective quality. Usually, one coat is enough, but two can deepen the color.
- Shimmery & Glittery: These can add texture and sparkle. Fine shimmers catch the light subtly, while larger glitters offer a more dramatic effect.
- Matte: This finish absorbs light, creating a velvety, modern look. It works beautifully with darker shades and even softer pastels for a unique feel.
Why It Works:
When you focus on a single color with a striking finish, the manicure becomes a statement piece on its own. It’s about the inherent beauty of the color and its texture. This approach requires excellent application skills, but the simplicity of the design means less can go wrong. It’s a sophisticated way to wear color that feels intentional and chic with minimal effort.
Essential Tools for Color-Specific Designs
You don’t need a professional kit to create stunning color-specific designs. A few key tools can make all the difference in achieving clean lines and polished results.
| Tool | Purpose | Beginner Tip |
|---|---|---|
| Base Coat | Protects natural nails, helps polish adhere, prevents staining. | Always use one! It’s the foundation of a lasting manicure. |
| Top Coat | Adds shine, protects design, prevents chipping, speeds drying time. Look for quick-dry formulas! | Seal your free edge by brushing over the tip of your nail. |
| Fine Nail Art Brush | For drawing thin lines, details, polka dots, or French tips. | Clean it thoroughly after each use with nail polish remover. |
| Toothpick or Dotting Tool | For creating small dots, swirls, or adding tiny accents. | A toothpick works just as well as a fancy dotting tool when you’re starting out! Make sure the tip is clean. |
| Nail Polish Remover & Cotton Pads/Wipes | For cleaning up mistakes and cleaning brushes. | Use them gently to correct small errors without ruining the whole nail. Cotton wipes are less likely to leave lint. |
| Optional: Matte Top Coat | Transforms any glossy polish into a chic matte finish. | Test it on a nail wheel or paper first to see how it changes the color. |
Frequently Asked Questions (FAQ)
Q1: How do I prevent nail polish from chipping quickly?
A: Start with clean, dry nails and a good base coat. Apply thin, even coats of color, allowing each to dry slightly before the next. Crucially, “cap” the free edge of your nail by running your brush along the tip after applying polish and top coat. A quality quick-dry top coat also helps seal the deal!
Q2: My nail polish application looks streaky. What can I do?
A: Streaky polish is often caused by applying too thinly or unevenly. Ensure full coverage with two thin coats rather than one thick one. Gently shake your polish bottle before use (don’t vigorously shake, which can create air bubbles) and use smooth, deliberate strokes. Let each coat dry sufficiently before applying the next.
Q3: Can I use regular nail polish for these color-specific designs?
A: Absolutely! All the designs discussed use standard nail polish. If you’re using a fine brush for details, ensure your polish isn’t too thick; you might need to thin it slightly with a nail polish thinner (not remover!) if it’s old and gloopy. For metallic or shimmery finishes, regular polish is perfect.
Q4: What’s the easiest color-specific design for a total beginner?
A: Mastering the neutral base with a single bold accent dot or stripe is incredibly beginner-friendly. The neutral provides a forgiving canvas, and the single accent simplifies the design. Monochromatic French tips with a clean line are also surprisingly easy to achieve with a little practice.
Q5: How do I clean up polish that gets on my skin?
A: The easiest way is


